

Production Assist allows the integration of load cells directly into the app. In this way, the measurement results can be compared directly with the calculation results.
The aim of the integration is to compare the calculation results from Production Assist with the measurement results. Since the distribution of the loads in a statically indeterminate system is determined by the structure, the calculation results for each bearing point can deviate significantly from the measurement results. However, the overall load in the system is unaffected.
Production Assist automatically calculates the system loads and compares them with the measured system loads. Deviations in the system loads are evidence of incorrect load assumptions. Especially during trade fairs, the load specifications of the stands can easily be compared with the actual loads.
Production Assist can be connected directly to the Log100 software to read out the measurement results.
For this you need:
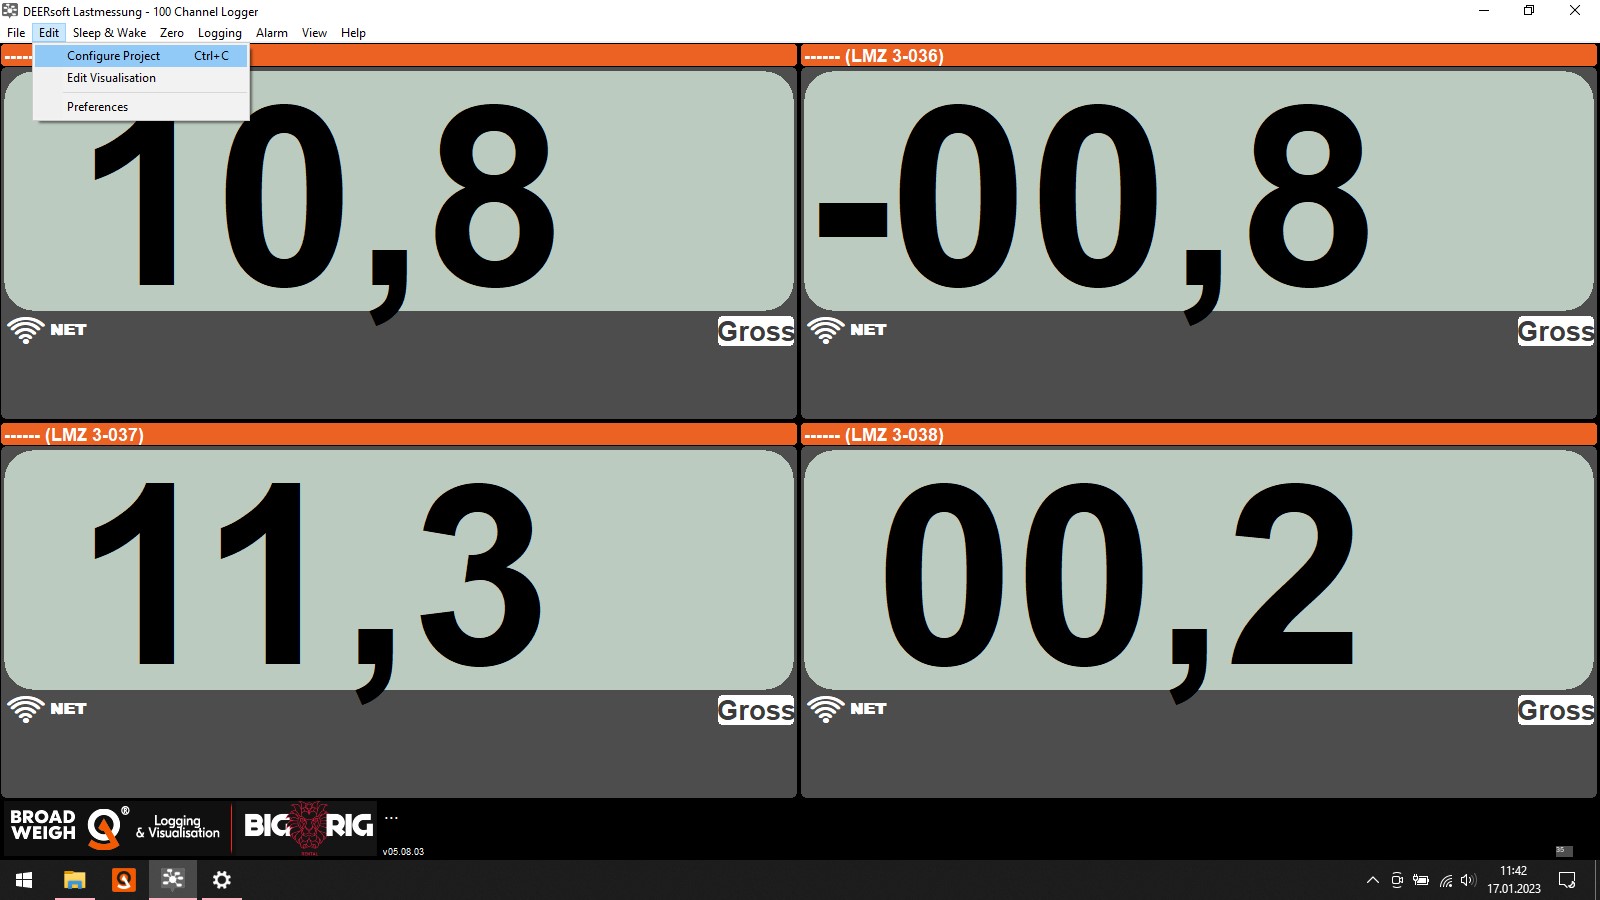
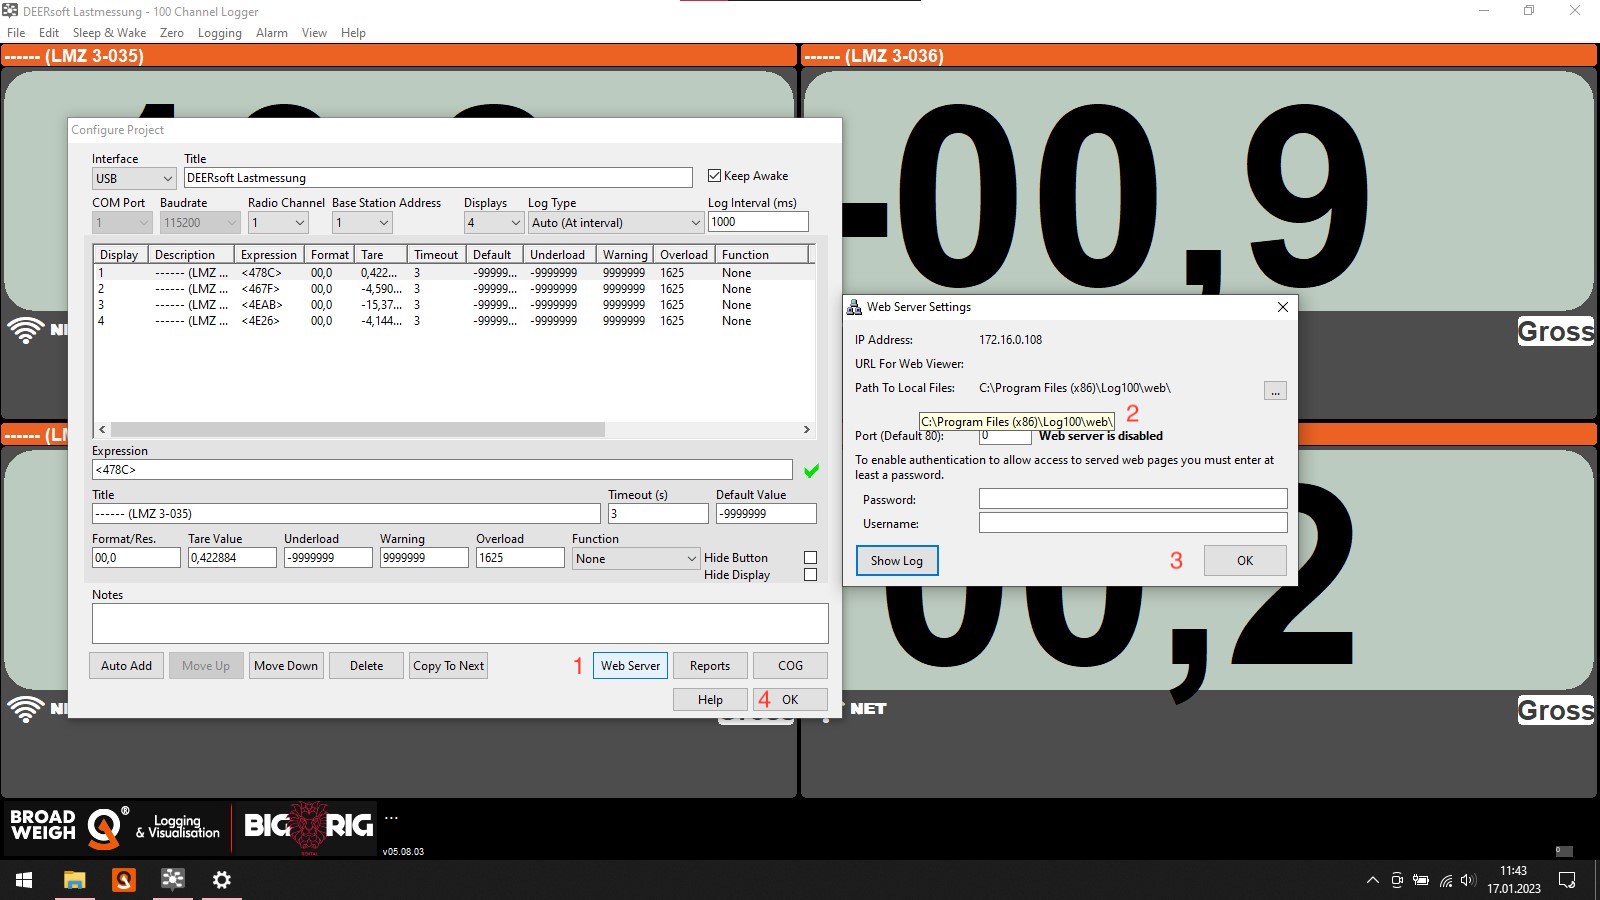
The first step is to run the Configure Project command. This opens the dialog for setting up the project.
| Step | Description |
|---|---|
| 1 | Click on Web Server |
| 2 | Enter a free port here. The default value of 80 only needs to be changed if other software is already running on this port. |
| 2.1 | Note the computer's IP address. You have to enter this later in Production Assist. |
| 3 | Confirm the web server dialog with OK |
| 4 | Confirm the Configure Project dialog with OK |
Start Production Assist. You can use any version (Desktop App or Vectorworks). It is only important that the computer is in the same network as the computer with Log100. This can also be a WLAN network.
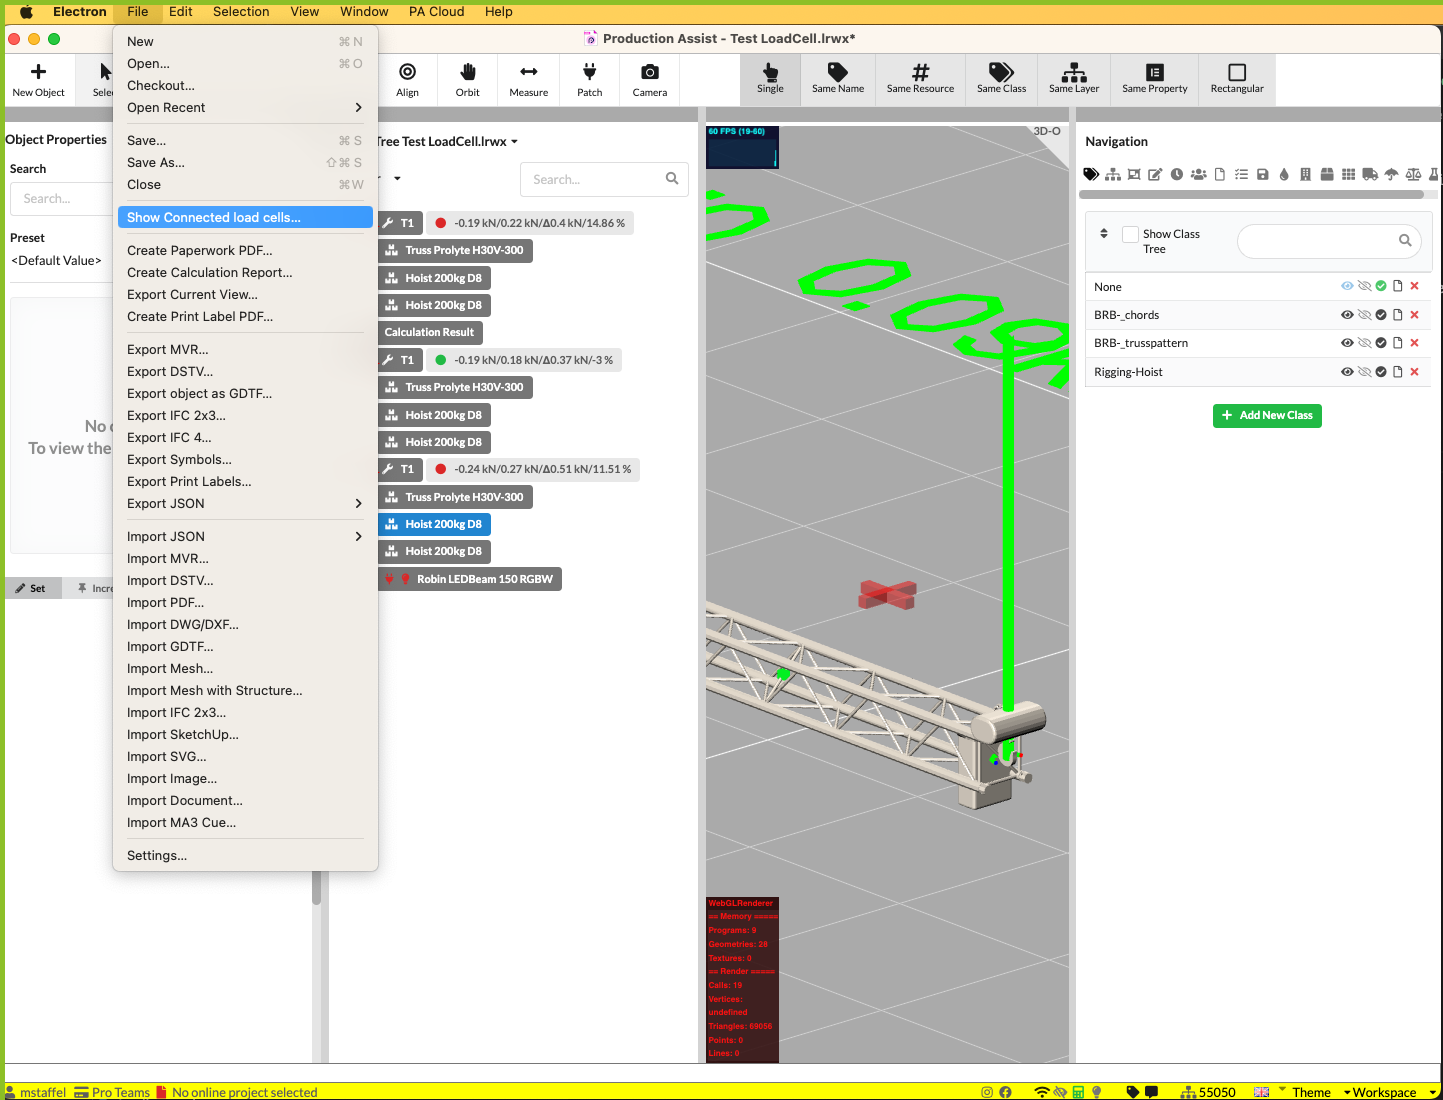
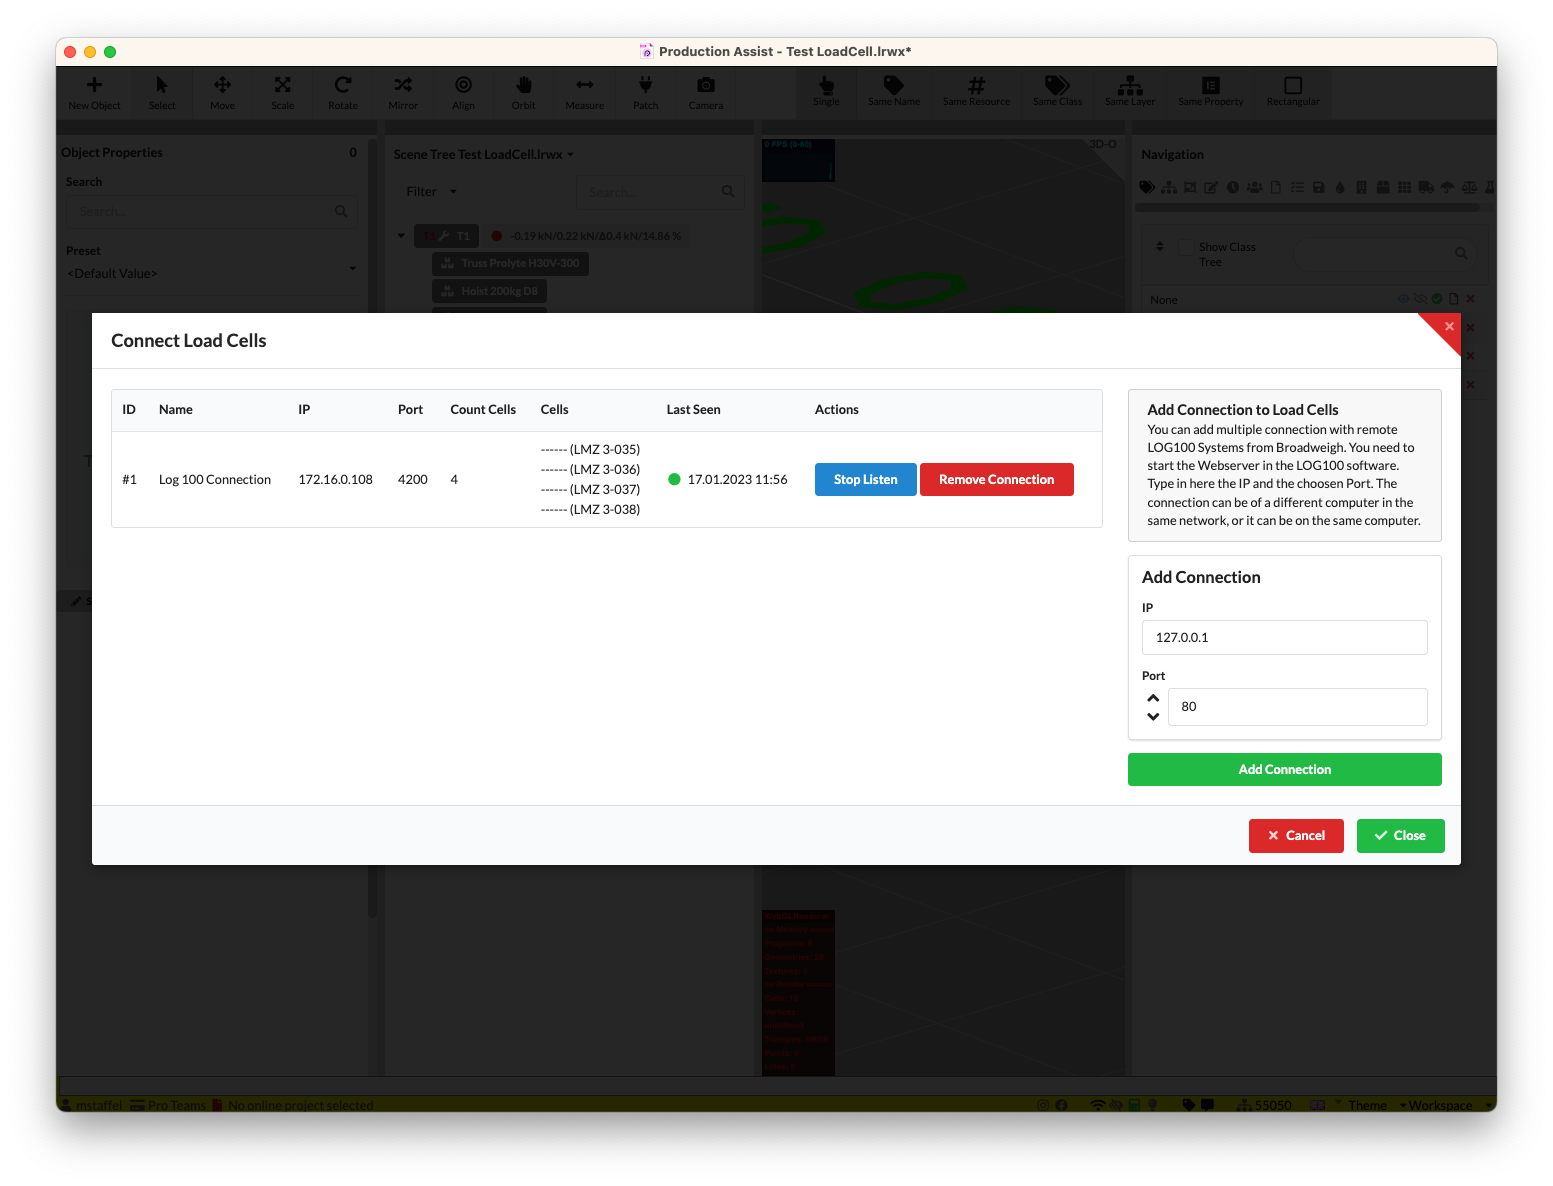
First, run the Show Connected Load Cells... command. This opens the dialog to create connections with the load measuring system.
| Step | Description |
|---|---|
| 1 | Enter the IP of the Log100 system on the right side under IP . |
| 2 | Enter the selected port of the Log100 system on the right side under Port . |
| 3 | Press OK. |
| 4 | The connection is automatically displayed on the left in the table. |
In the table becomes
| Column | Description |
|---|---|
| ID | Consecutive number of the Log 100 station. Several Log 100 systems can be connected. |
| Name | The name of the connection. |
| IP | The IP address of the connection. |
| Port | The port address of the connection. |
| Count Cells | The number of load cells whose results are transferred. |
| Cells | A list of all load cell names. If you click on the name, the name is automatically copied to the clipboard. |
| Last Seen | The date on which results were last received for the station. The green circle is displayed when the last attempts to get data from the load cells were successful. |
| Stop Listen | If this button is clicked, querying of the results will be interrupted. |
| Remove Connection | If this button is clicked, the connection with the Log 100 station will be deleted. |
In order for the results of the load measuring cells to be correctly assigned in Production Assist, the Load Measurement Cell ID of the supports must be entered. To do this, enter the names of the load measuring cells directly into the Load Measurement Cell ID field of the object.
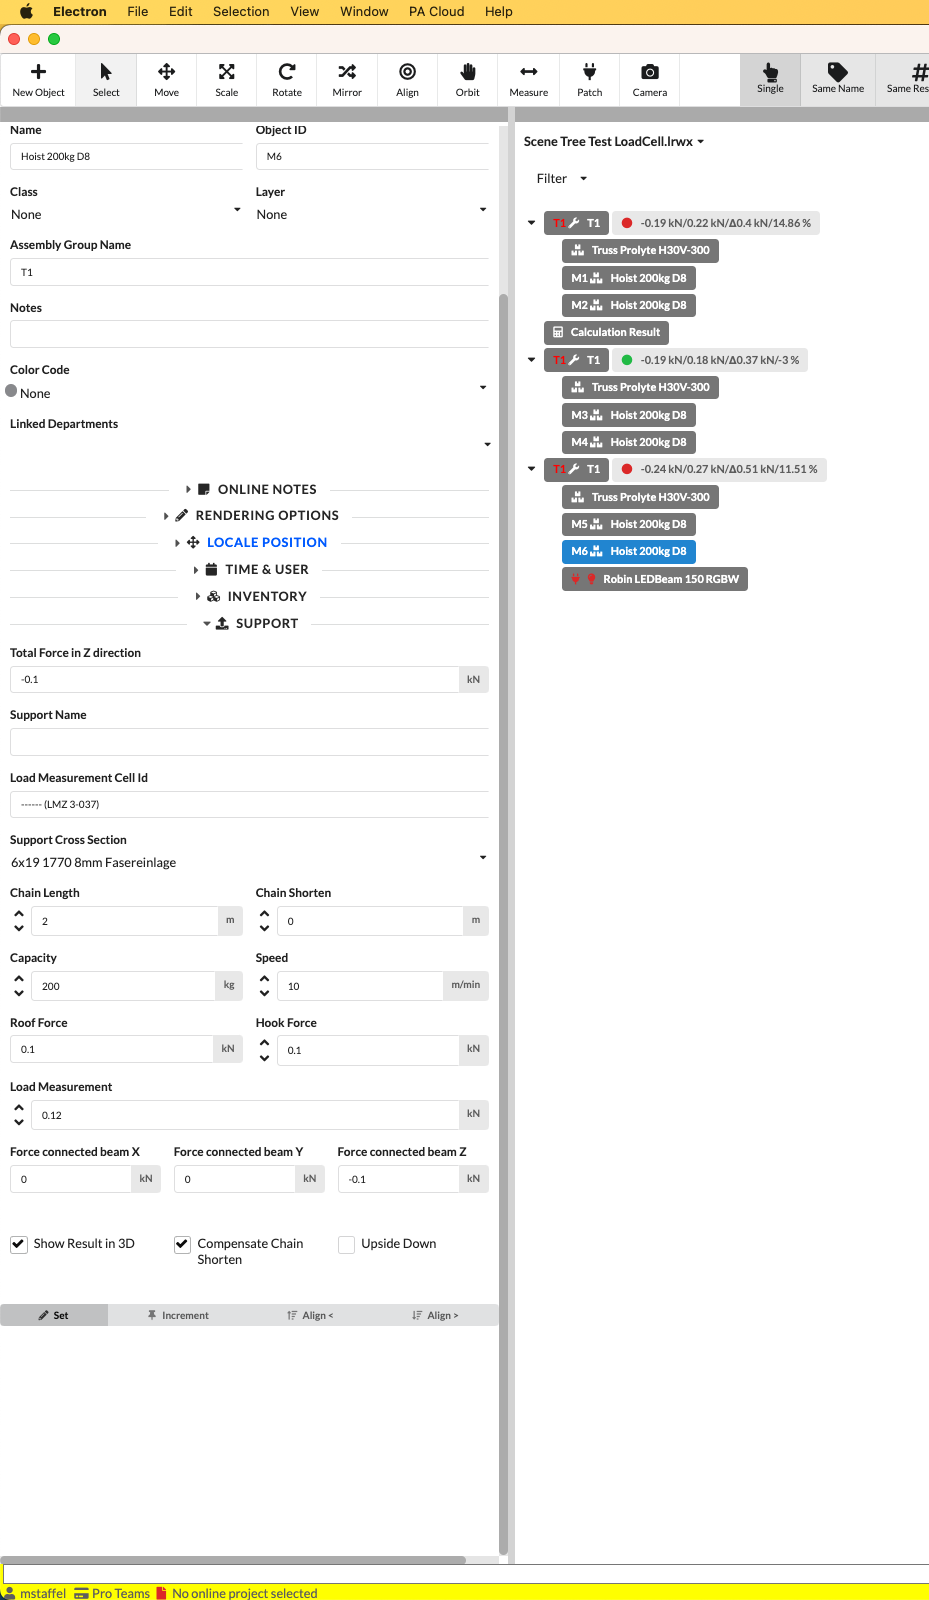
When the setup of the load cells is completed in Production Assist, the results are assigned directly to the supports and the system loads are calculated.
The system loads of the assemblies are displayed in the Scene Tree. An additional label is displayed behind each assembly.
| Value | Description |
|---|---|
| 1 | Status indicator: Green if the system load deviation is less than 5%, otherwise red |
| 2 | Calculated system load |
| 3 | Measured system load |
| 4 | Delta Measured Load vs. Calculated System Load |
| 5 | Percentage deviation |
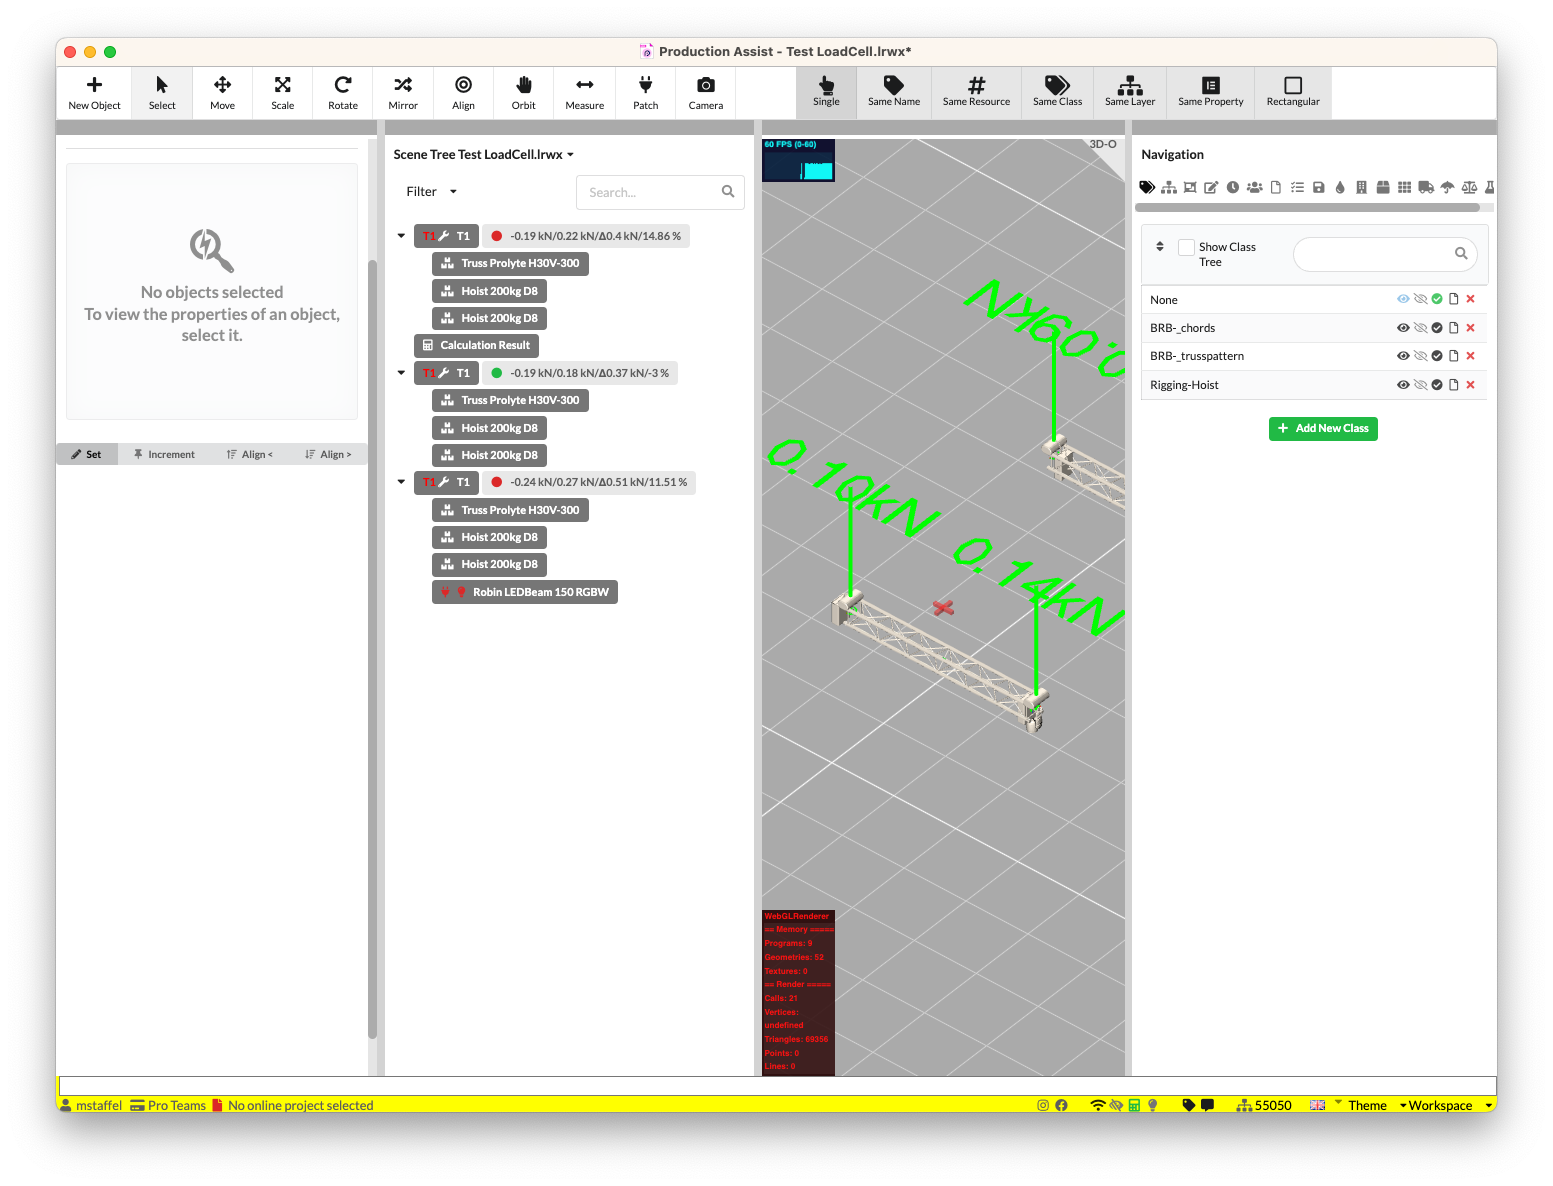
With this view you can easily see whether the system loads of the assemblies correspond to the calculated values.
The worksheets also show the results. There are two templates that can be used to display the results:
| Value | Description | Description |
|---|---|---|
| Hoist Load Cells | Shows all chain hoists with roof load and measured load. Here the results can be compared directly to check the leveling. | 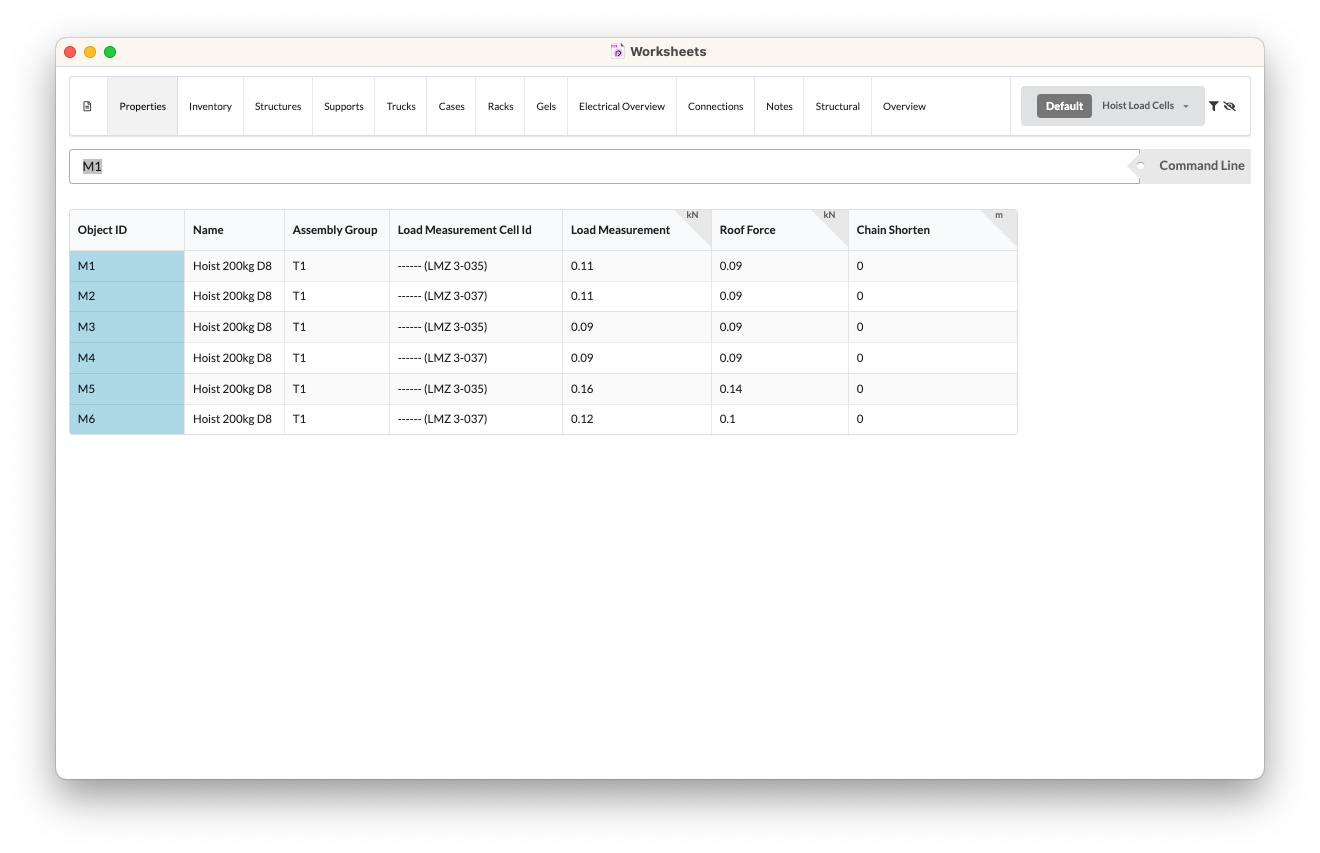 |
| Measured load overview | Displays all assemblies with the measured and calculated system load. A comparison can be made here to see whether the respective truss systems do not use more load than planned | 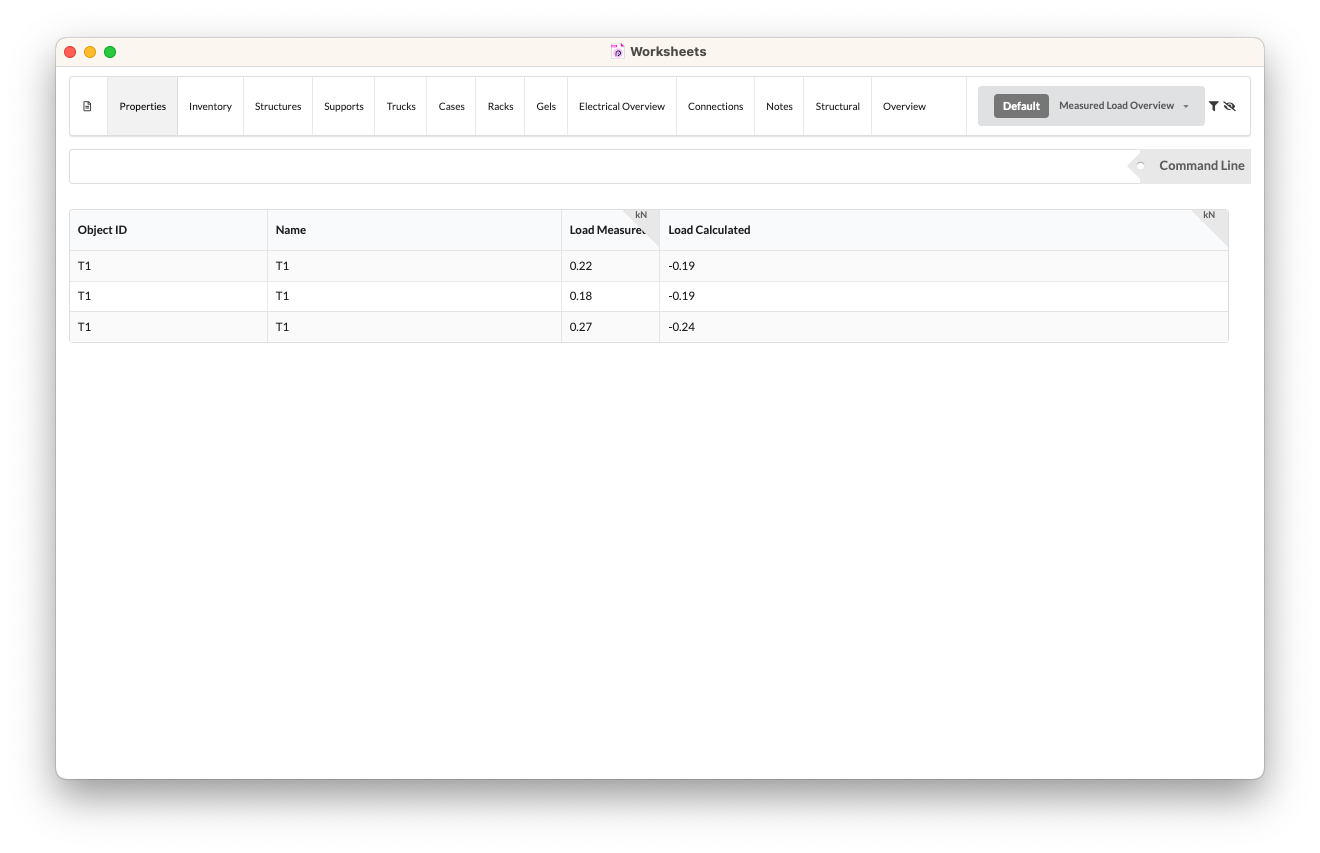 |