In this tutorial, we patch headlights on network and electricity, create lists and overviews, and export them as PDF.
INFO: In order to properly patch spotlights, they should already have a Fixture ID. You can tell this by whether they have an ID in front of their name in the Scene Tree . If this is not the case, activate it, access Fixture Data in Object Properties and give it an ID there.
To be able to patch spotlights, the first thing you need are plugboxes or another Schuko distributor. To insert them, click New Object in Toolbar and then click Symbol to the right. The Resources window opens.
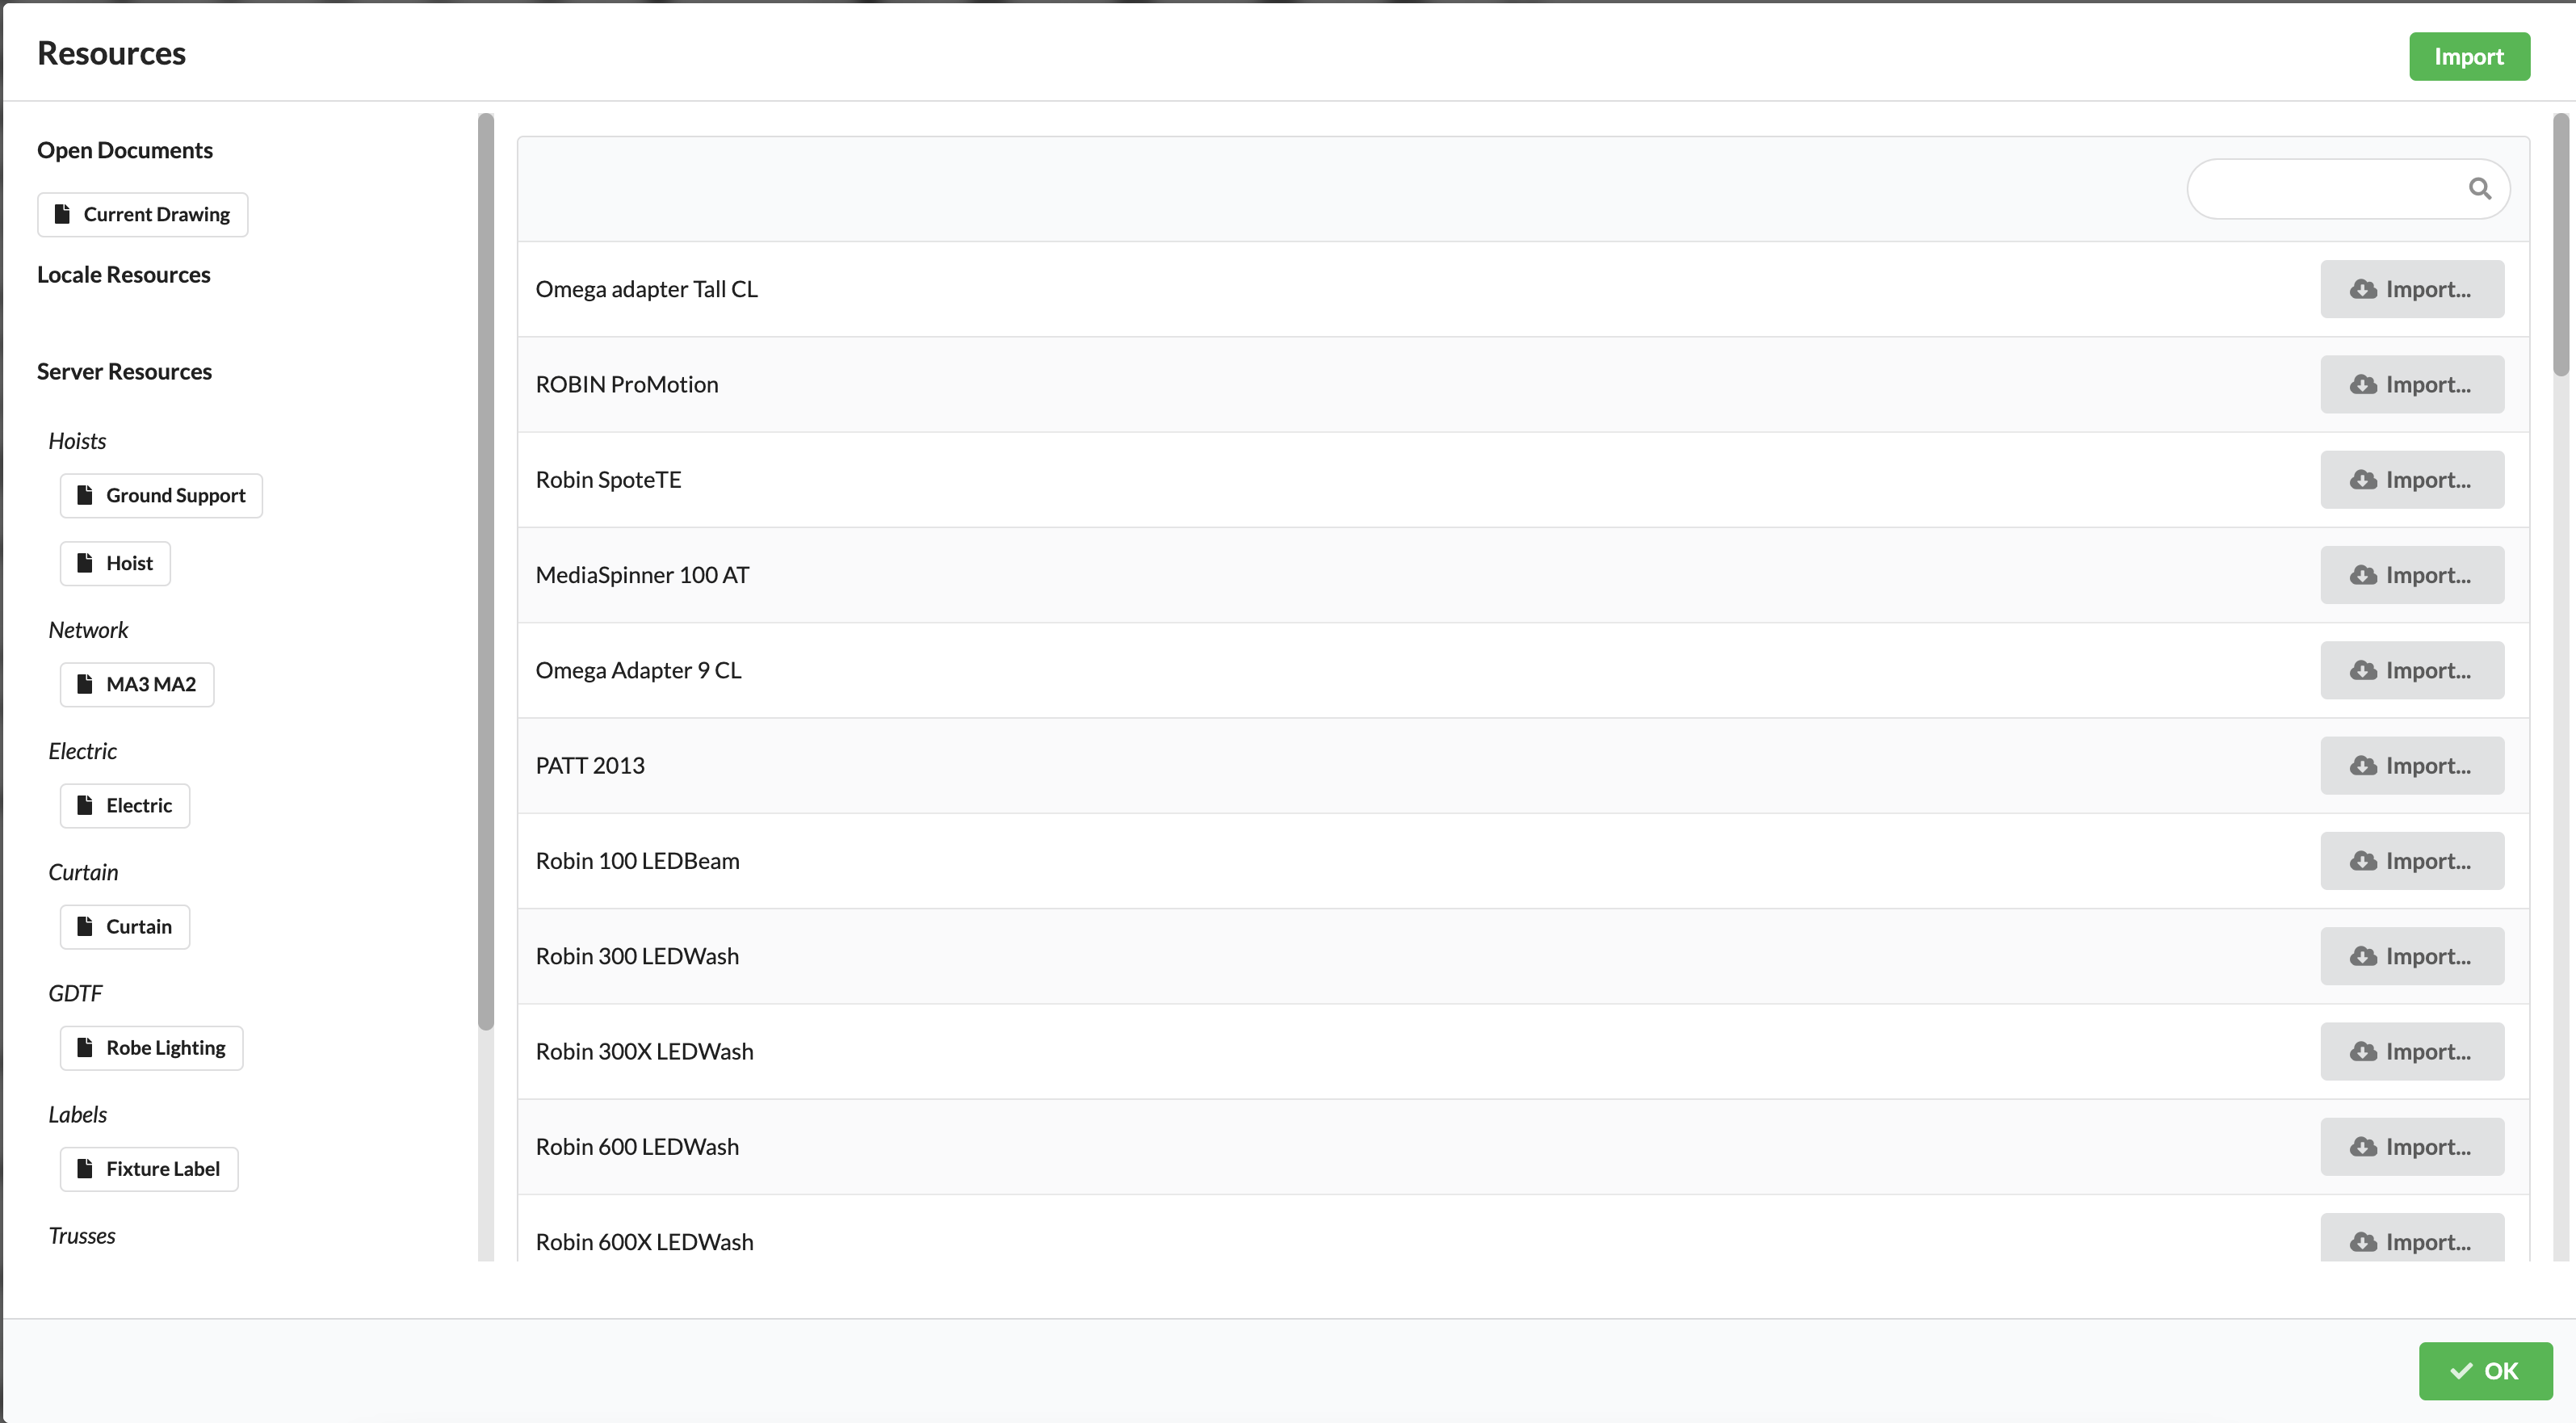
Select the Electric library on the left, search for a plugbox in the list, and click Import to the right.
Now click on the positions where you want to locate plugboxes in Renderer. Finish inserting by clicking Select in Toolbar or using the “X” shortcut key.
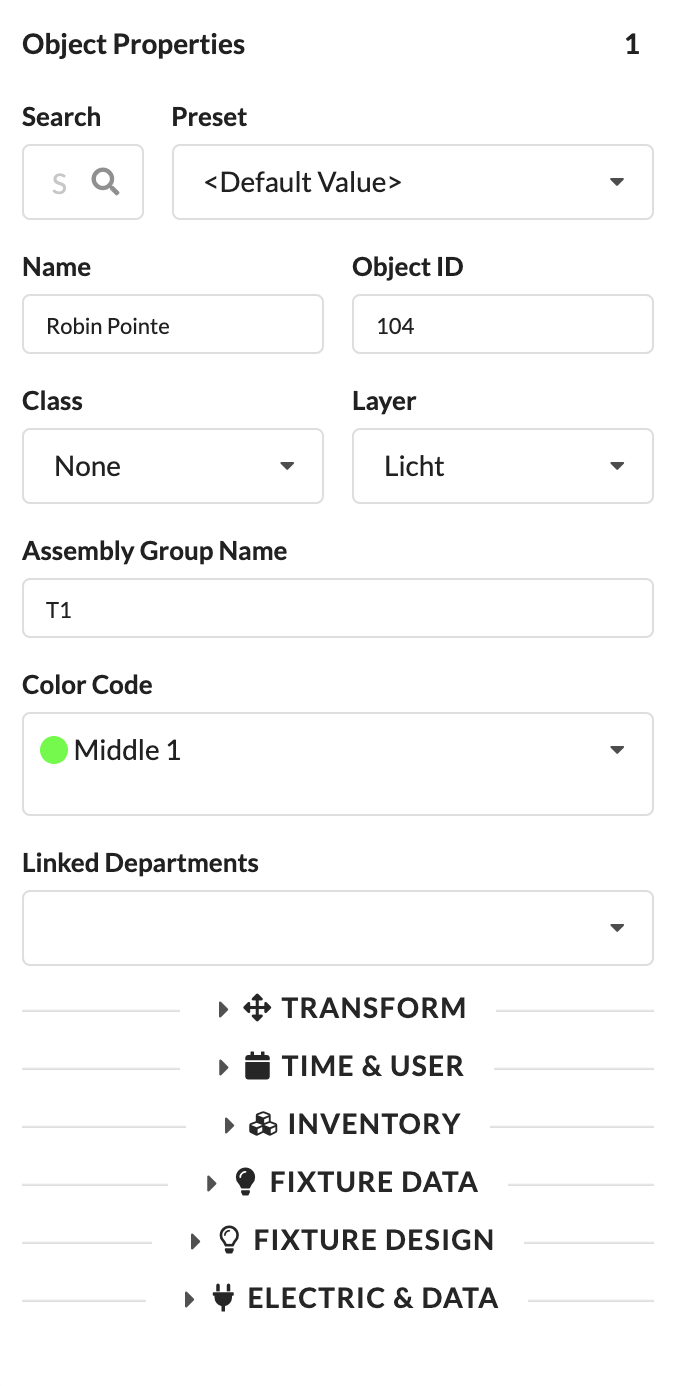
Activate the plugboxes in Renderer or Scene Tree and assign an object ID in the *Object Properties.
There are two ways to assign slots to spotlights:
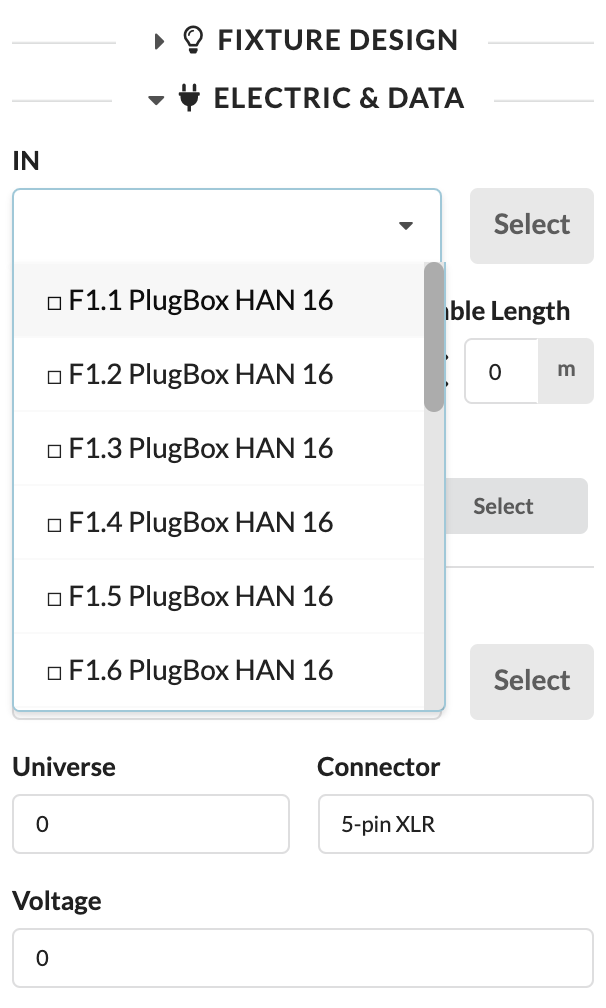
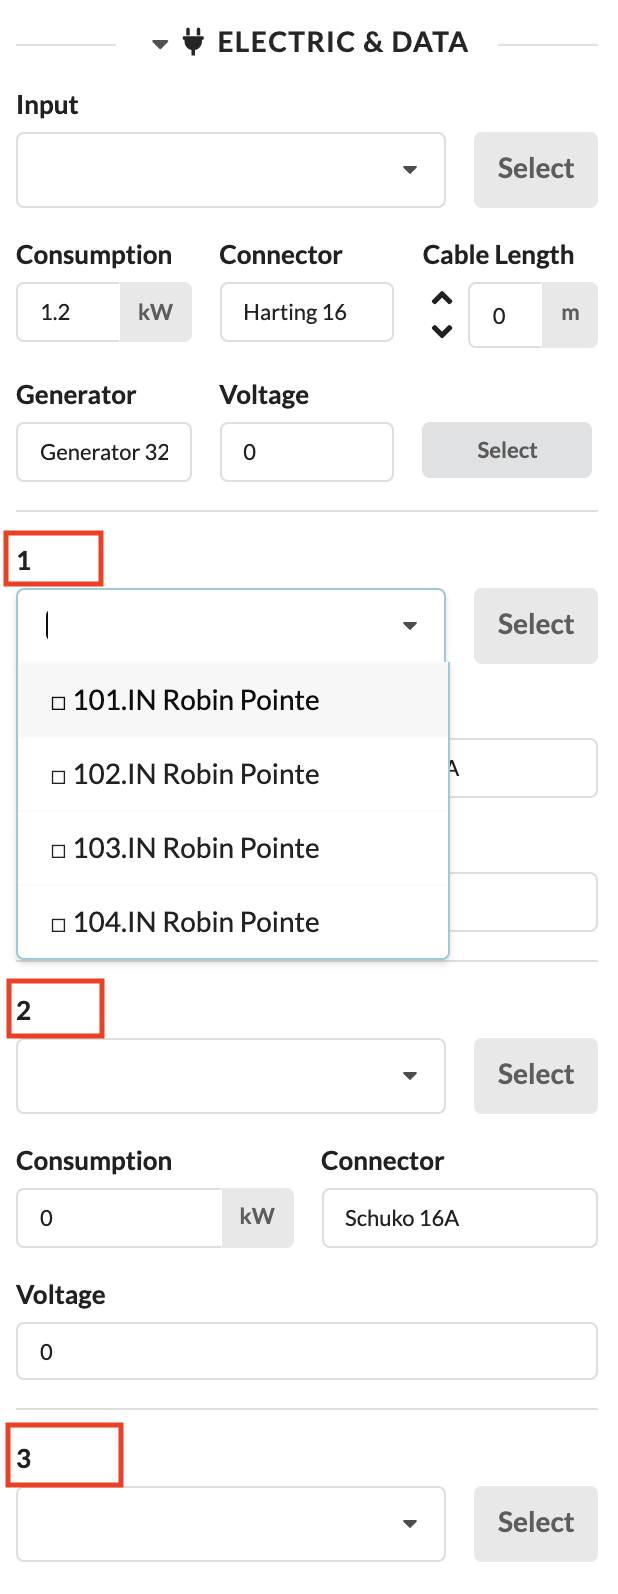
Activate the spotlight you want to patch. In Object Properties, access Electric & Data via drop-down menu. You can find the field In for power input there. Click the box to select the appropriate plugbox and slot from a drop-down menu. The slot is separated from the name of the plugbox with a “.”. You can also enter the name of the plugbox so that only that box's slots are displayed.
Activate the plugbox you want to assign spotlights to. In Object Properties, access Electric & Data via drop-down menu. You can find slots 1-6 there. Click the box at the appropriate slot to select the spotlight you want from a drop-down menu. You can also enter the name or Fixture ID of the desired spotlight in the box to find it faster.
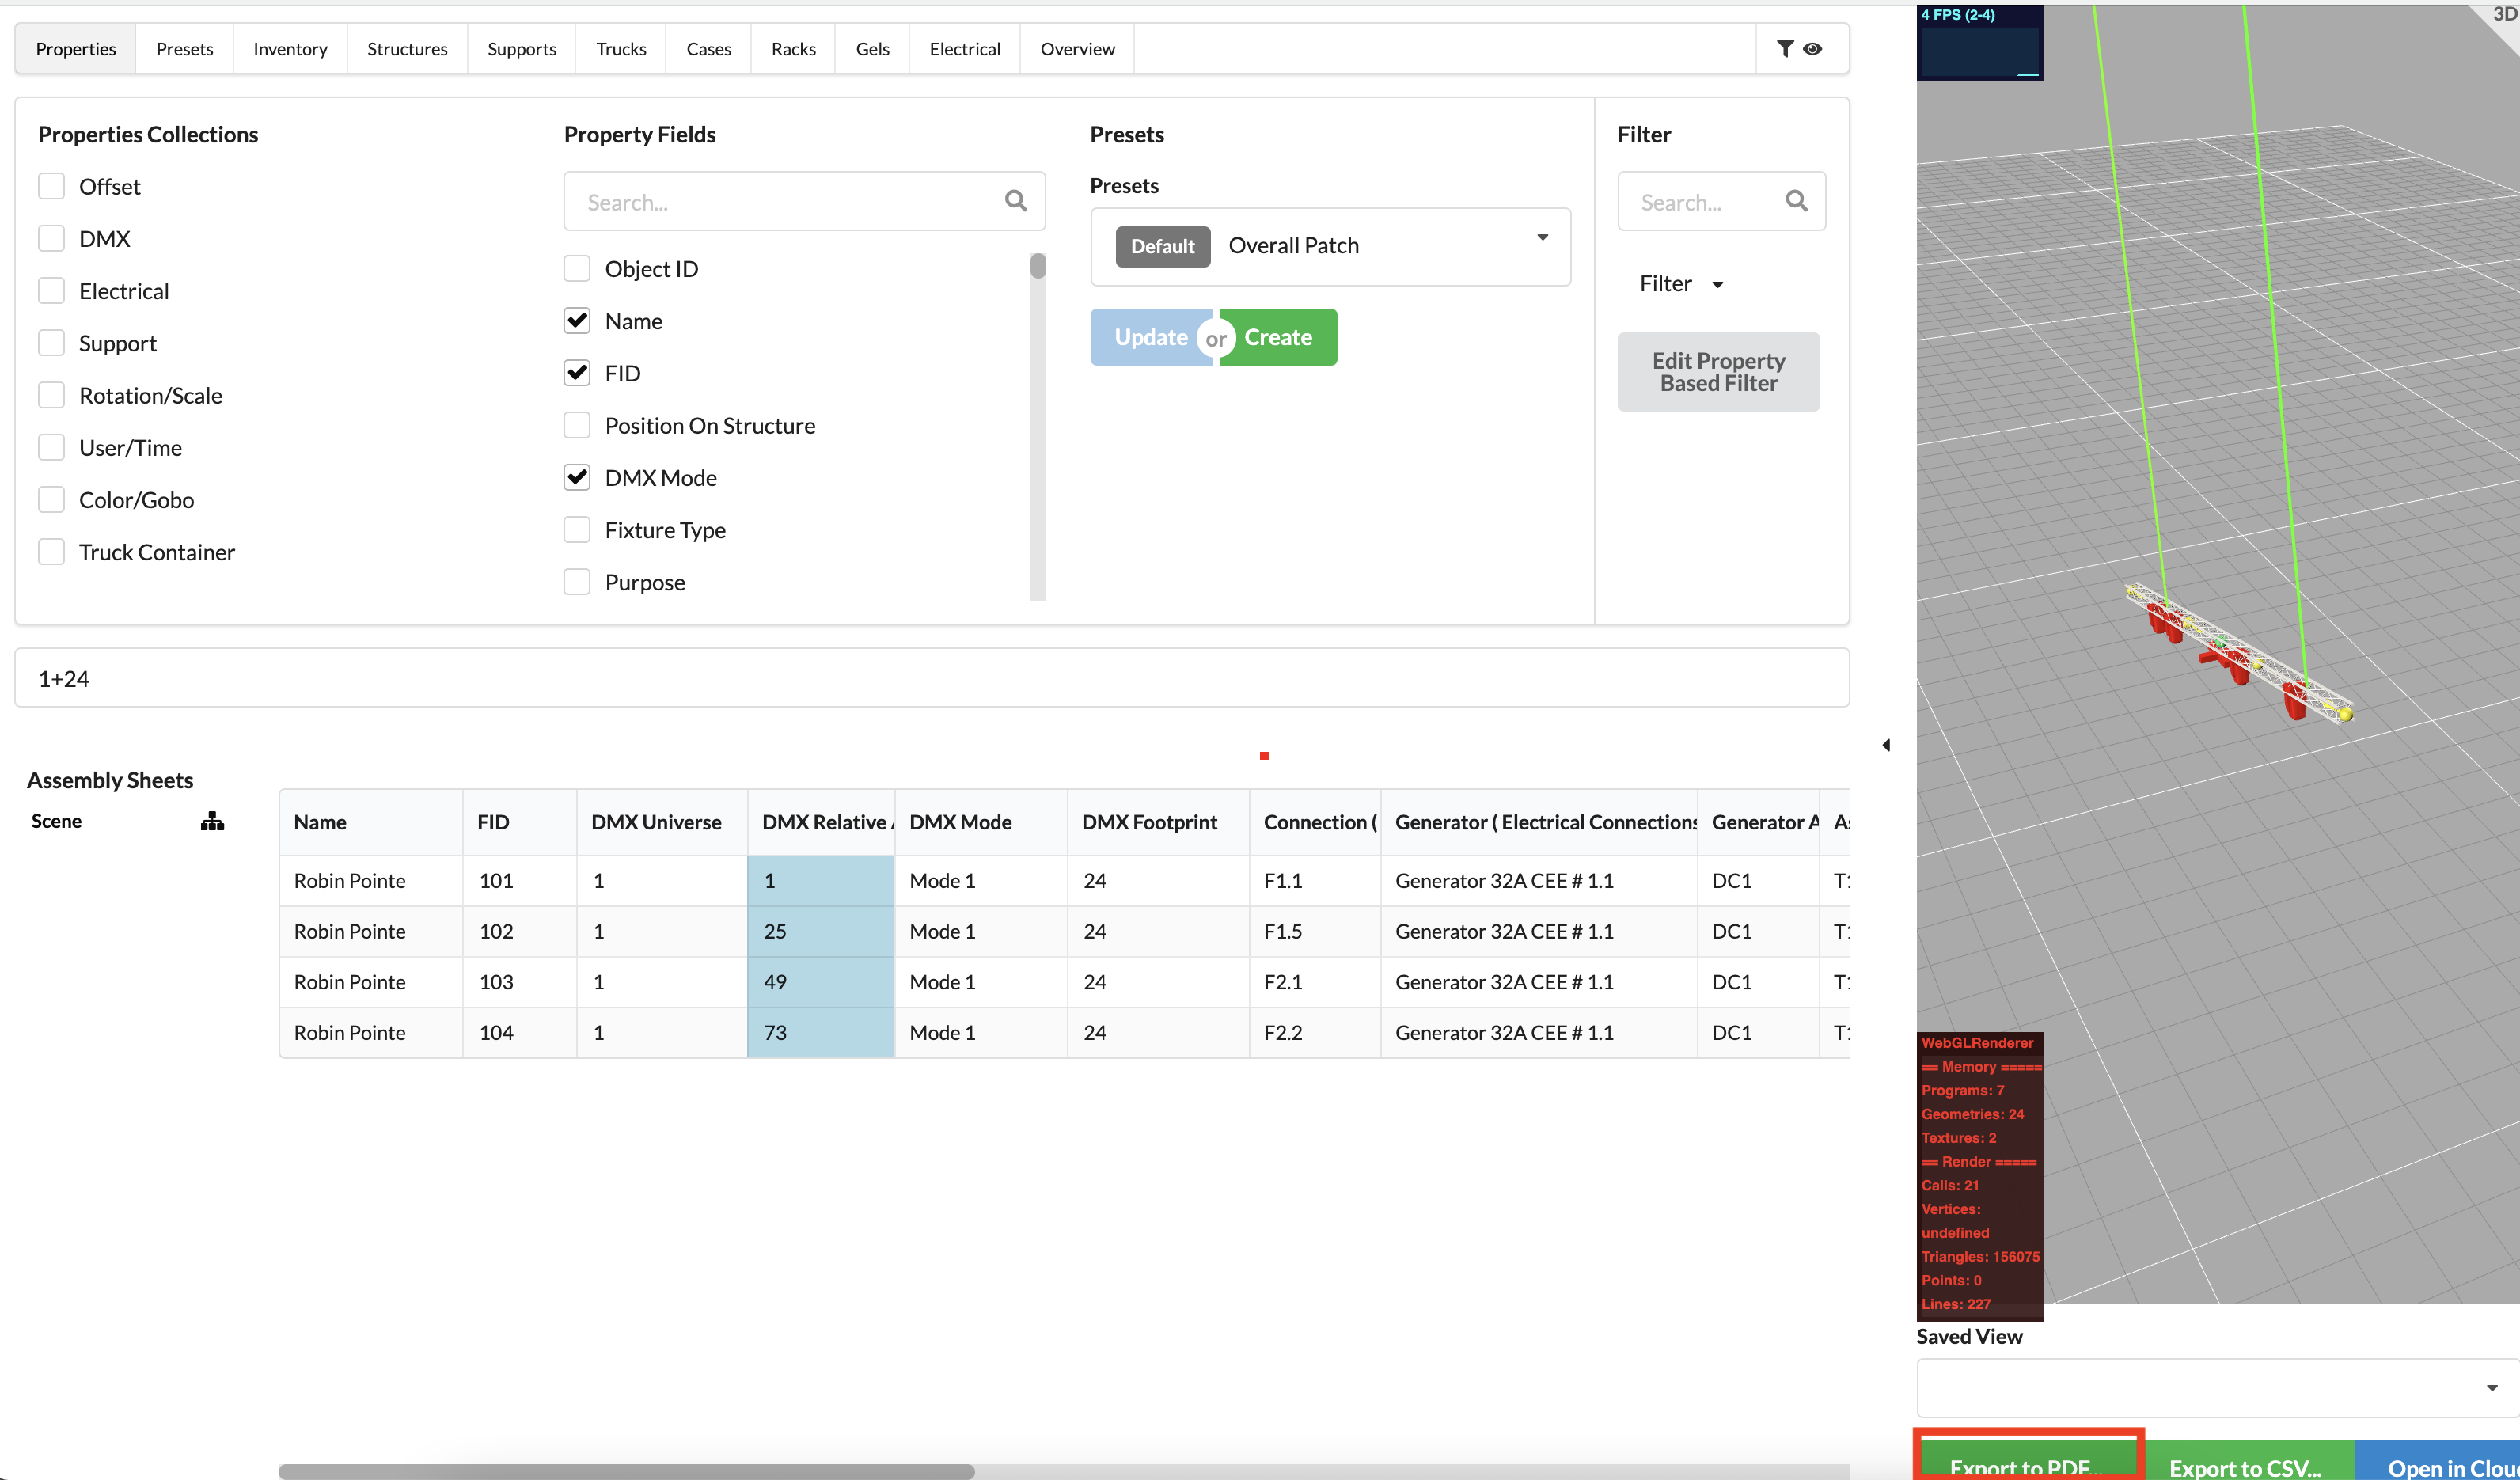
Open the Worksheet window in the menu bar via Window->Worksheet.
It opens with the tab Properties.
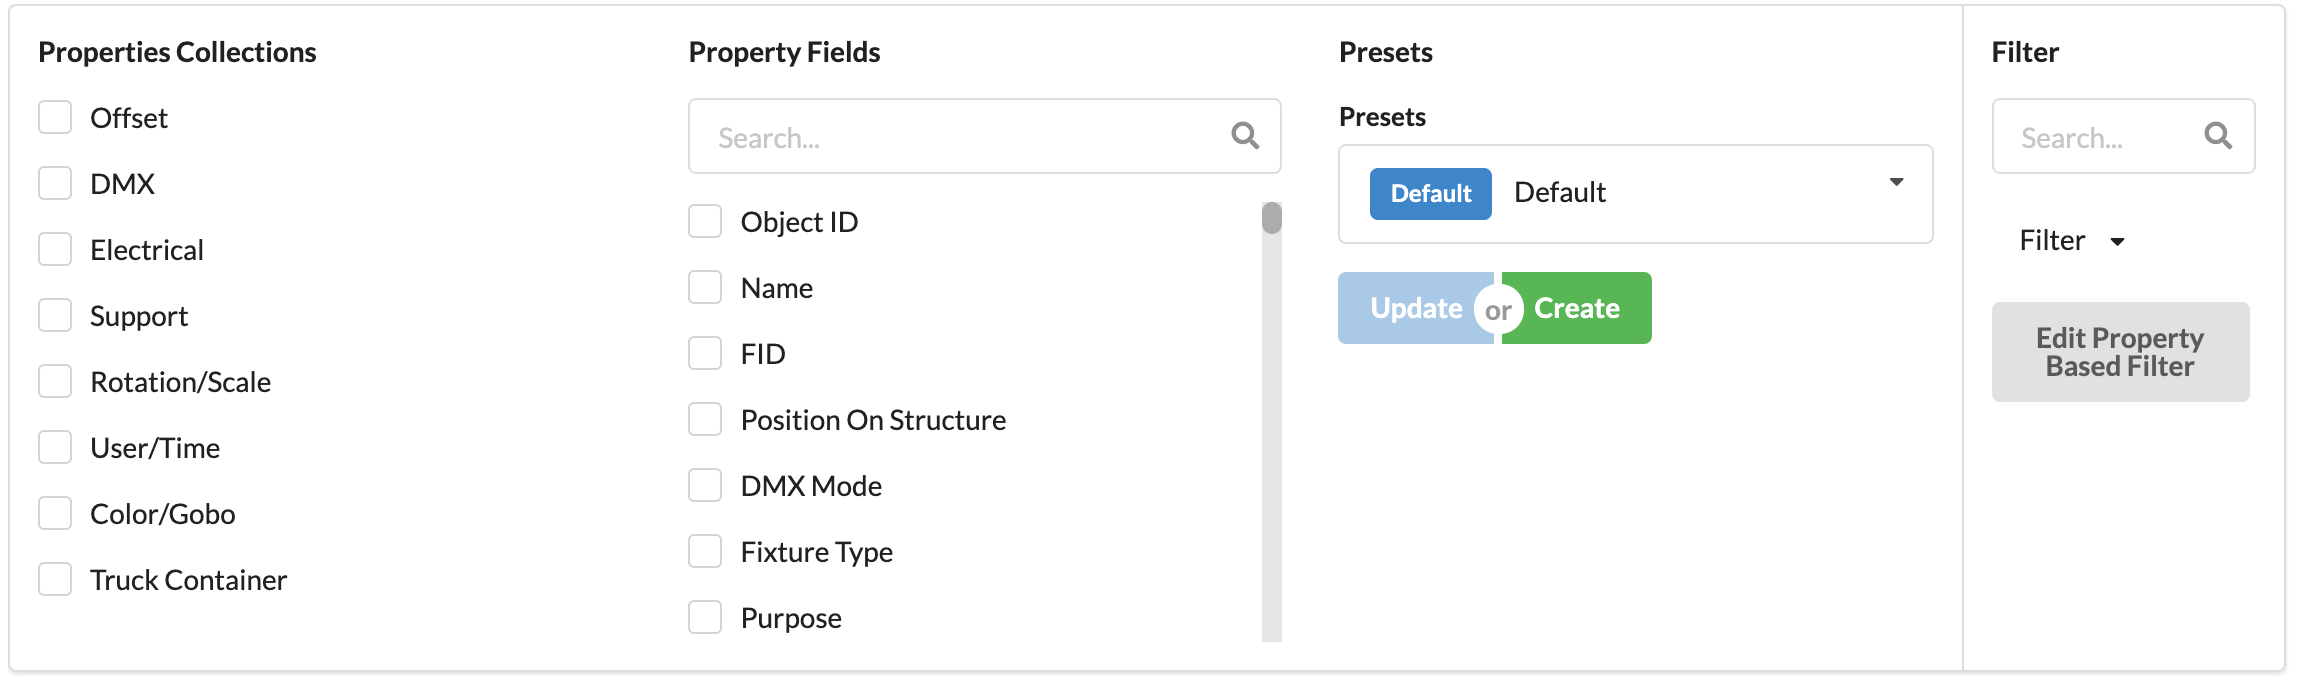
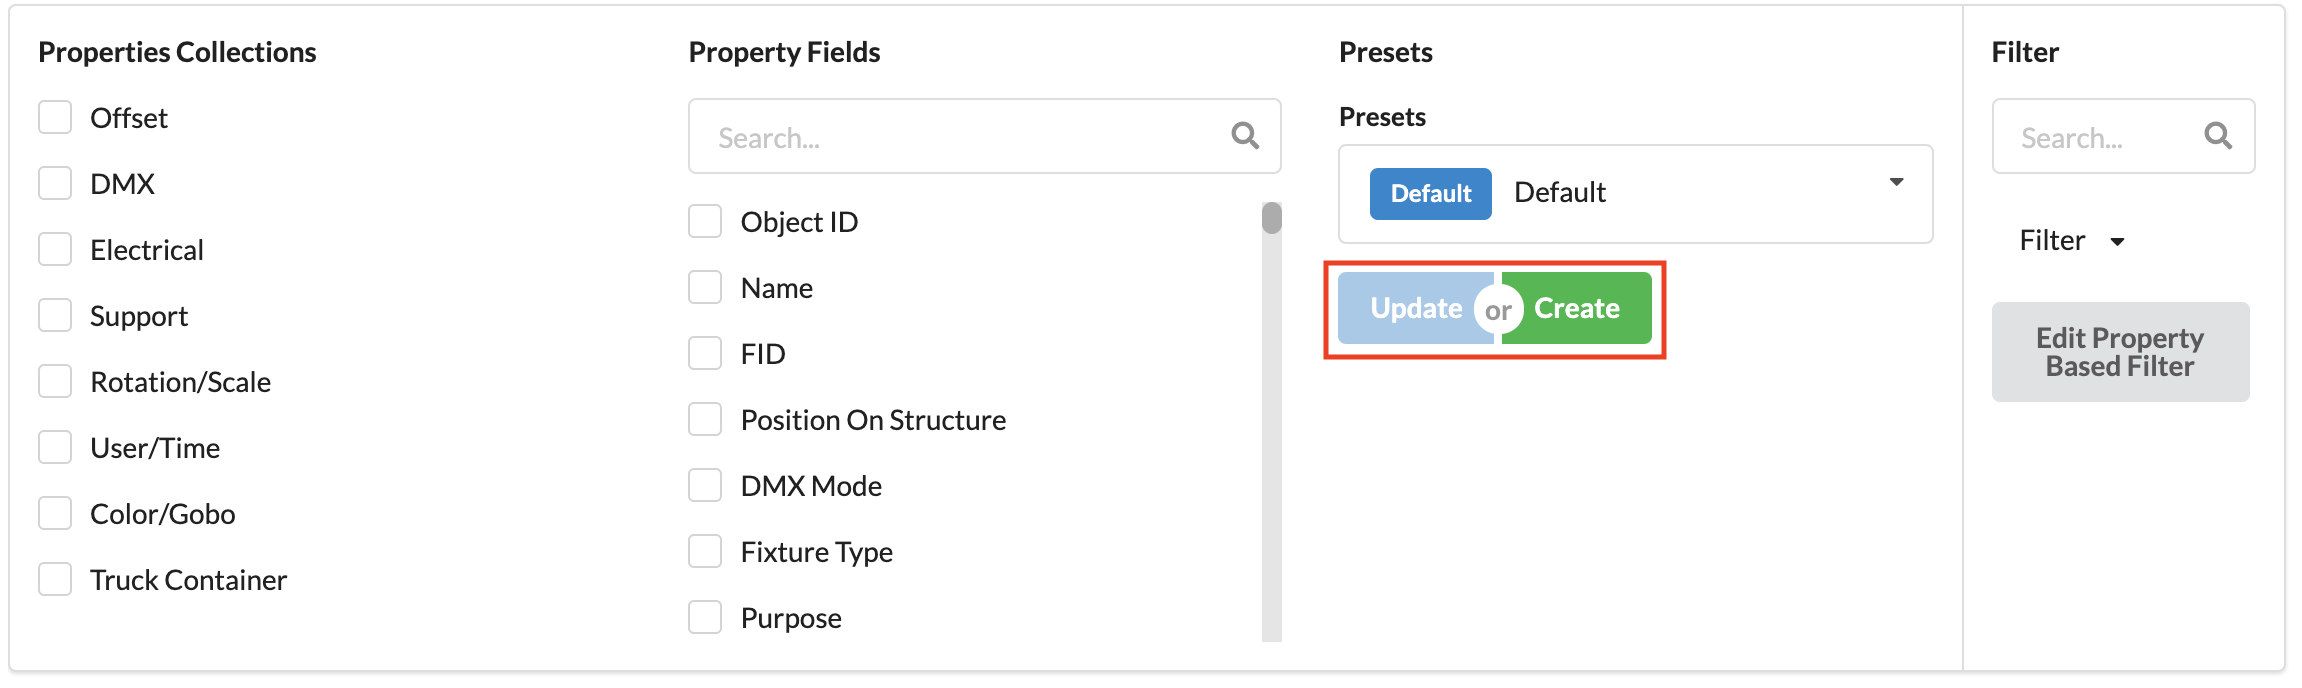
At the top, you can see the filter area. Under Property Fields, you can enable individual object properties to display them at the bottom of the worksheet. Under Properties Collections, you'll find a few predefined property sets on specific topics so you can enable/disable them more quickly. See Presets for useful, sorted compilations of object properties for paperwork. On the far right, you can also filter whether you want to display only objects with specific properties in the worksheet.
You can drag&drop and sort the columns in the worksheet by clicking on them.
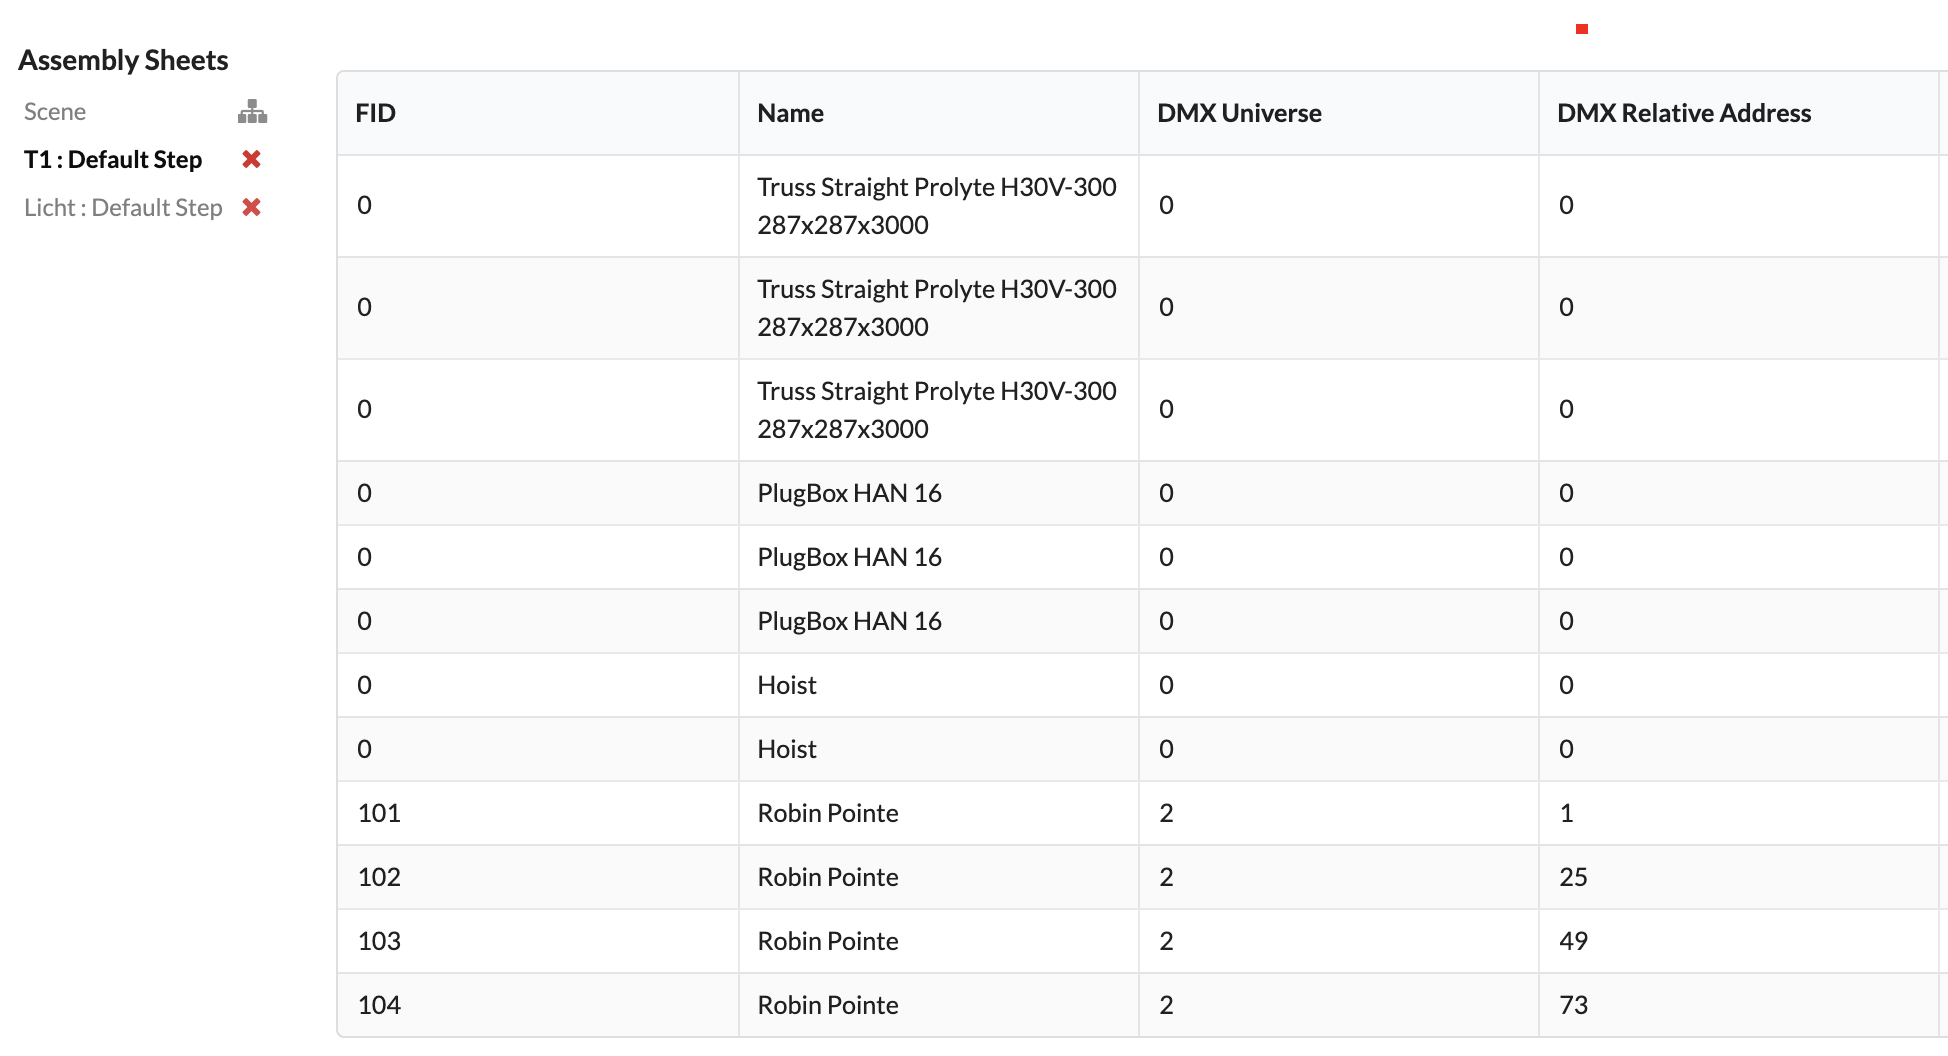
To patch spotlights, activate the preset Data Patch. You select column DMX Universe, and holding down the mouse key, select the universe field of all the spotlights you want to patch to the same universe. Now you enter the corresponding number and confirm with Enter.
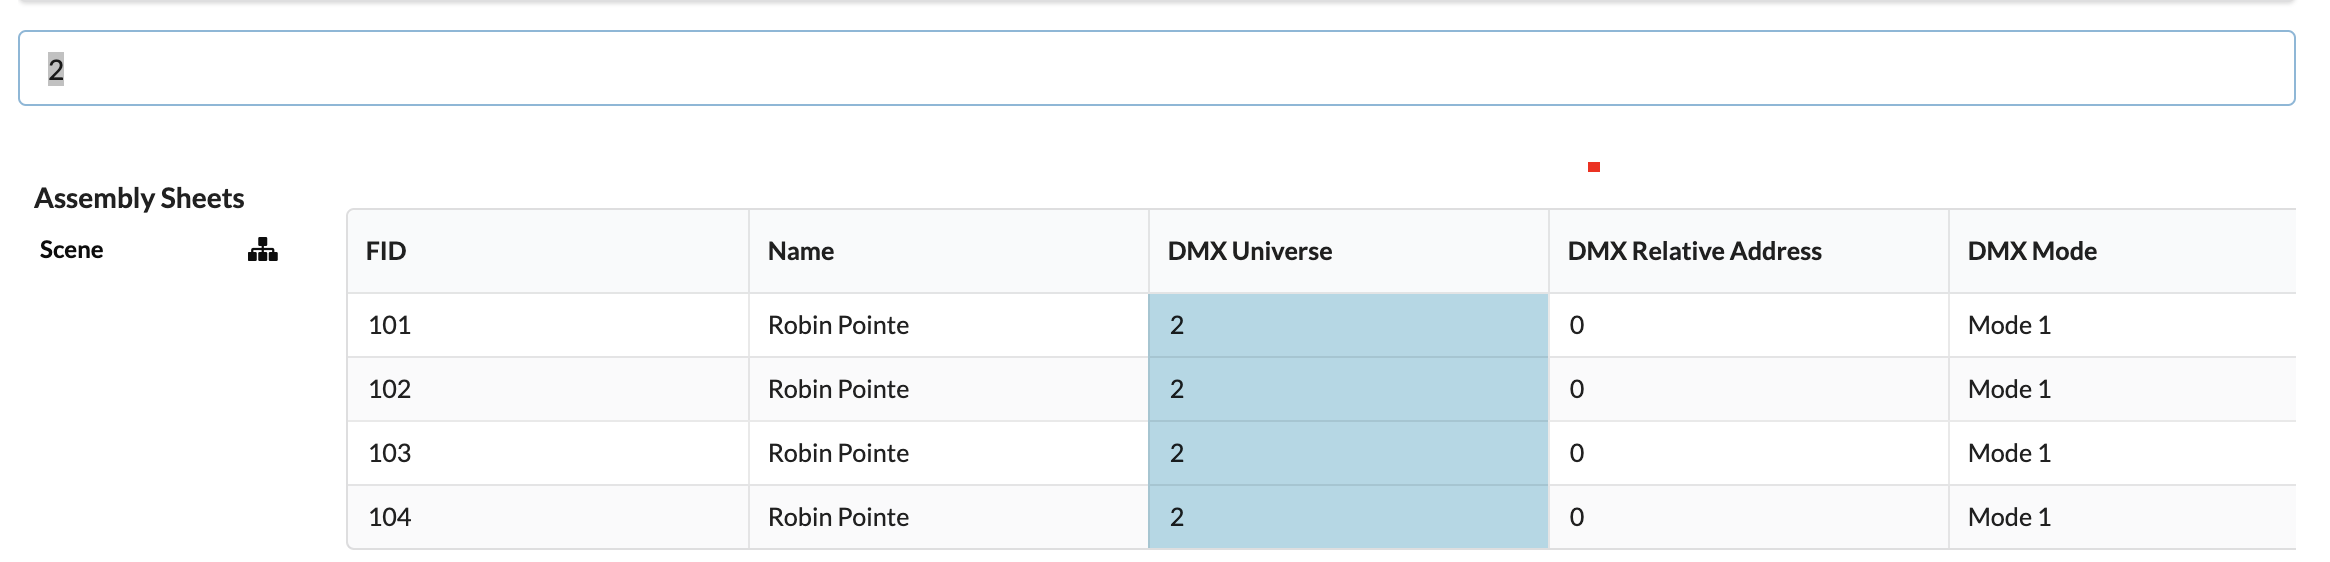
Now find column DMX Relative Address, enter the desired address and confirm with Enter. If you want multiple spotlights to be patched in a row, you can also select multiple fields by holding the mouse button down, enter the start address followed by a “+” and the DMX footprint and confirm with Enter.
If you only enter the start address followed by a "+", Production Assist automatically increases the DMX address by the footprint stored in the selected mode.

As mentioned above, you can filter the items you want to display in the worksheet using the filter in the upper right corner. However, it is also possible to create different worksheets for specific areas or object groups, for example, a separate worksheet for each truss, which displays only the objects on that truss.
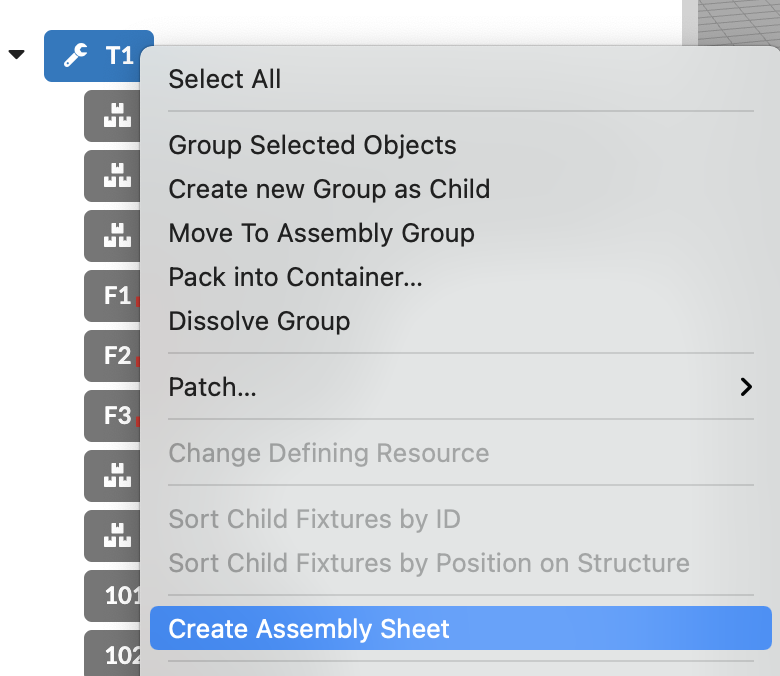
To do this, we right-click the desired Assembly Group in Scene Tree and create a worksheet using the command Create Assembly Sheet.
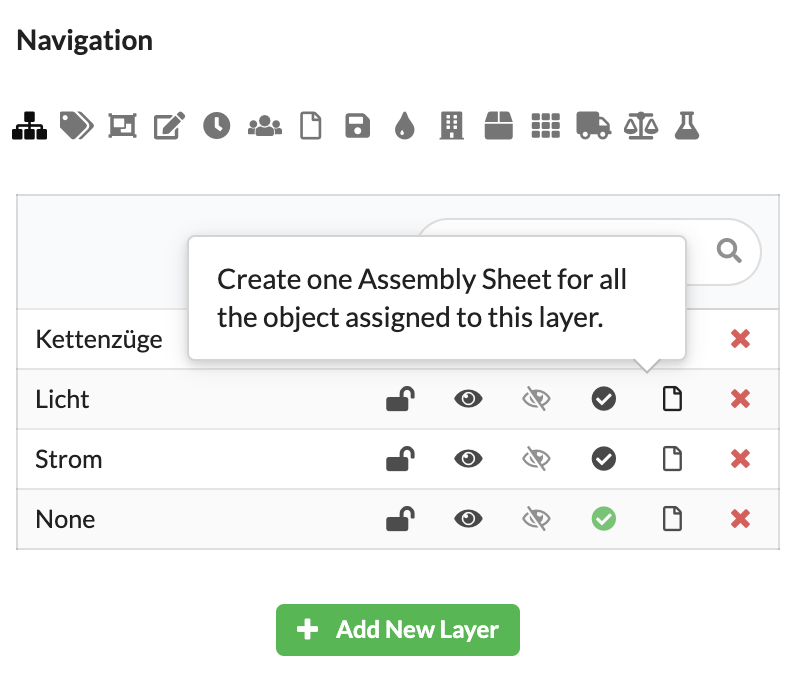
For example, if you've placed all floor lights on their own level, you can also click paper icon Create Assembly Sheet directly in Navigation .
Or you can you another way to activate all desired objects for your worksheet in the Scene Tree or Renderer, and then by right-clicking, select the command Create Assembly Sheet.
All your created worksheets will be displayed to the left of the worksheet in the Worksheet window and you can easily switch between them by clicking on them.
As mentioned earlier, under Presets, in the filter area of the Assembly Sheet window, you can find useful, sorted compilations of object properties for paperwork. You can also update or rebuild them as you like by choosing any settings you want in the worksheet and pressing Update or Create .
Once you've completed your worksheet and sorted it as you like, you can click the green button Export to PDF in the lower right corner and export your PDF with the name you want.