SketchUp Plugin#
Introduction#
Production Assist is also available for SketchUp. It integrates directly into SketchUp and offers the same range of features as the desktop app and all other plugins.
Production Assist works with the following SketchUp versions:
All versions use the same extension file (.rbz).
Installation#
Attention: For Production Assist to work correctly, both the desktop version and the plugin must be installed. All support files such as cross-sections and templates are included in the installation.
- First, download and install the Production Assist desktop app from https://www.production-assist.com/download
- Then download the Production Assist SketchUp extension from the same website.
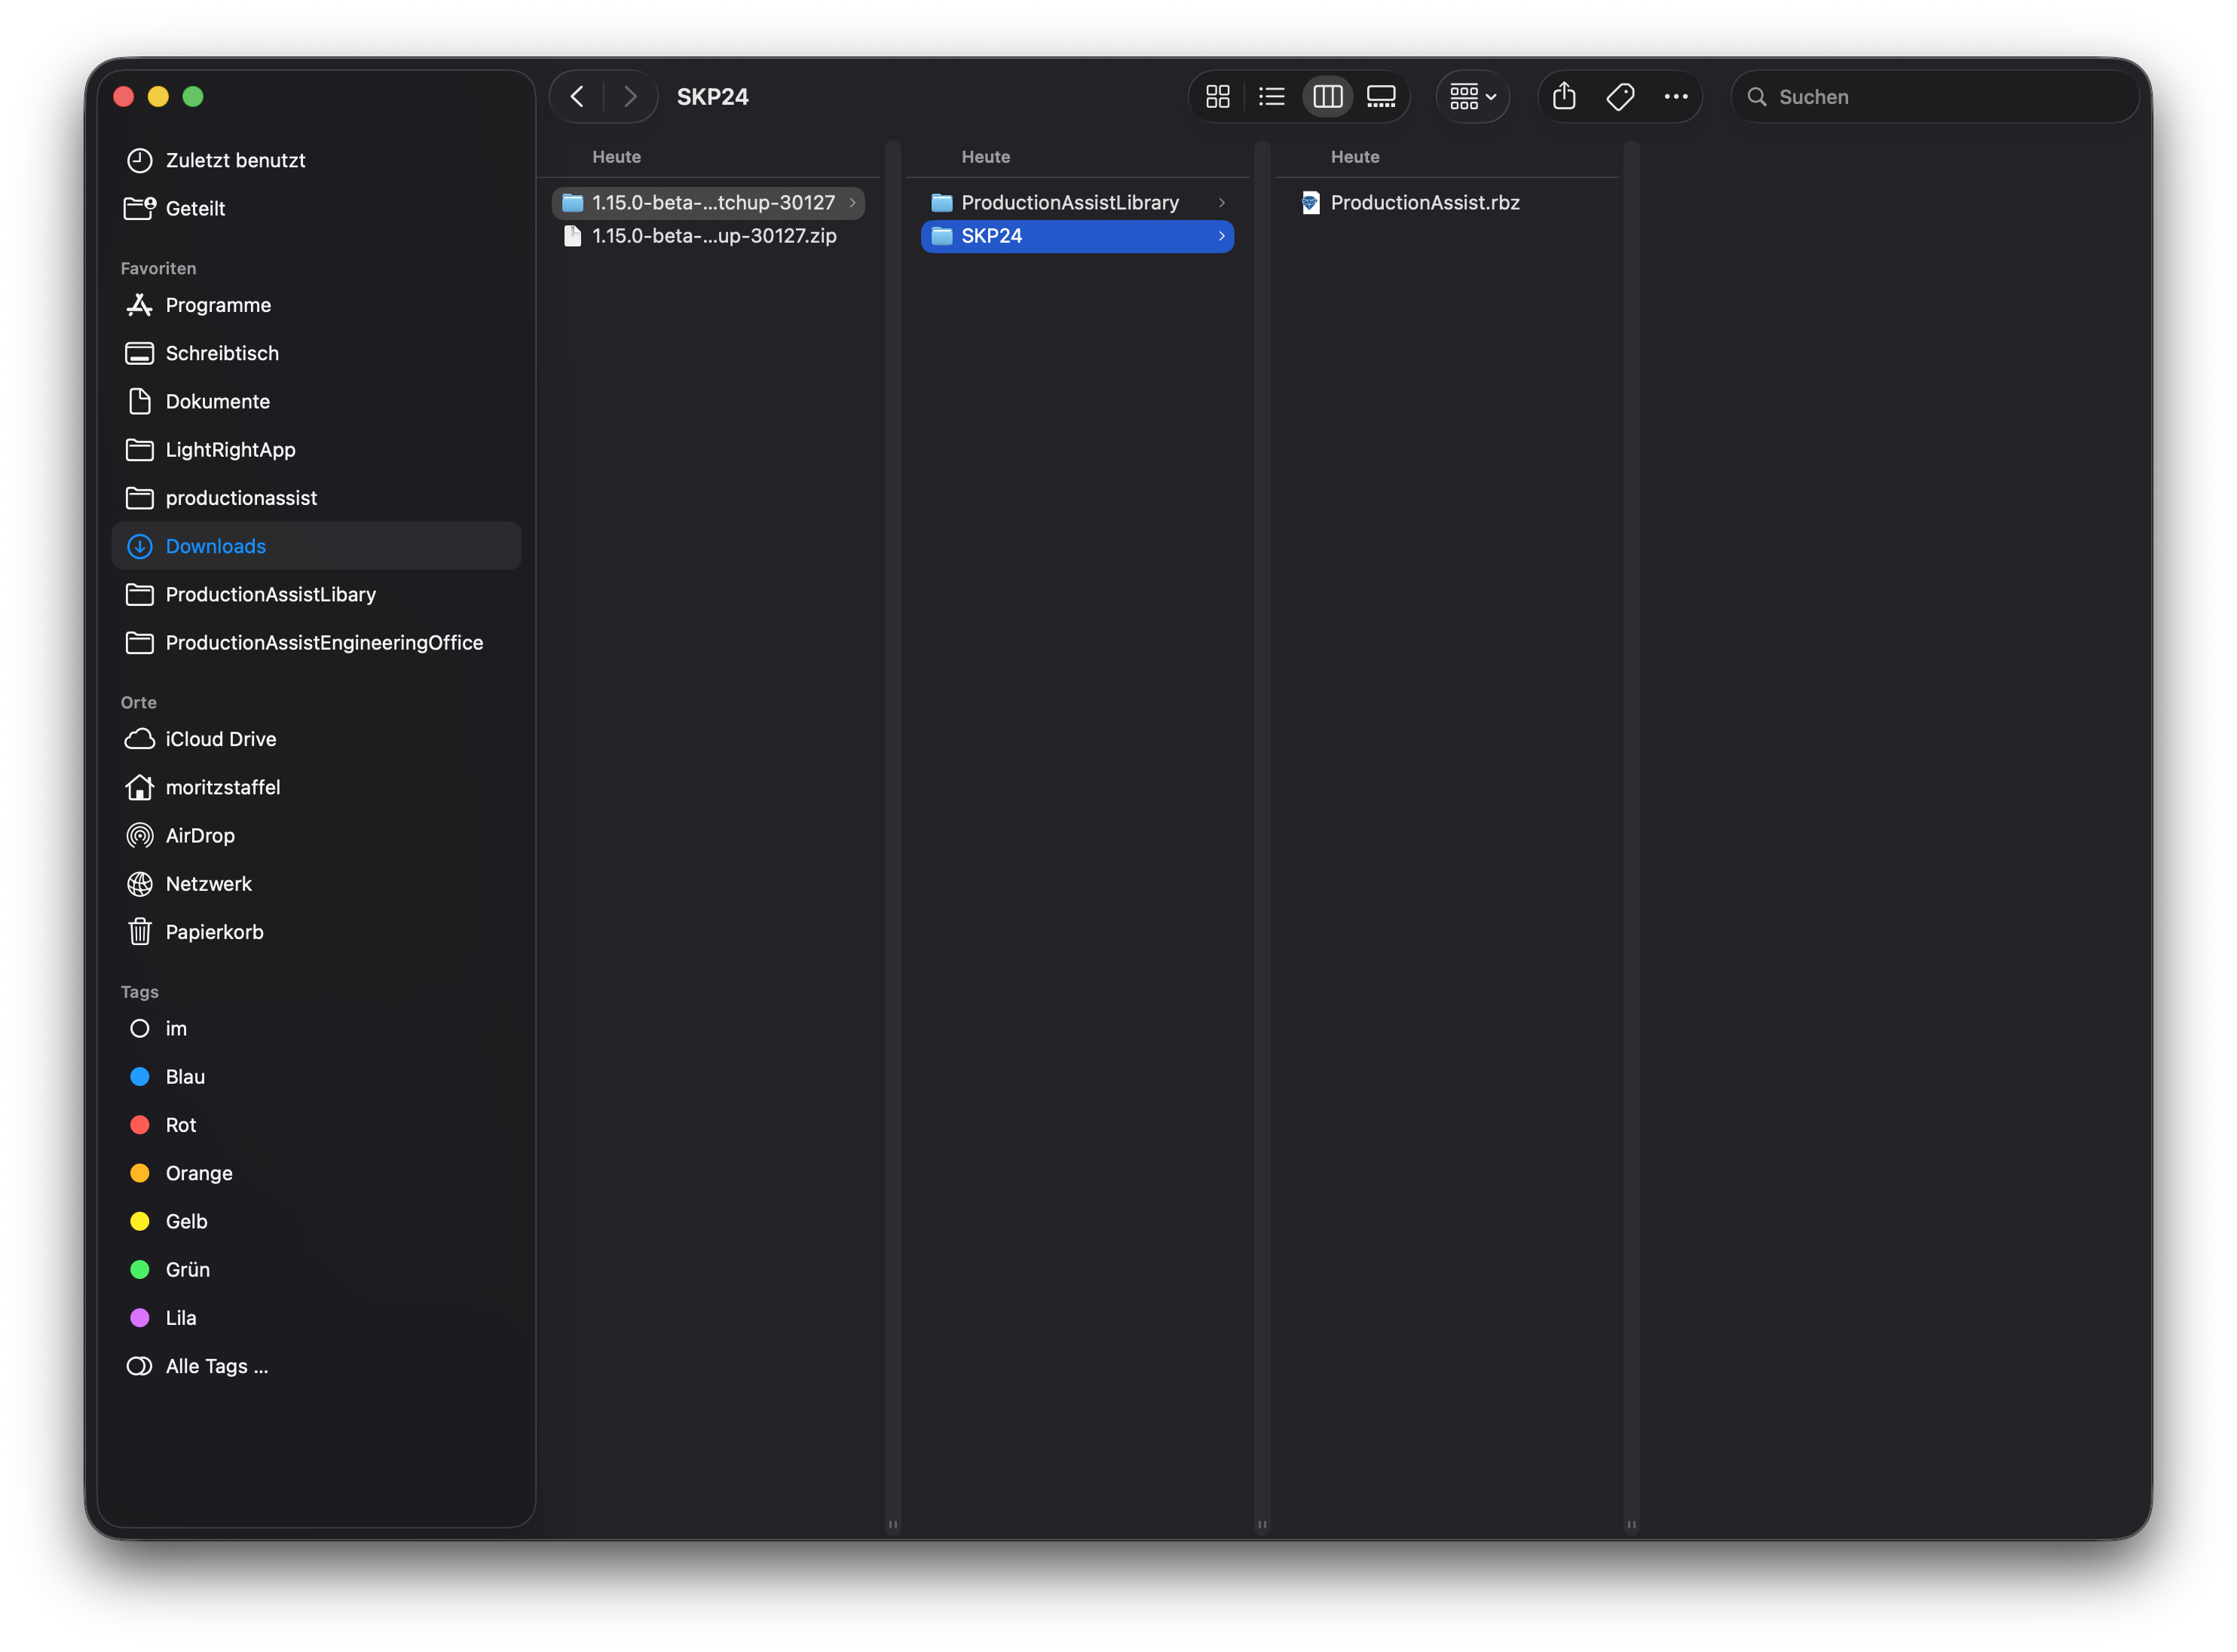
- Extract the archive.
- Move the
ProductionAssistLibrary folder to a location where you store reusable components (e.g., in your Documents folder). Remember this location, as you will need it later to access the Production Assist components in SketchUp.
- Start SketchUp and open the Extension Manager via the Extensions menu.
- Click Install Extension and select the
ProductionAssist.rbz file.
The ProductionAssistLibrary folder contains the library that you can use in SketchUp. These components have already been prepared for use with Production Assist. You can also create your own components or modify existing components to work with Production Assist.
The SKP24 folder contains the extension that needs to be installed in SketchUp. This can be used for all SketchUp versions from 2024 onwards.
Note: If a previous version of Production Assist is already installed, you must restart SketchUp for the new version to take effect.
General Workflow#
Production Assist adds additional tools and a web palette to SketchUp. These can be used to interact with the SketchUp scene.
For elements to be calculated, the components must be prepared. The components from the ProductionAssistLibrary are already configured accordingly.
Typical Workflow#
- Add components – Insert components from the ProductionAssistLibrary into your model (trusses, chain hoists, etc.).
- Start PA synchronization – Connect your model with Production Assist.
- Add loads – Add loads to your structure using the load tools.
- Start calculation – Run the calculation in the Production Assist palette.
- View results – Use the overlays to display forces, errors, and analysis results directly in SketchUp.
Quick Start: Your First Calculation#
This tutorial guides you through creating a simple truss structure with two chain hoists and performing your first calculation.
Step 1: Open Component Library#
- In SketchUp, go to Window > Components.
- Click on the house icon and select Open or Create Local Collection.
- Navigate to the ProductionAssistLibrary folder that you saved during installation.

Step 2: Place First Truss#
- In the library, find a truss structure (e.g., h30v-l200-3q).
- Drag the truss into your SketchUp scene.
- Place it at the desired position.
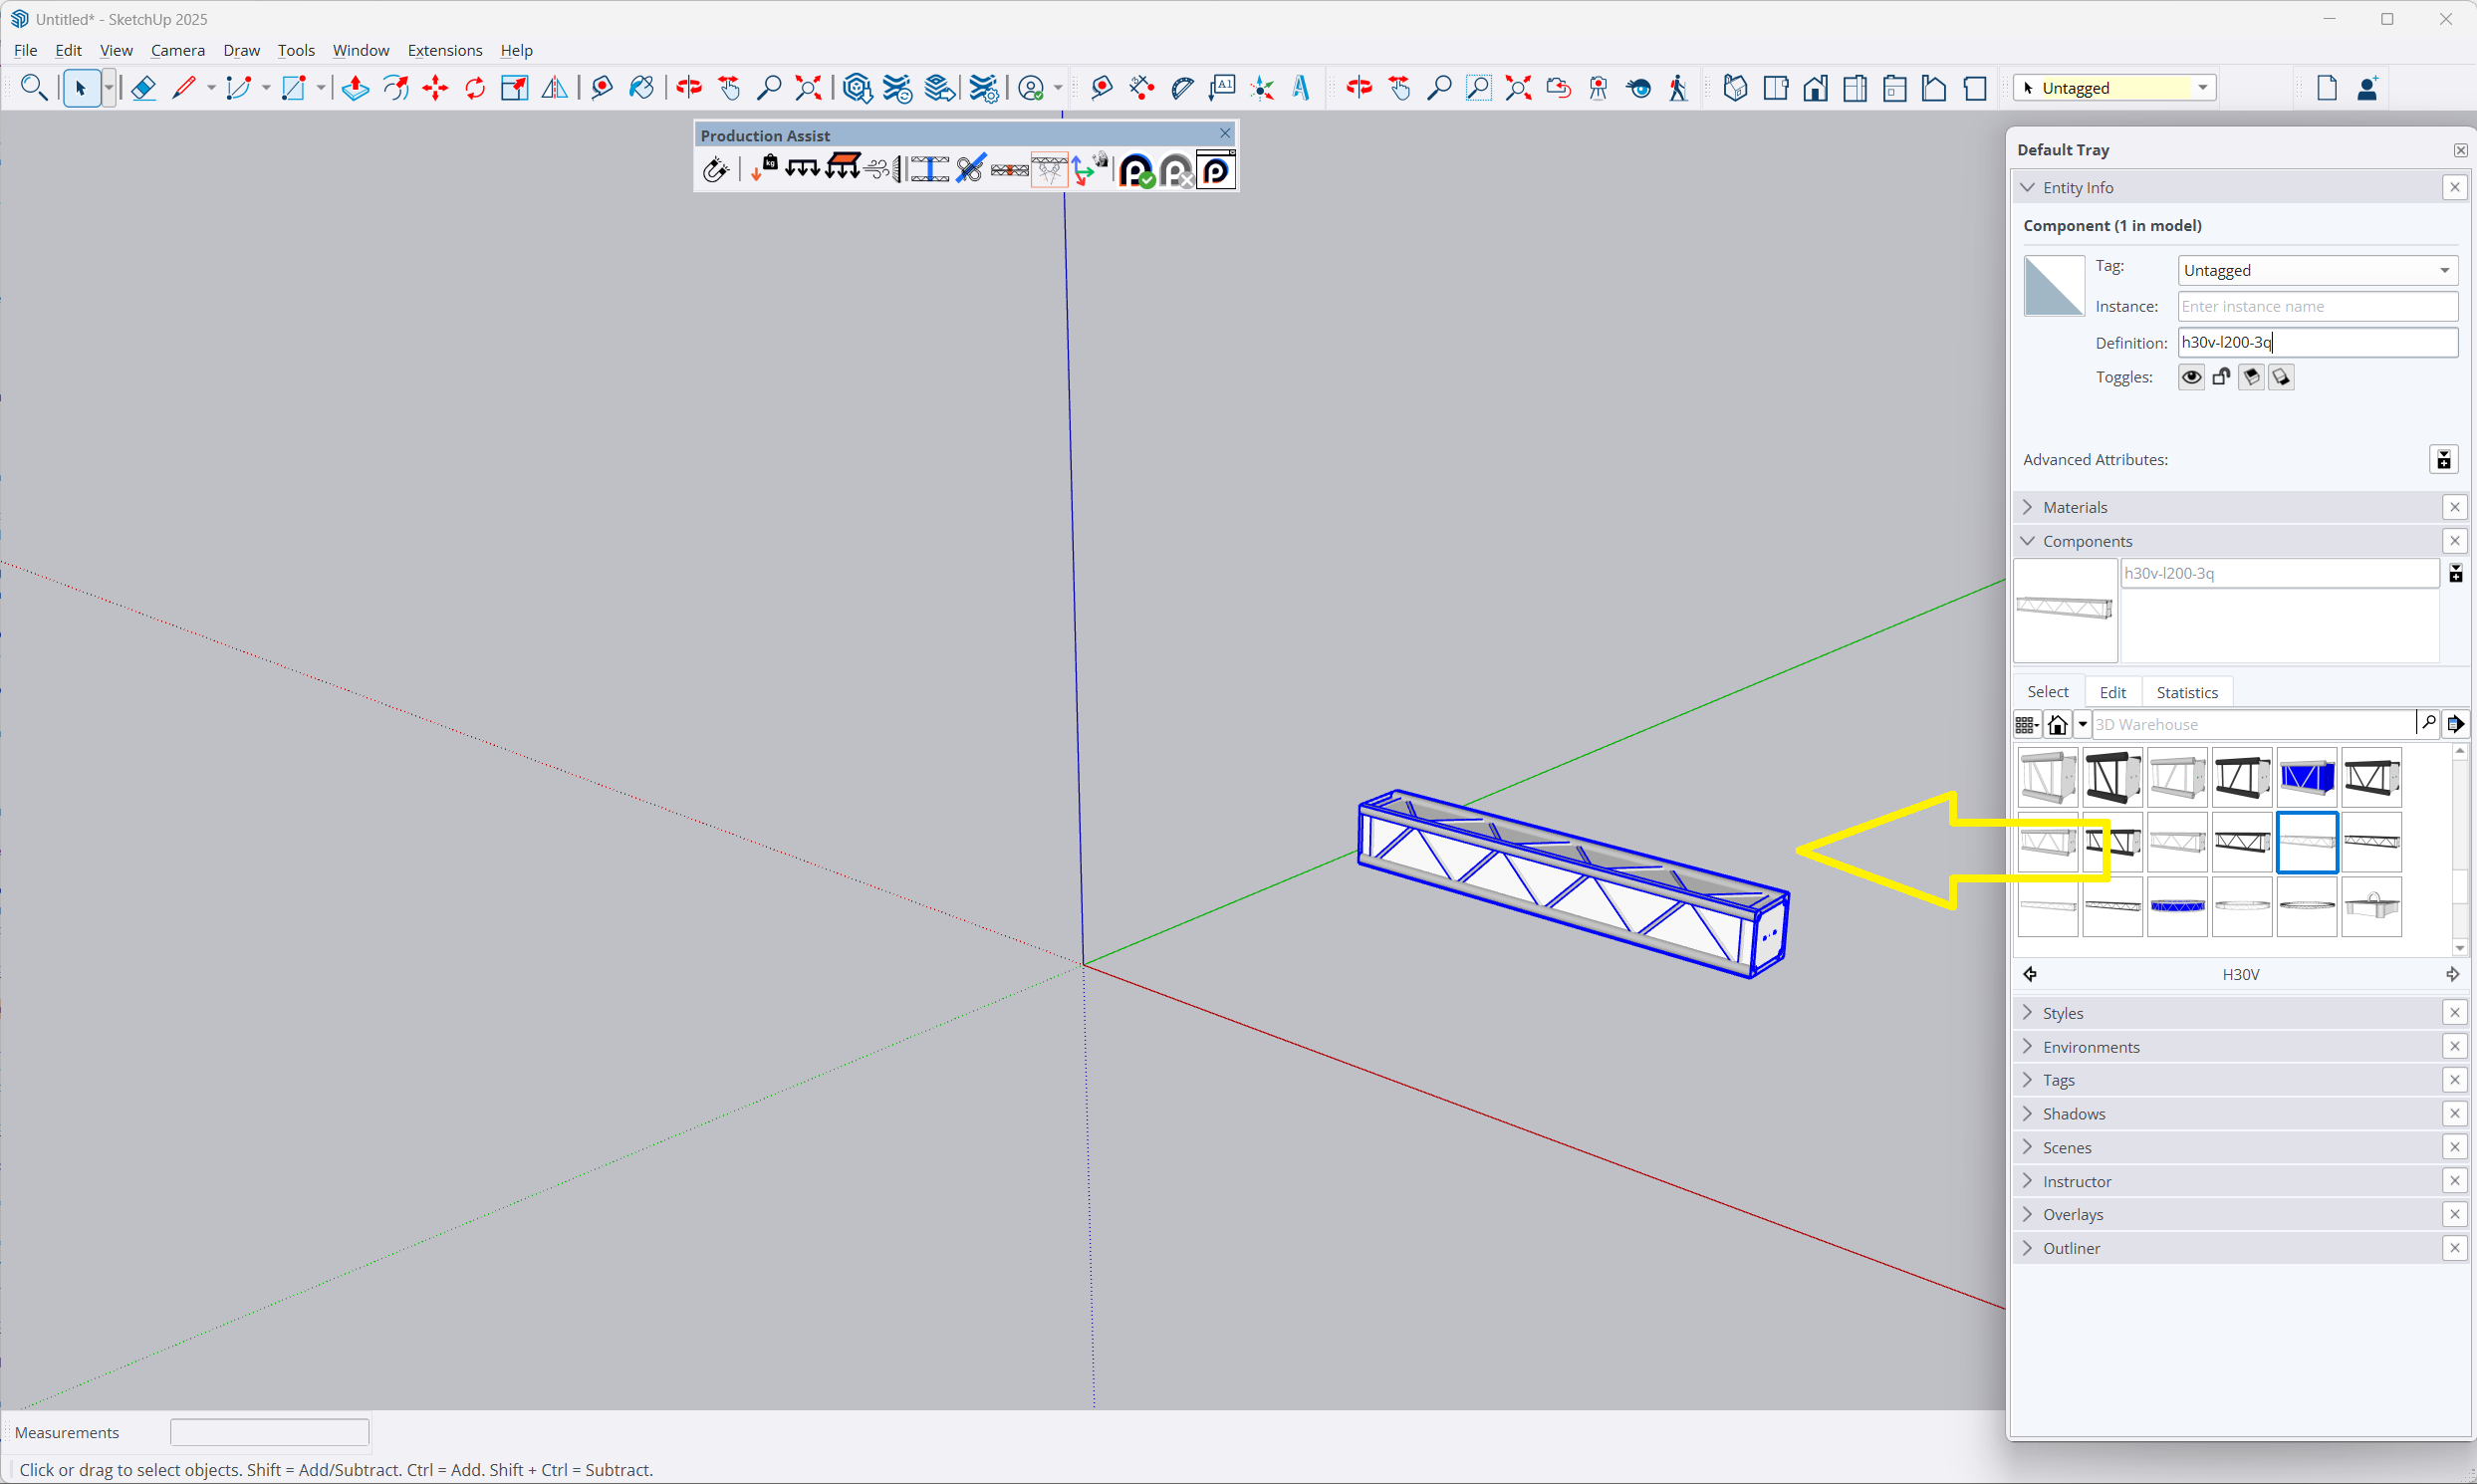
Step 3: Extend Truss Line#
- Select the Move Tool from the Production Assist toolbar.
- Click on the placed truss.
- Press ALT to create a copy.
- Move the copy to the end of the first truss – it will automatically snap to the magnetic connection.
- Repeat the process until the desired length is reached.

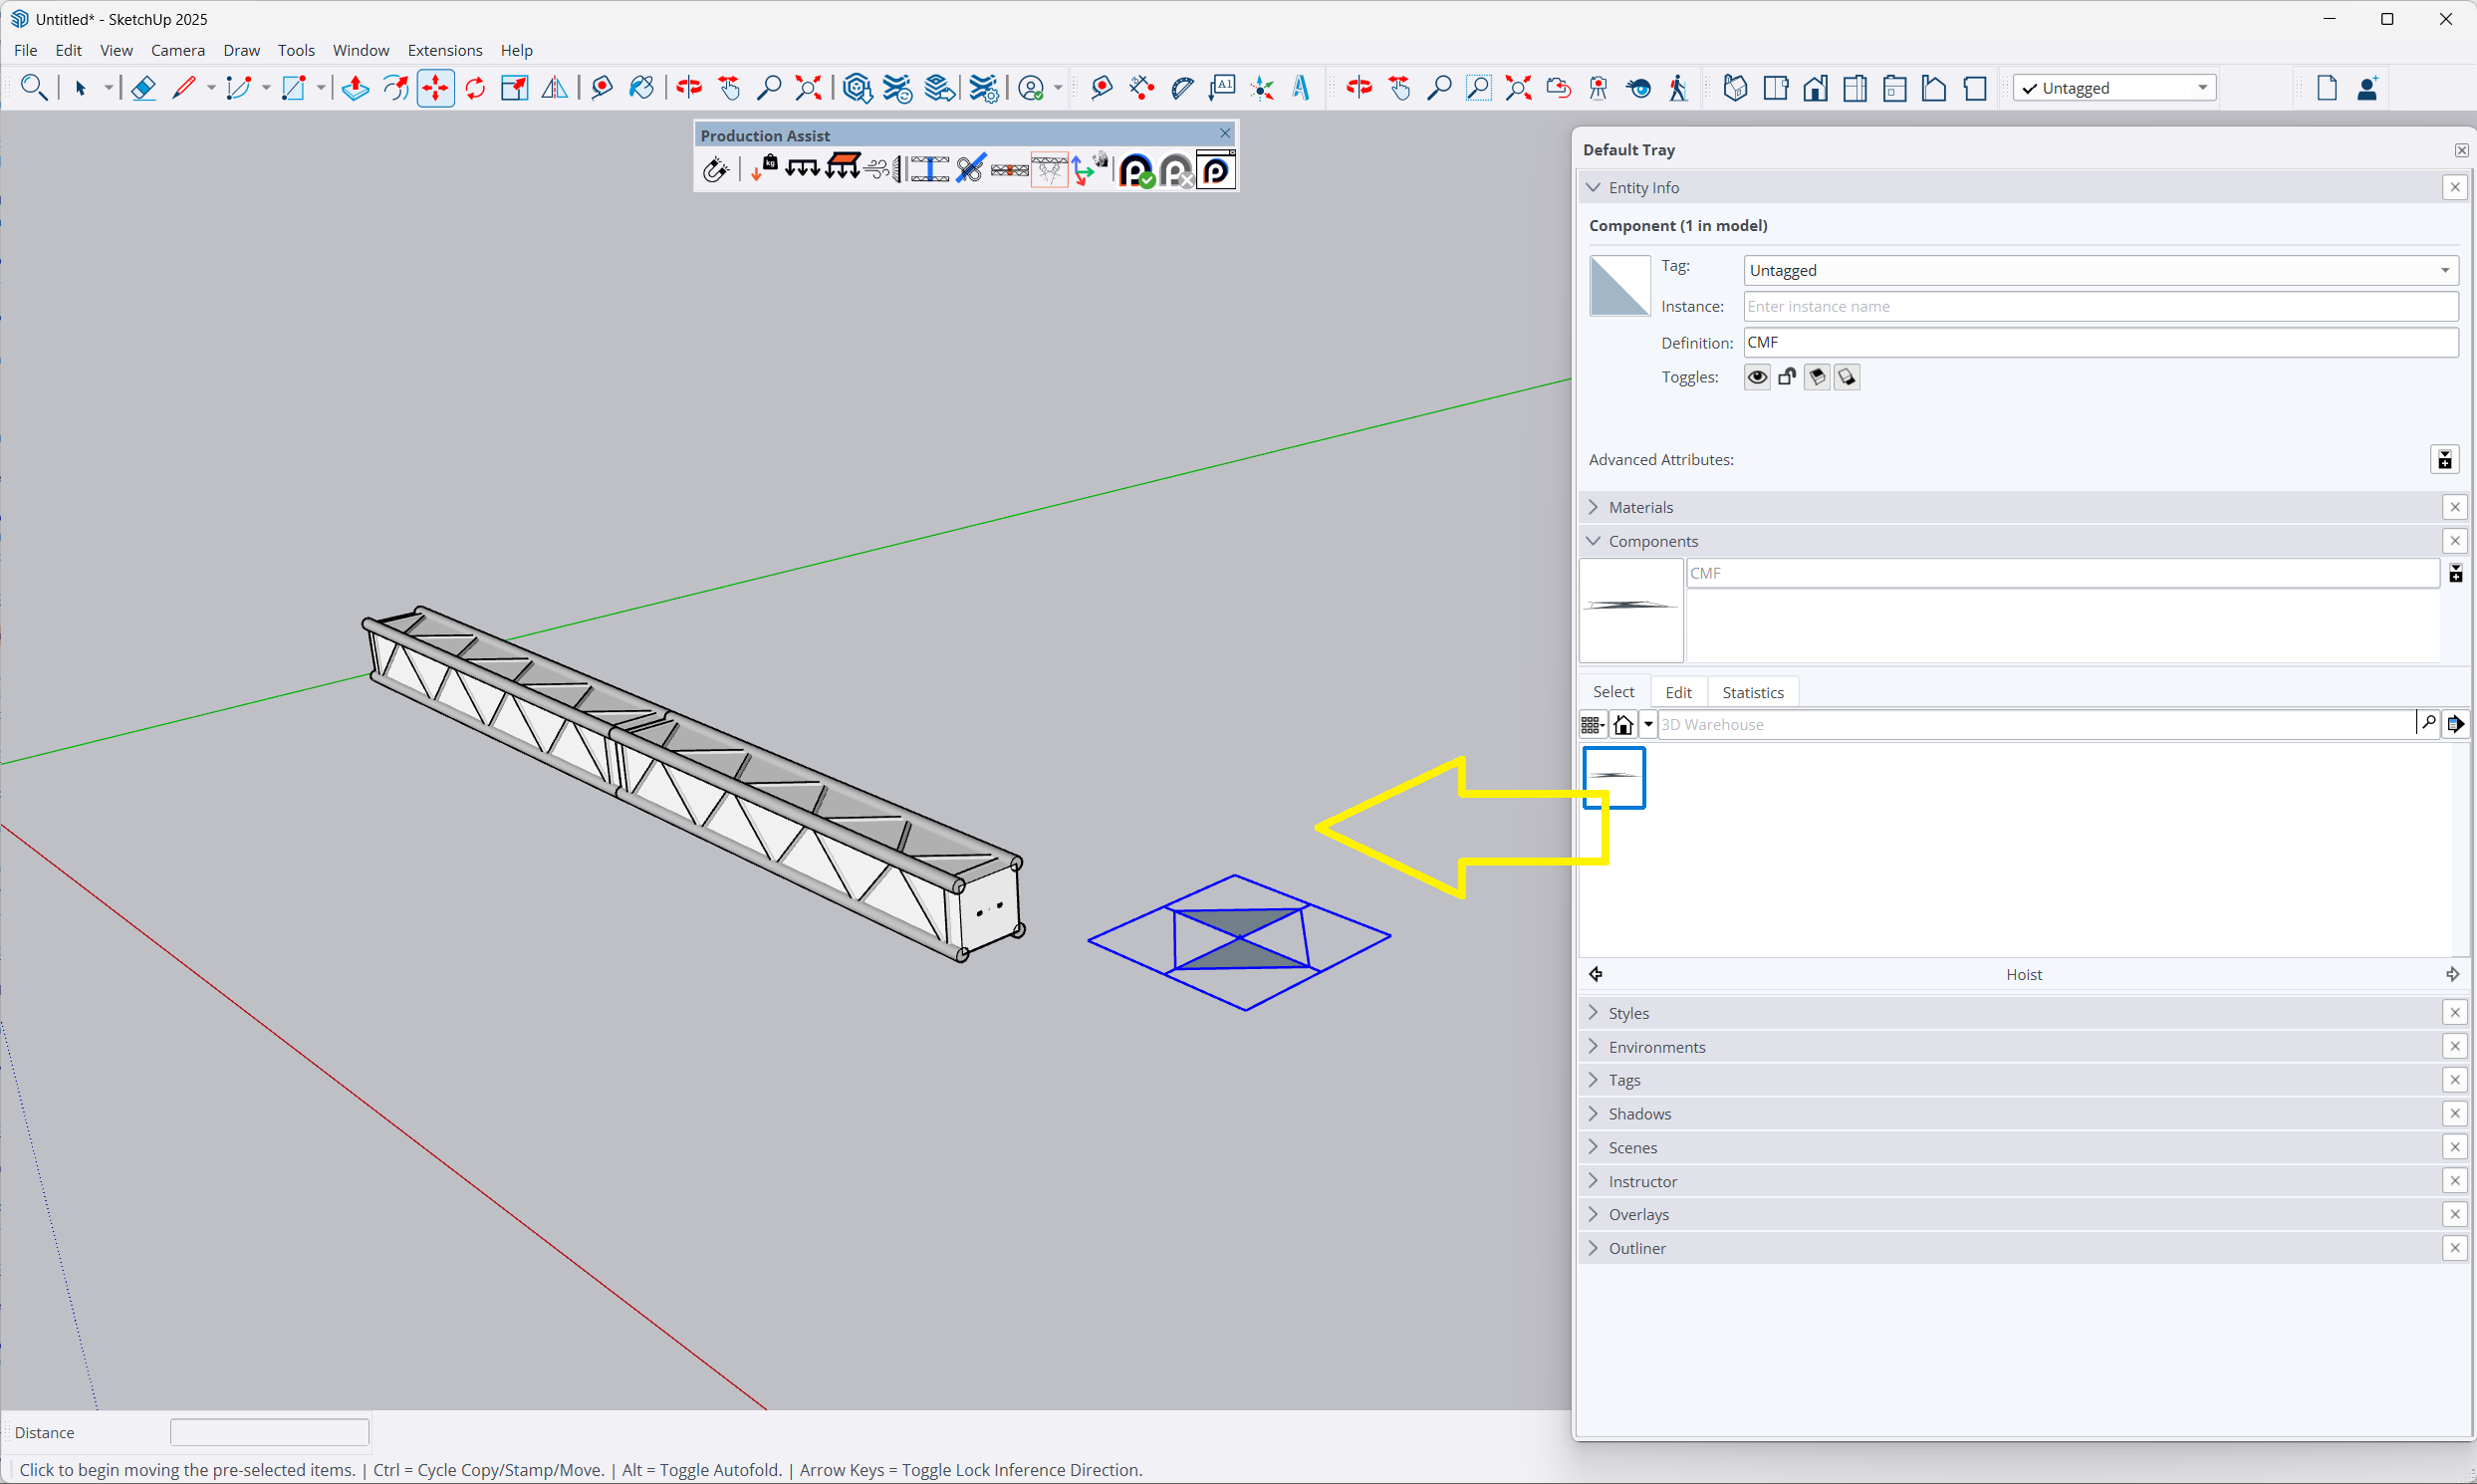
Step 4: Add Chain Hoists#
- In the component library, find a chain hoist (e.g., CMF).
- Drag it into the scene.
- Position it on the truss using the Move Tool – it will automatically snap to the center axis.
- Add a second chain hoist at the other end.
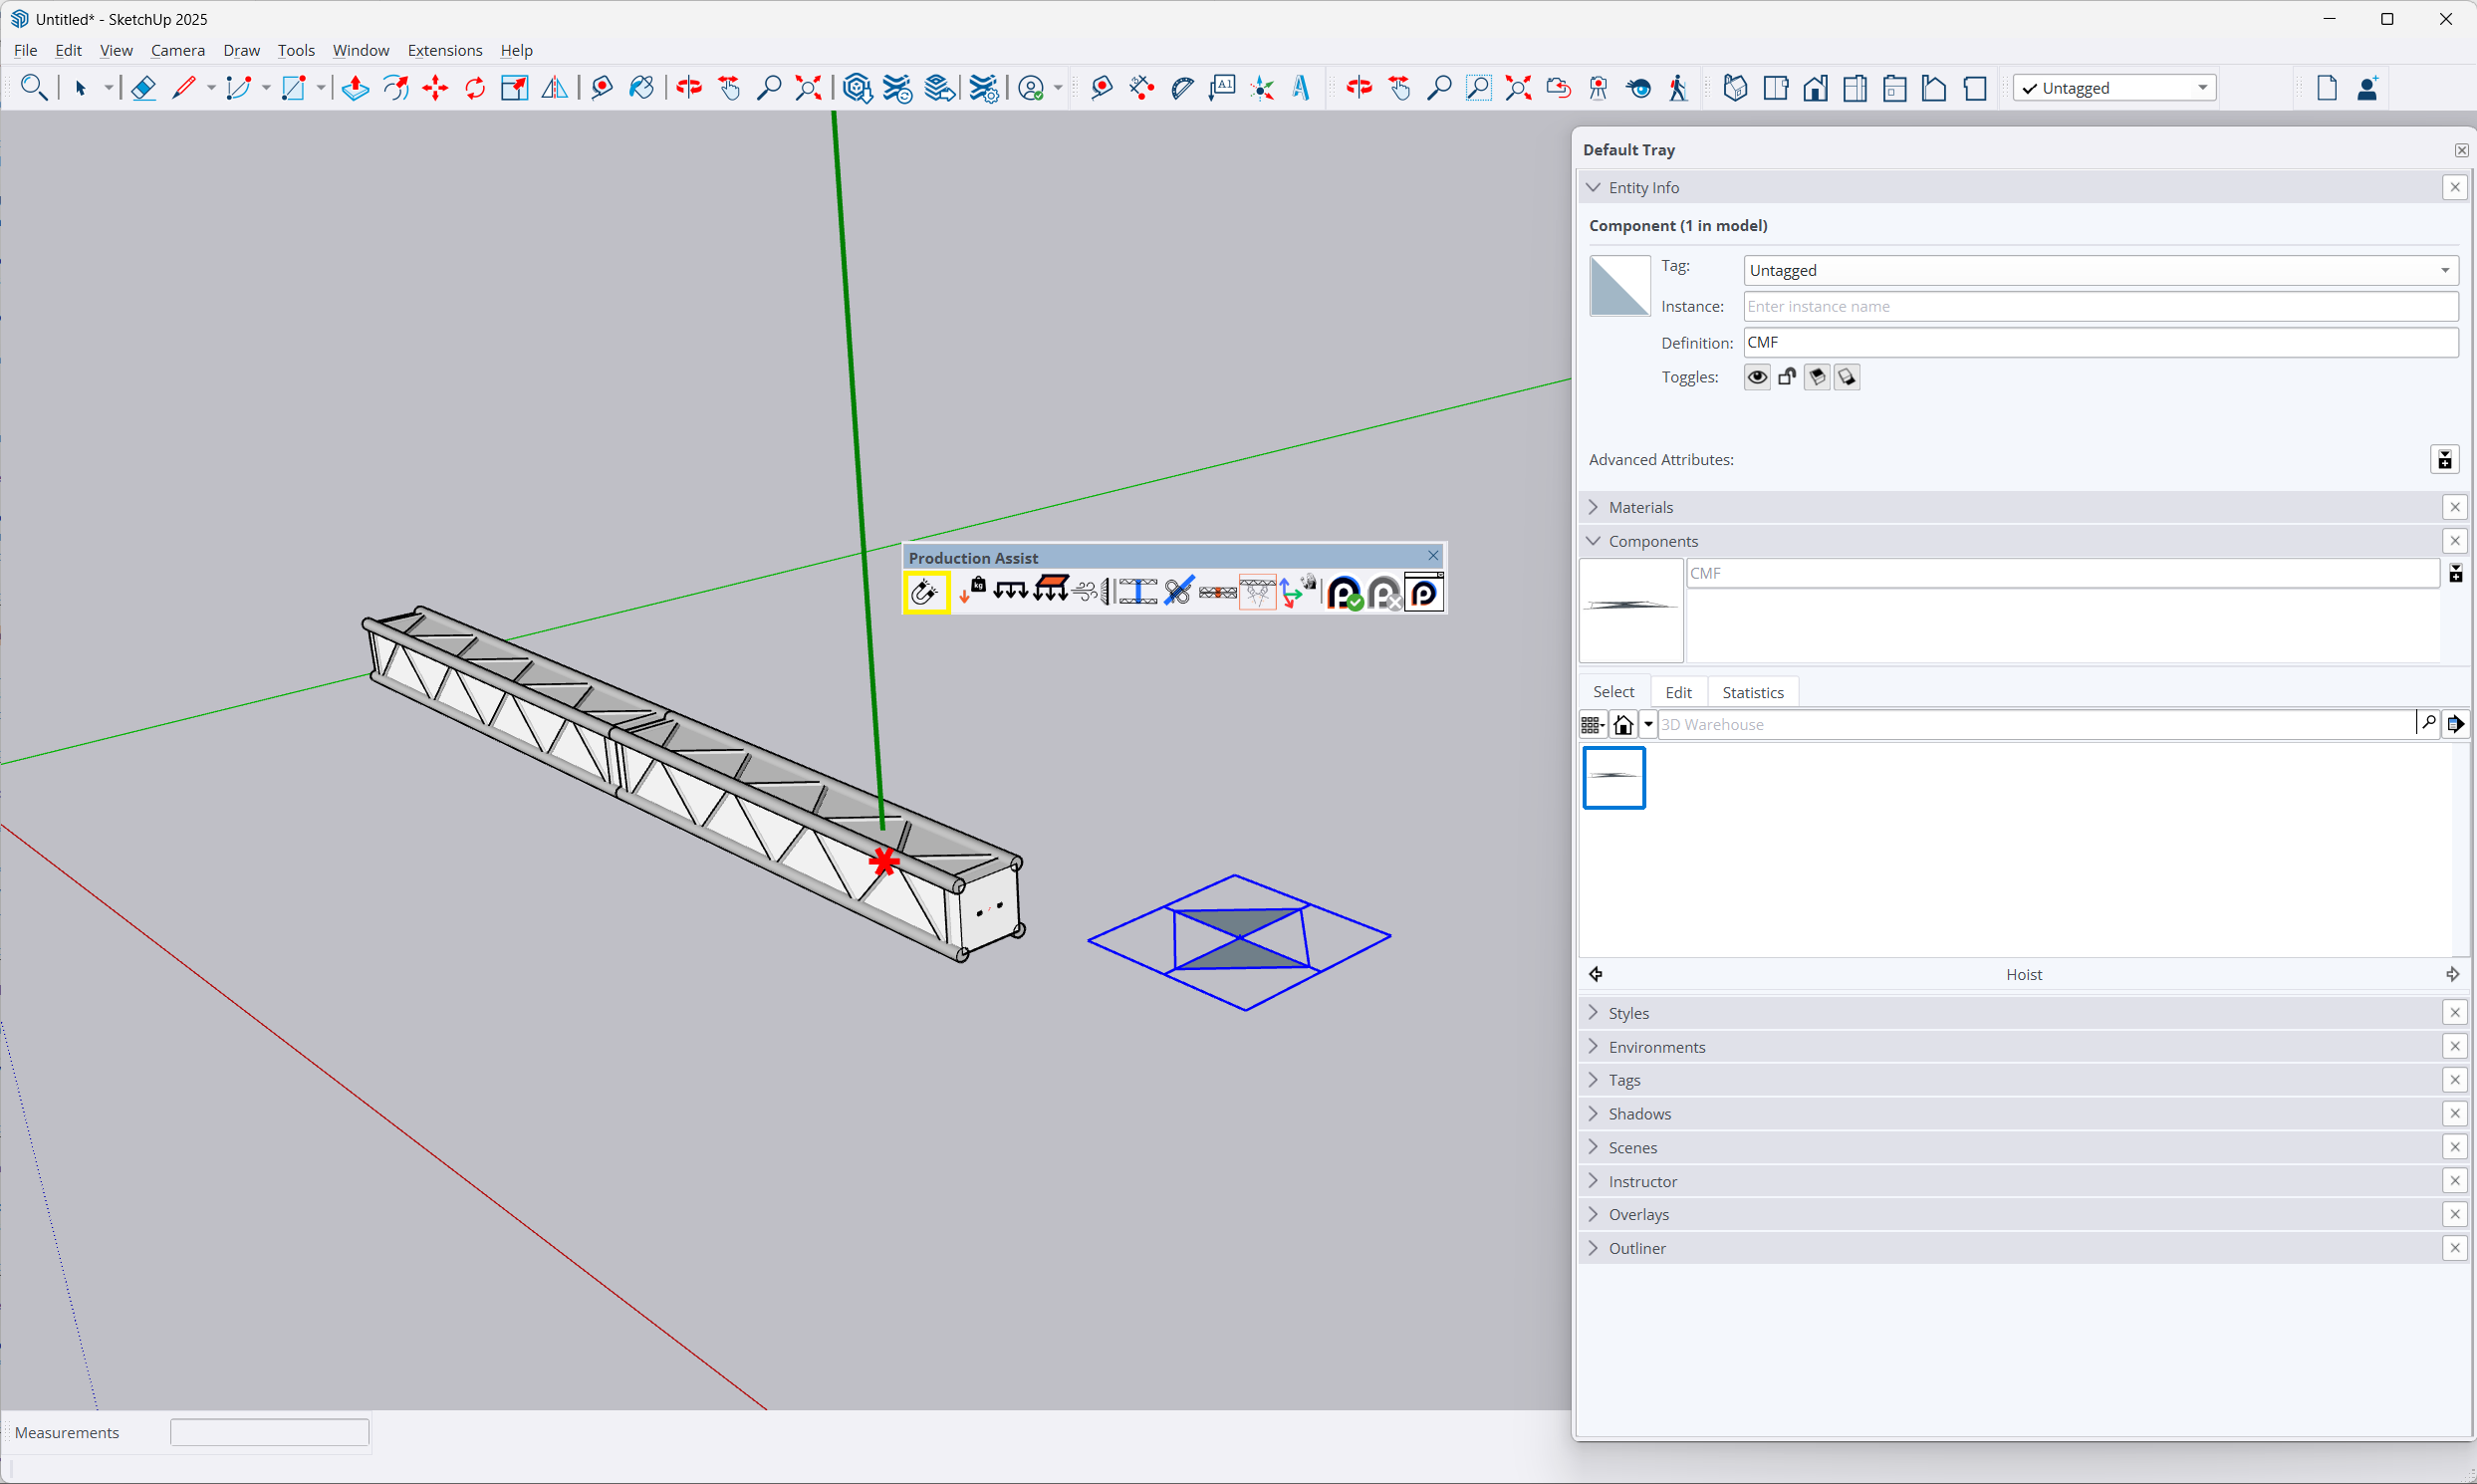
Step 5: Start Synchronization and Calculate#

- Click on Start PA Drawing Synchronization in the toolbar.
- Production Assist reads your model and starts the calculation.
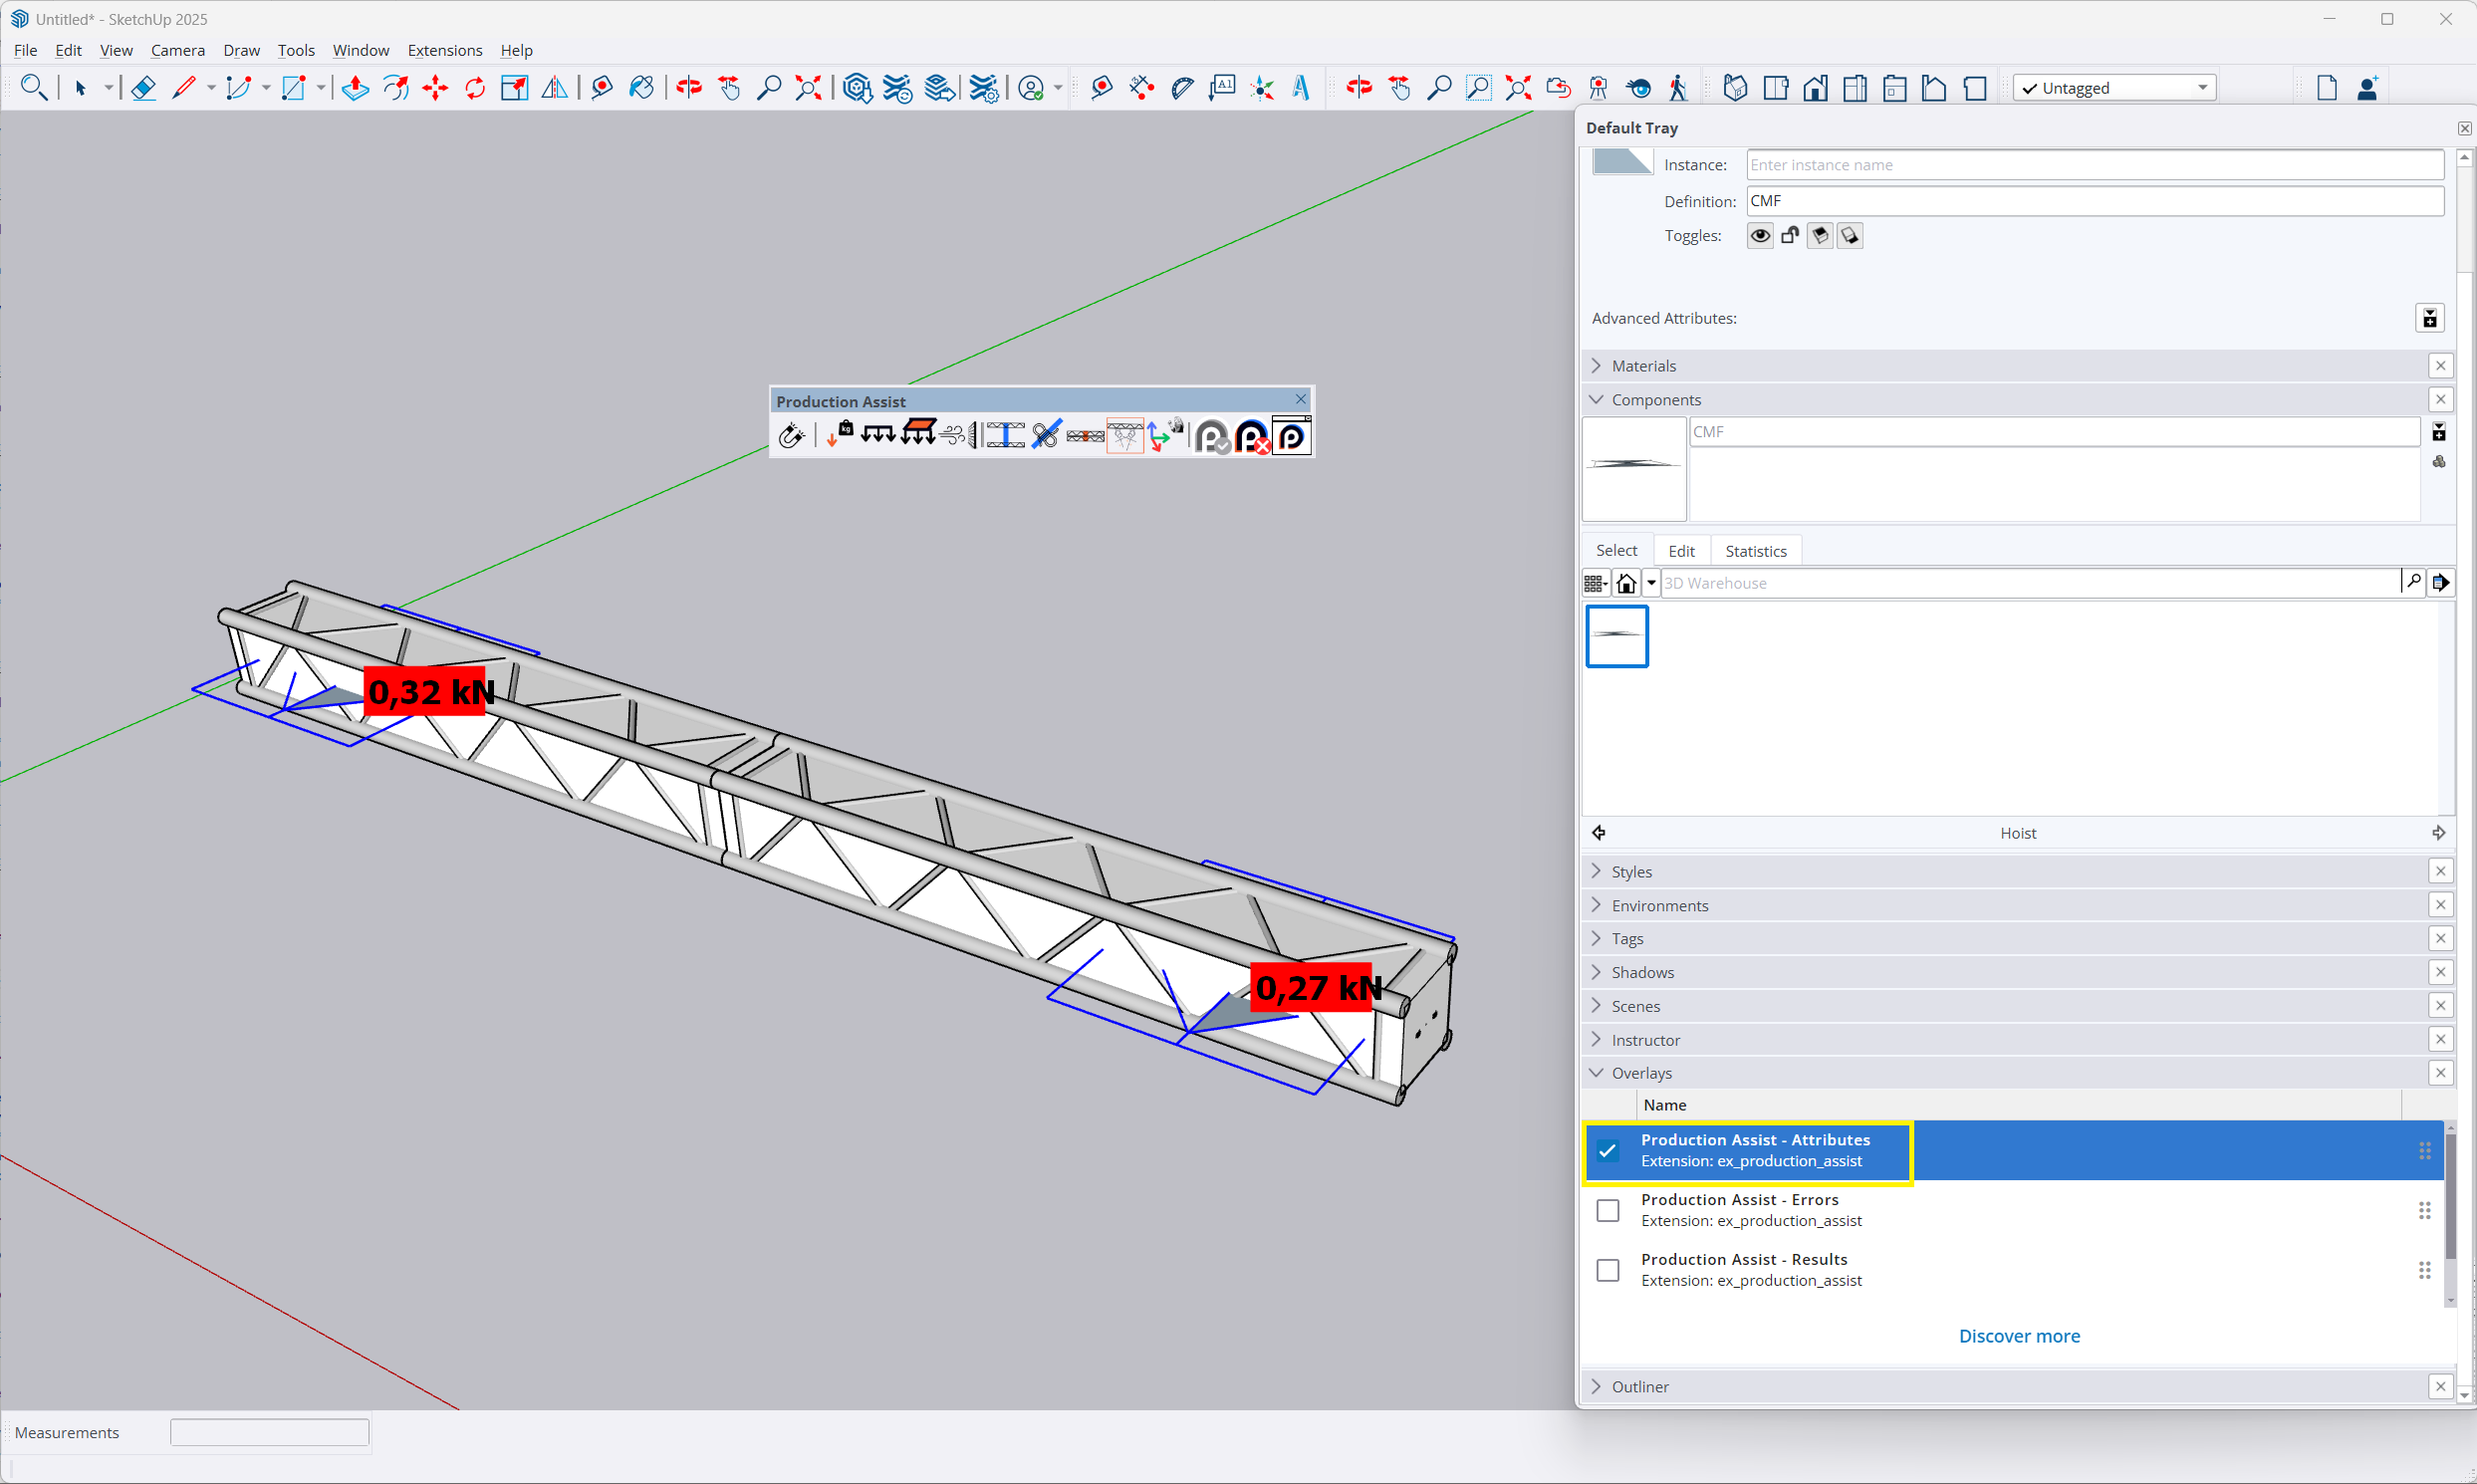
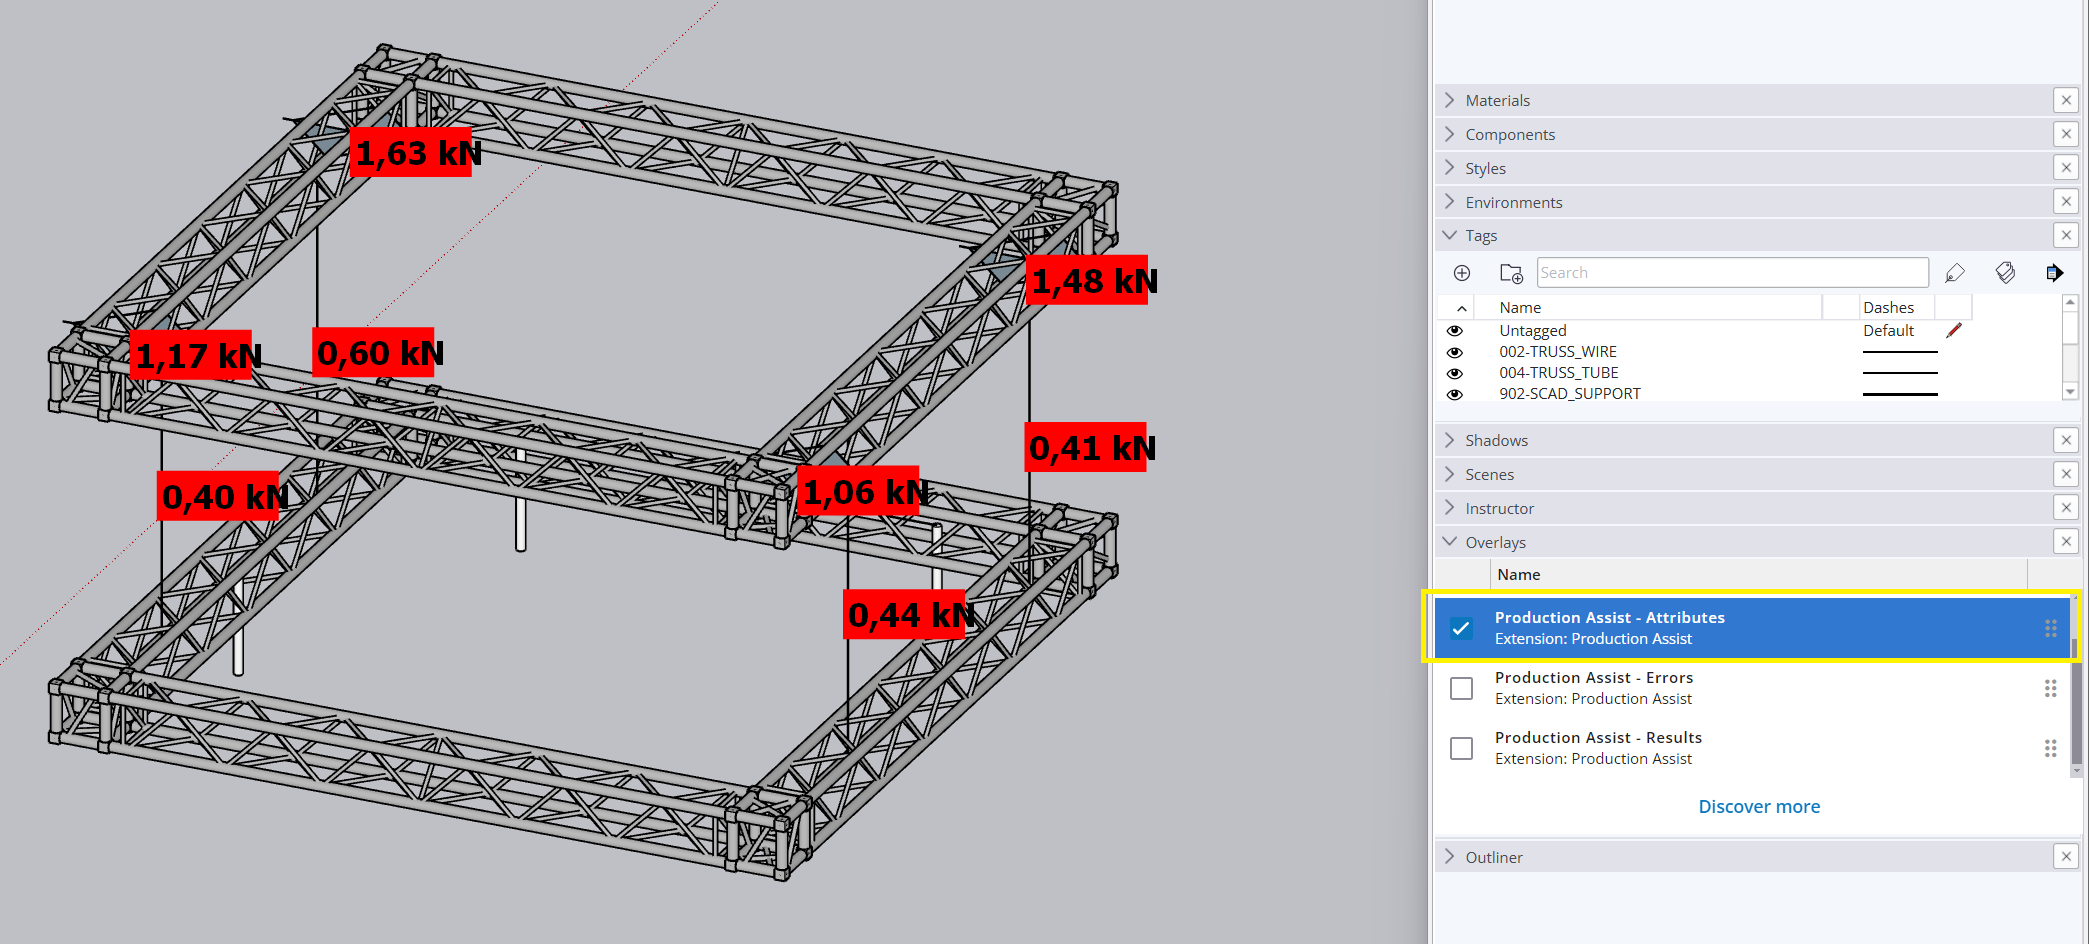
Step 6: View Results with Overlays#
- Go to Window > Overlays.
- Enable the Attribute Overlay.
- The support reactions of the chain hoists are displayed directly in the model.
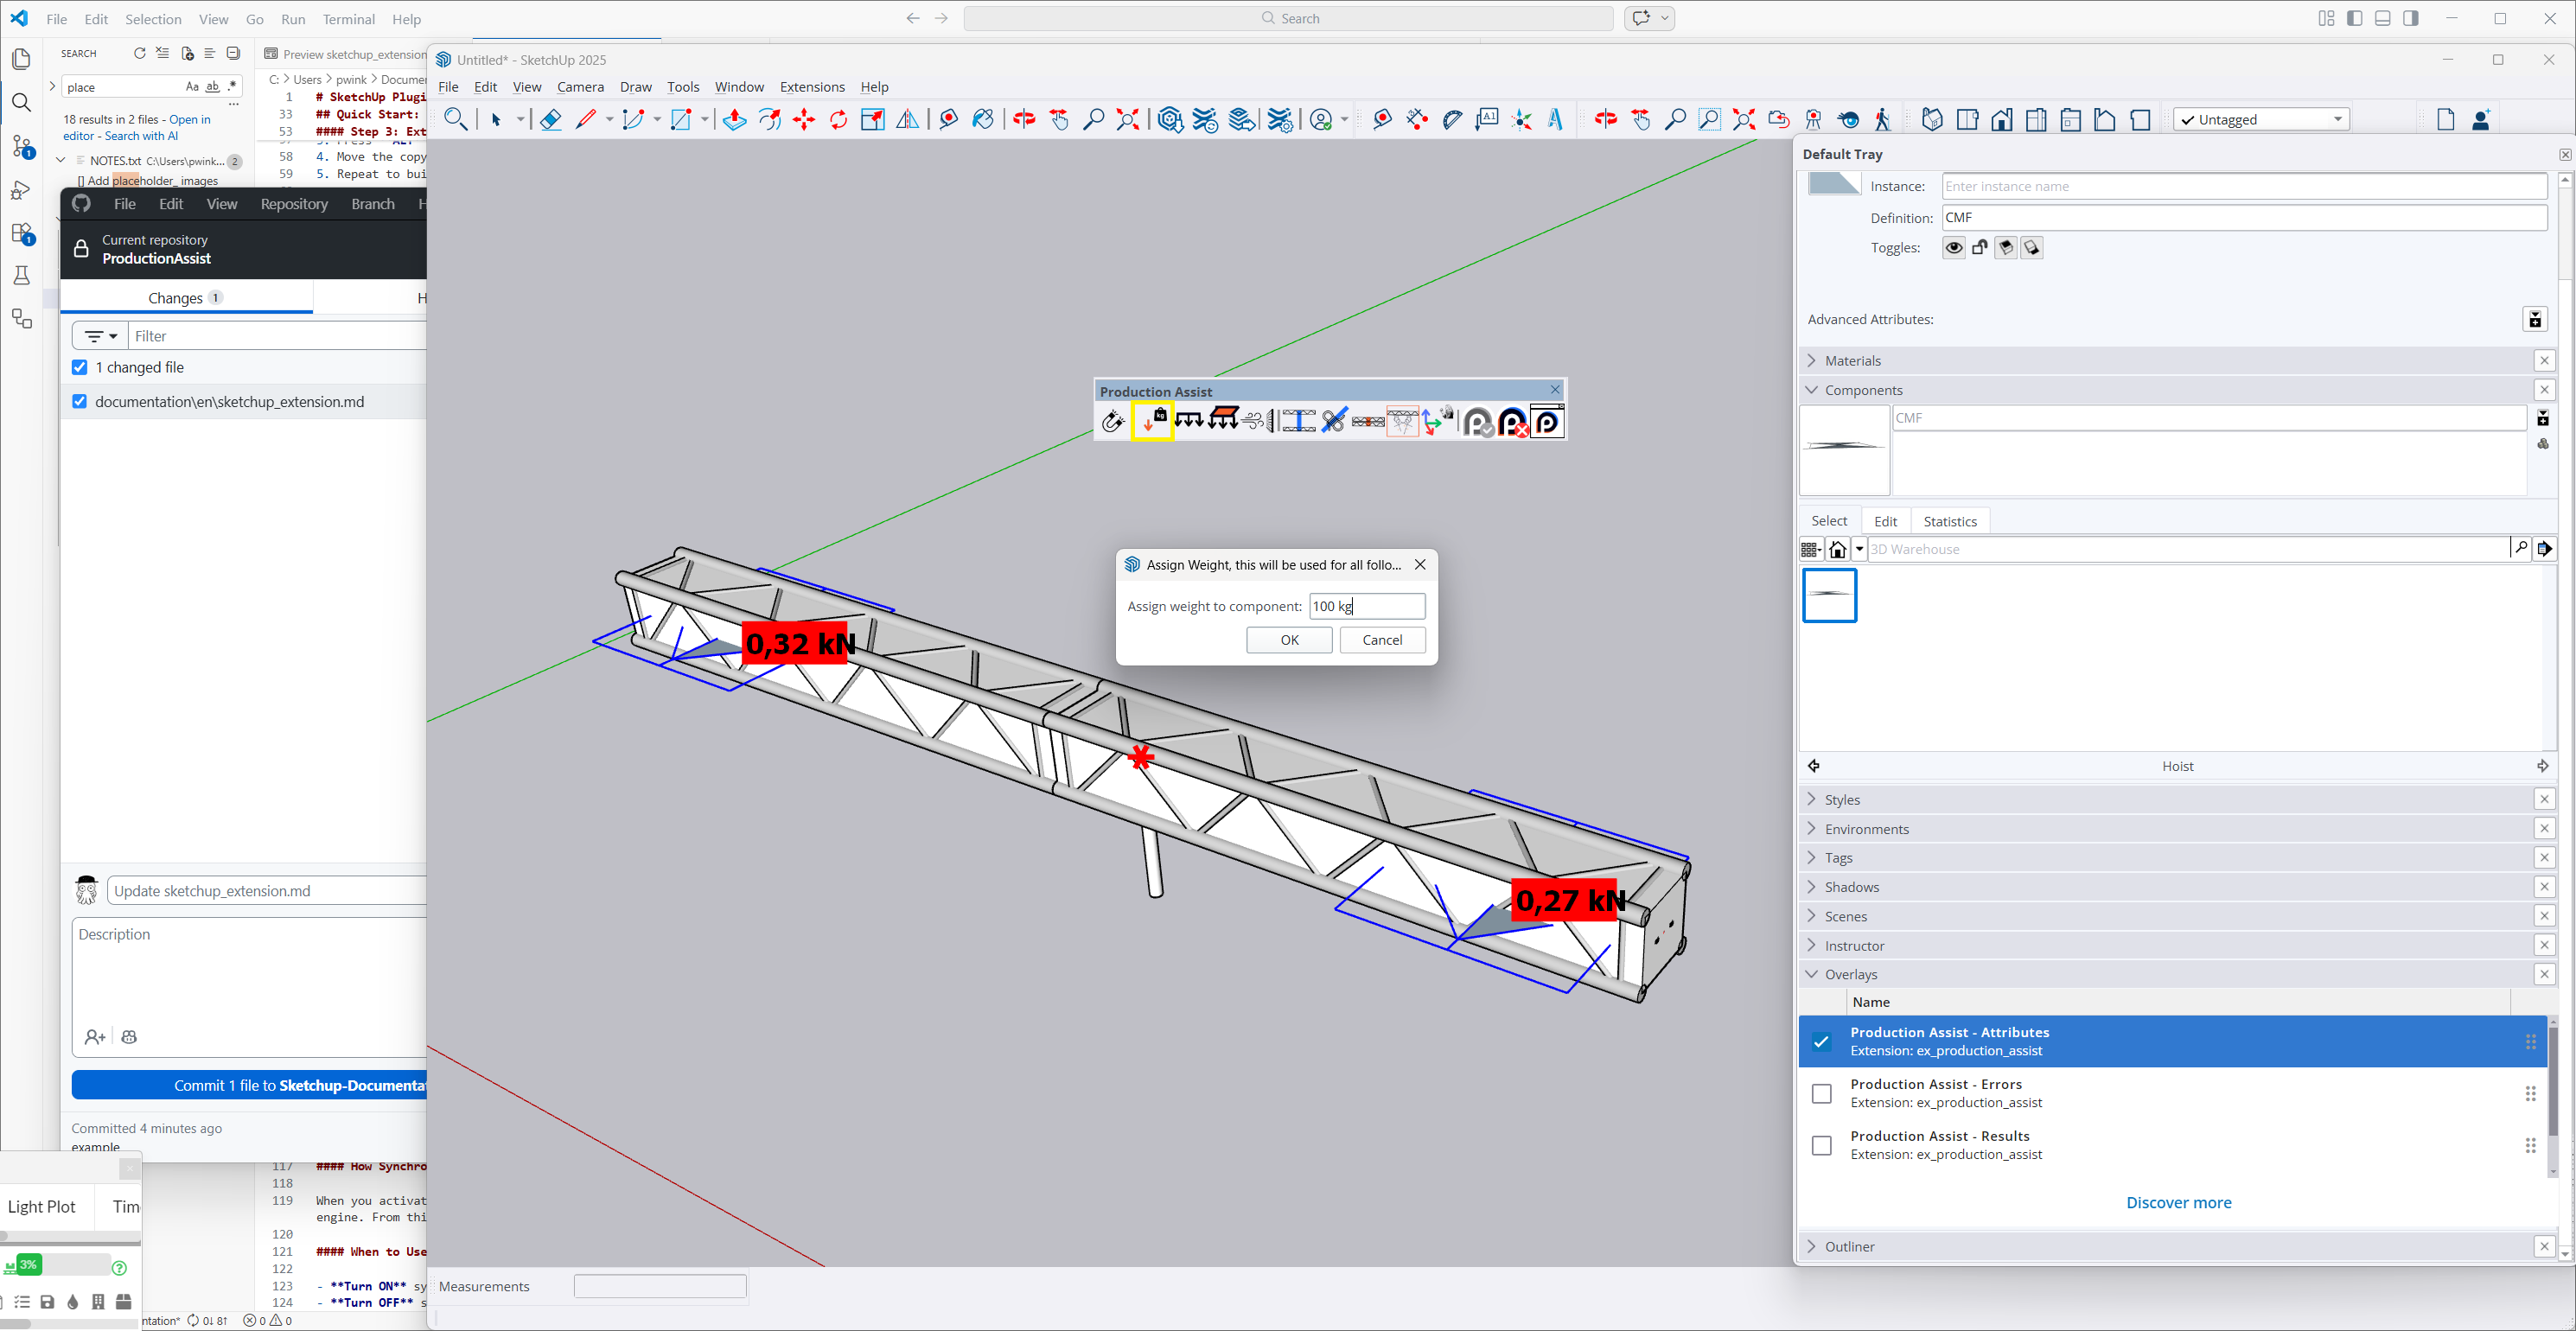
Step 7: Add Load#
- Select the Insert Point Load tool.
- Move the mouse cursor over the truss.
- Click to insert the load.
- Enter, for example, 100 kg.
- The calculation updates automatically.
Congratulations! You have performed your first structural calculation with Production Assist in SketchUp.
Synchronization#
Synchronization is essential for working with Production Assist in SketchUp.
How It Works#
When synchronization is activated, Production Assist reads all relevant elements from the SketchUp scene and transfers them to the calculation engine.
All changes are then synchronized in real time.
When to Use Synchronization?#
- Turn on when you want to calculate and see results.
- Turn off when performing major model changes.
Start PA Drawing Synchronization#
Starts bidirectional real-time synchronization.
Stop PA Drawing Synchronization#

Ends synchronization.
Show Production Assist Palette#

Opens the Production Assist interface within SketchUp.
Overlays#
Overlays display calculation results directly in the model.
Activation via Window > Overlays.
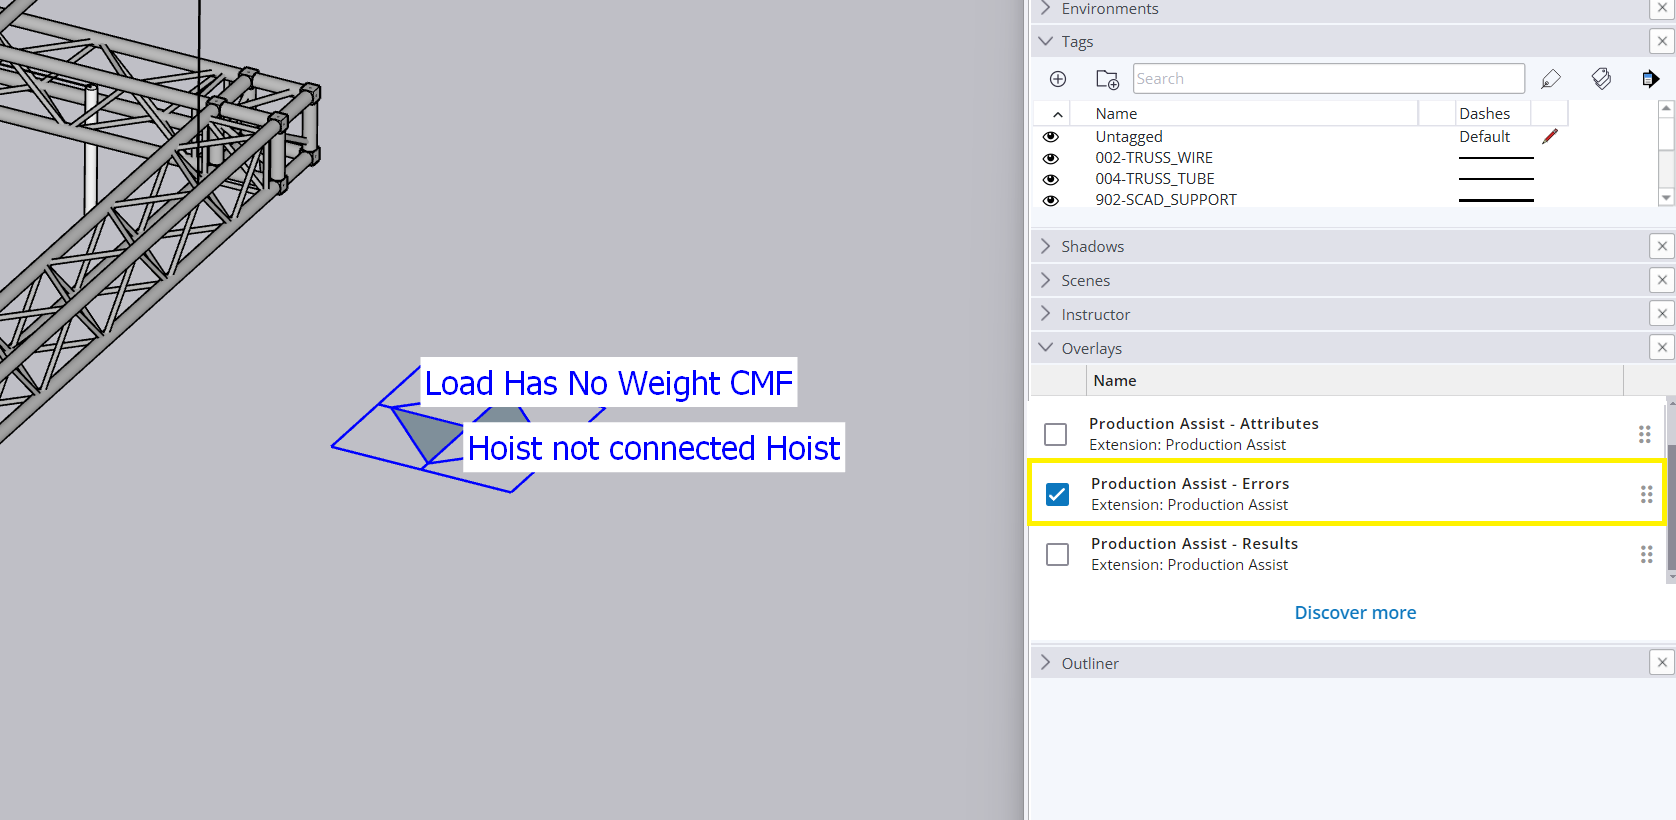
Error Overlay#
Shows errors such as:
- Unassigned loads
- Too few chain hoists
- Missing weight specifications
Attribute Overlay#
Shows support forces directly in the model.
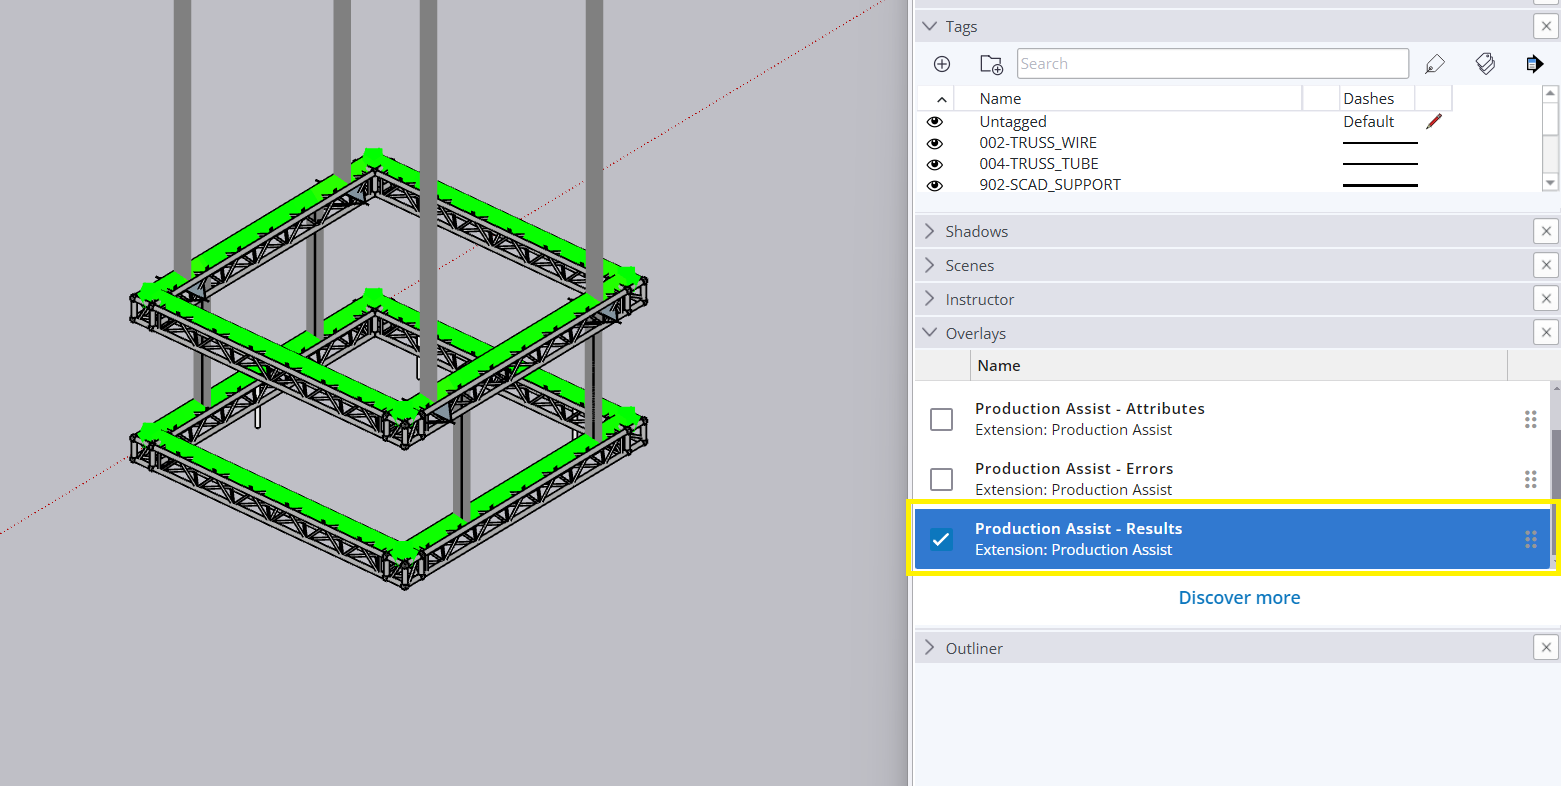
Results Overlay#
Shows influence lines and deformations.

Assigning Weights#
Insert Point Load#
Insert load directly onto structure.
- Select component
- Extensions > Production Assist > Assign Weight
- Enter weight
| Tool | Description |
|---|
| Move Tool | Move/Copy with automatic alignment |
| Insert Point Load | Add point load |
| Insert Line Load | Add line load |
| Insert Area Load | Add area load |
| Insert Windload | Add wind load |
| Insert Point Force | Freely definable force |
| Insert Drop | Vertical connection |
| Insert Rope | Rope connection |
| Stack Trusses | Stack truss lines |
| Start/Stop Sync | Control synchronization |
| Show Palette | Show PA window |
Creating Custom Components#
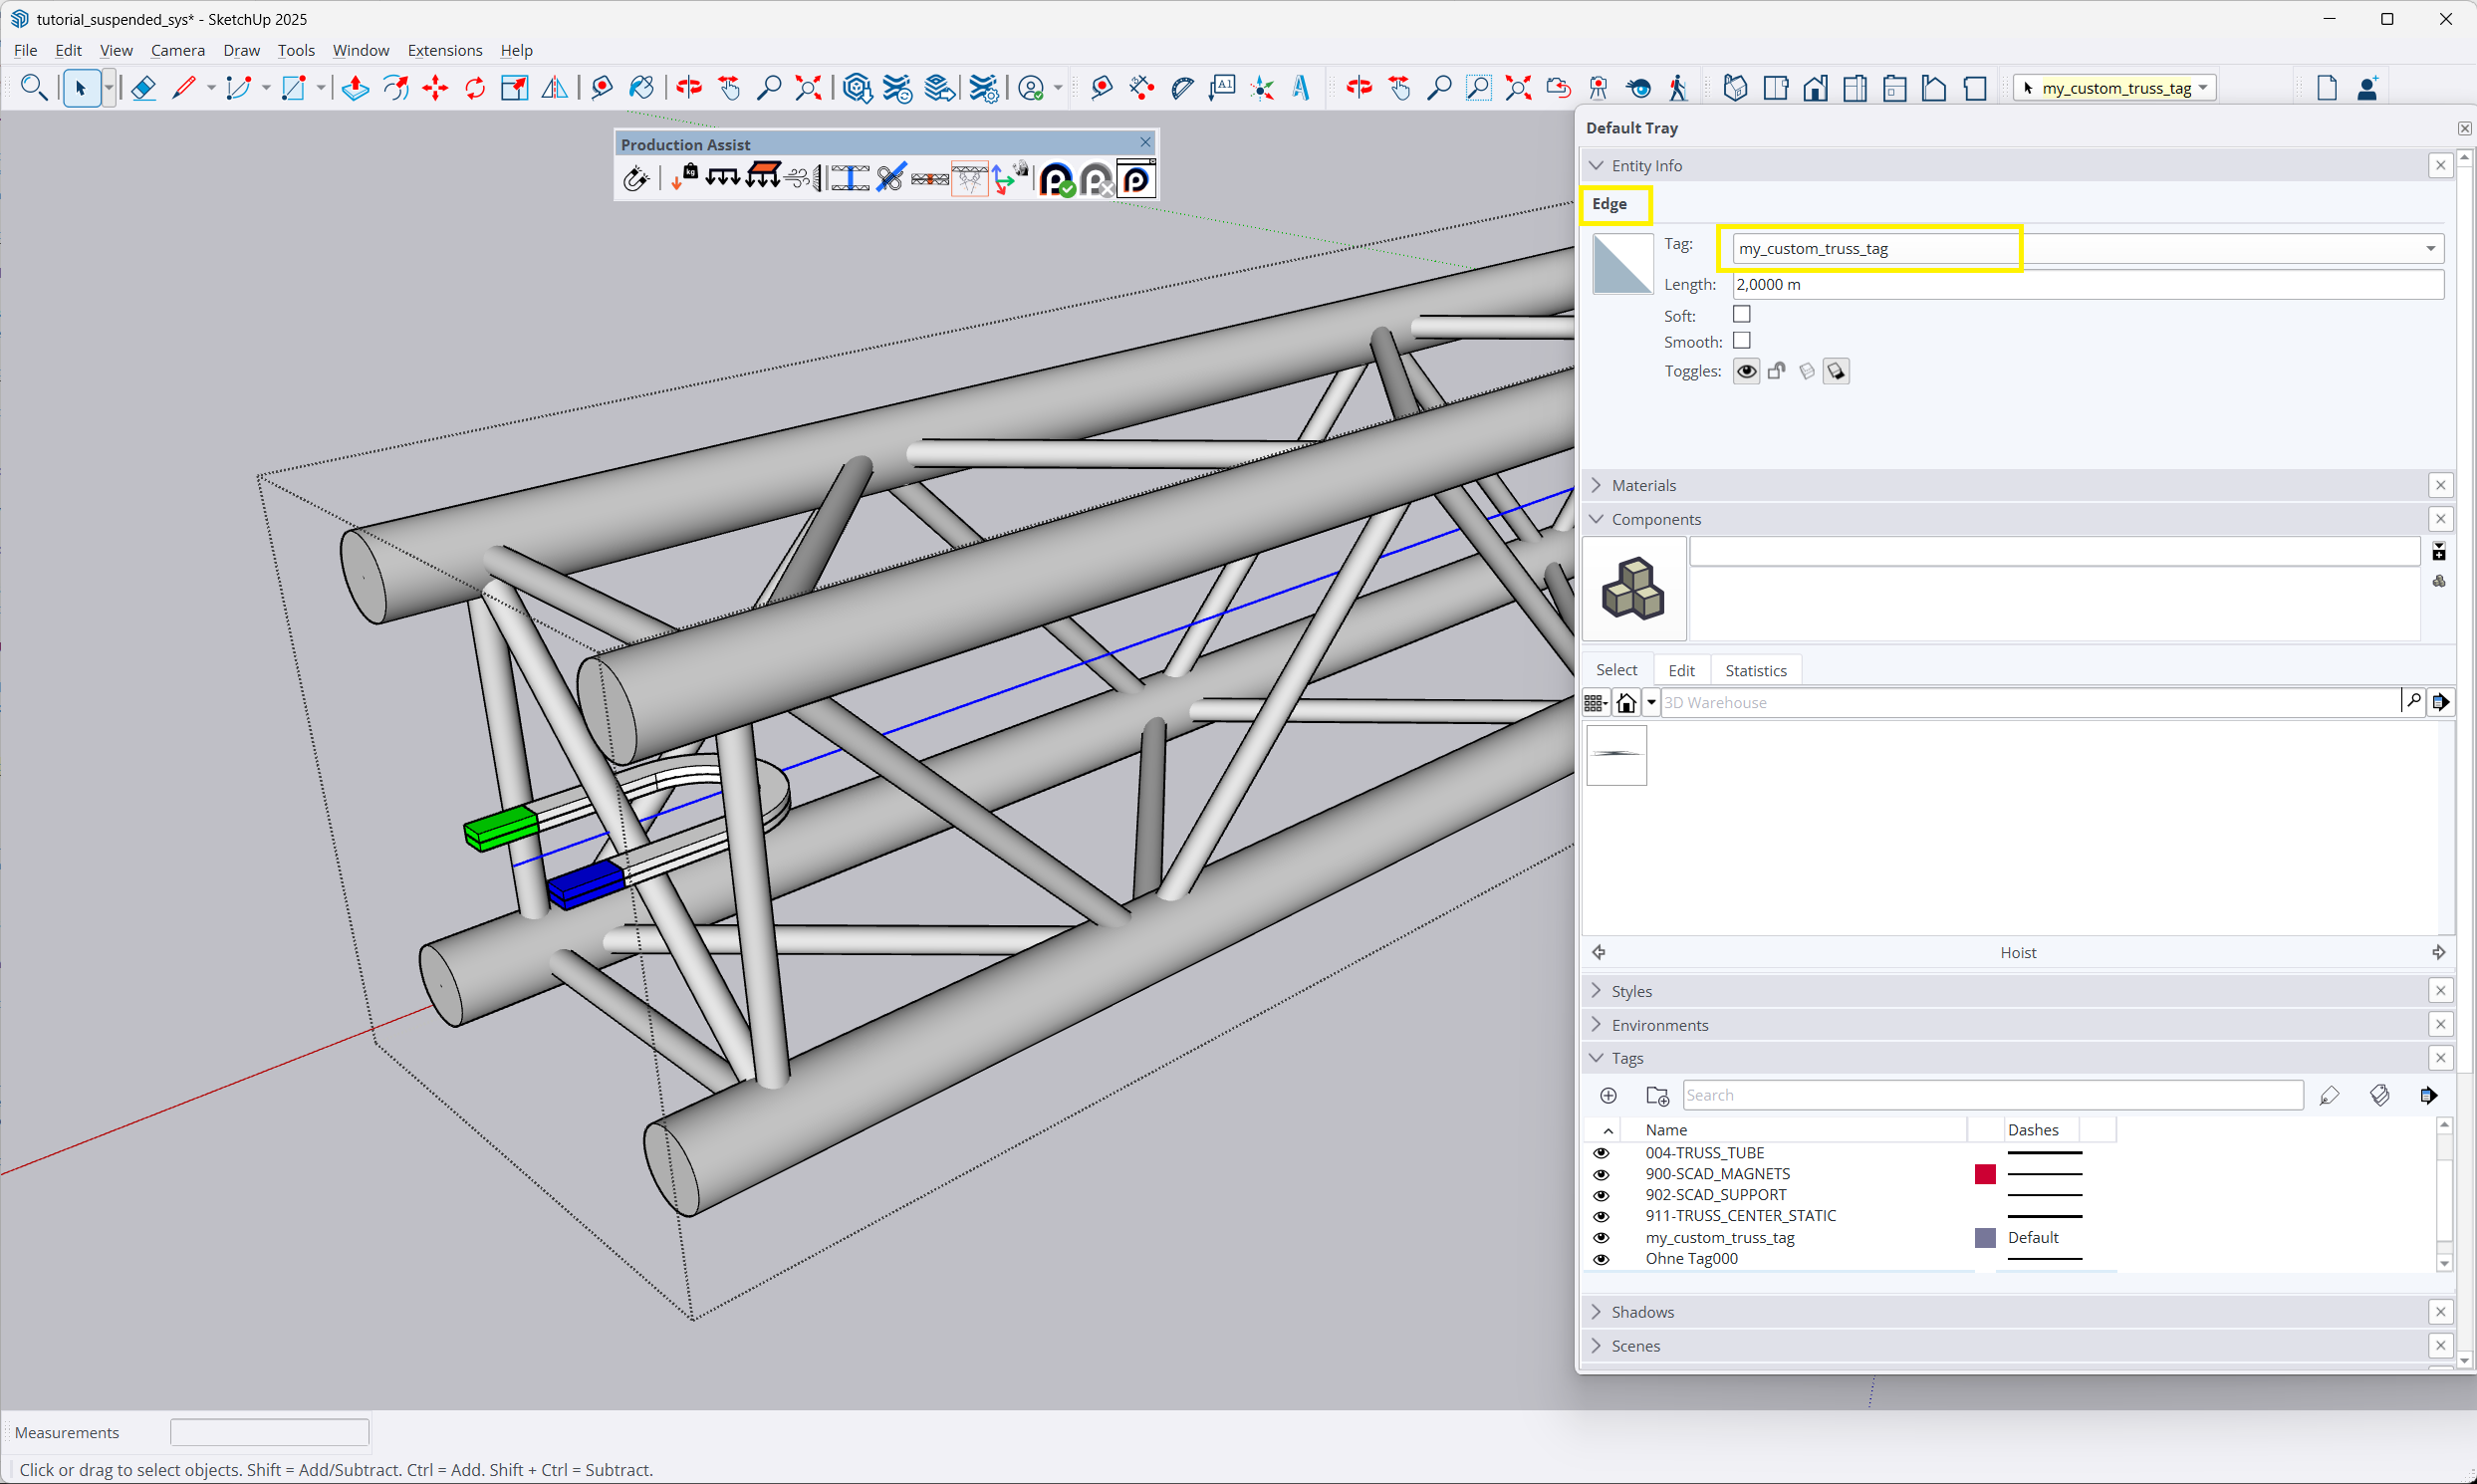
Define Structural Lines#
- Open PA palette
- Define Structural Lines
- Tag edges with corresponding tag
Add Magnets#
- Edit component
- Place magnet component
- Define position and orientation