

This quick start shows you how to read a Vectorworks drawing into Production Assist, place a simple truss with two chain hoists, and then view the calculated hoist forces directly in Vectorworks. You can then add fixtures and a distributor, patch the power connections, and check them in the electrical view. To get started, you need the Production Assist integration installed, along with suitable object and symbol definitions.
First, install the Production Assist plug-in for Vectorworks. Then restart Vectorworks and open the web palette from Window → Web Palettes → Production Assist. Sign in if the palette asks for a Production Assist account.
The layer-selection dialog appears when Vectorworks Loading Behavior is set to Ask at each start. This is the default setting. With Always Use, Production Assist is used without this prompt; with Manually Enable, it does not start automatically. You can find this setting under Vectorworks settings.
In the Use column, enable or disable each Vectorworks layer individually for import. The list contains design layers. Select All enables all layers; Deselect All disables them. This is an import filter and does not change layer visibility in Vectorworks. For this example, select the layer that contains your truss and chain hoists.
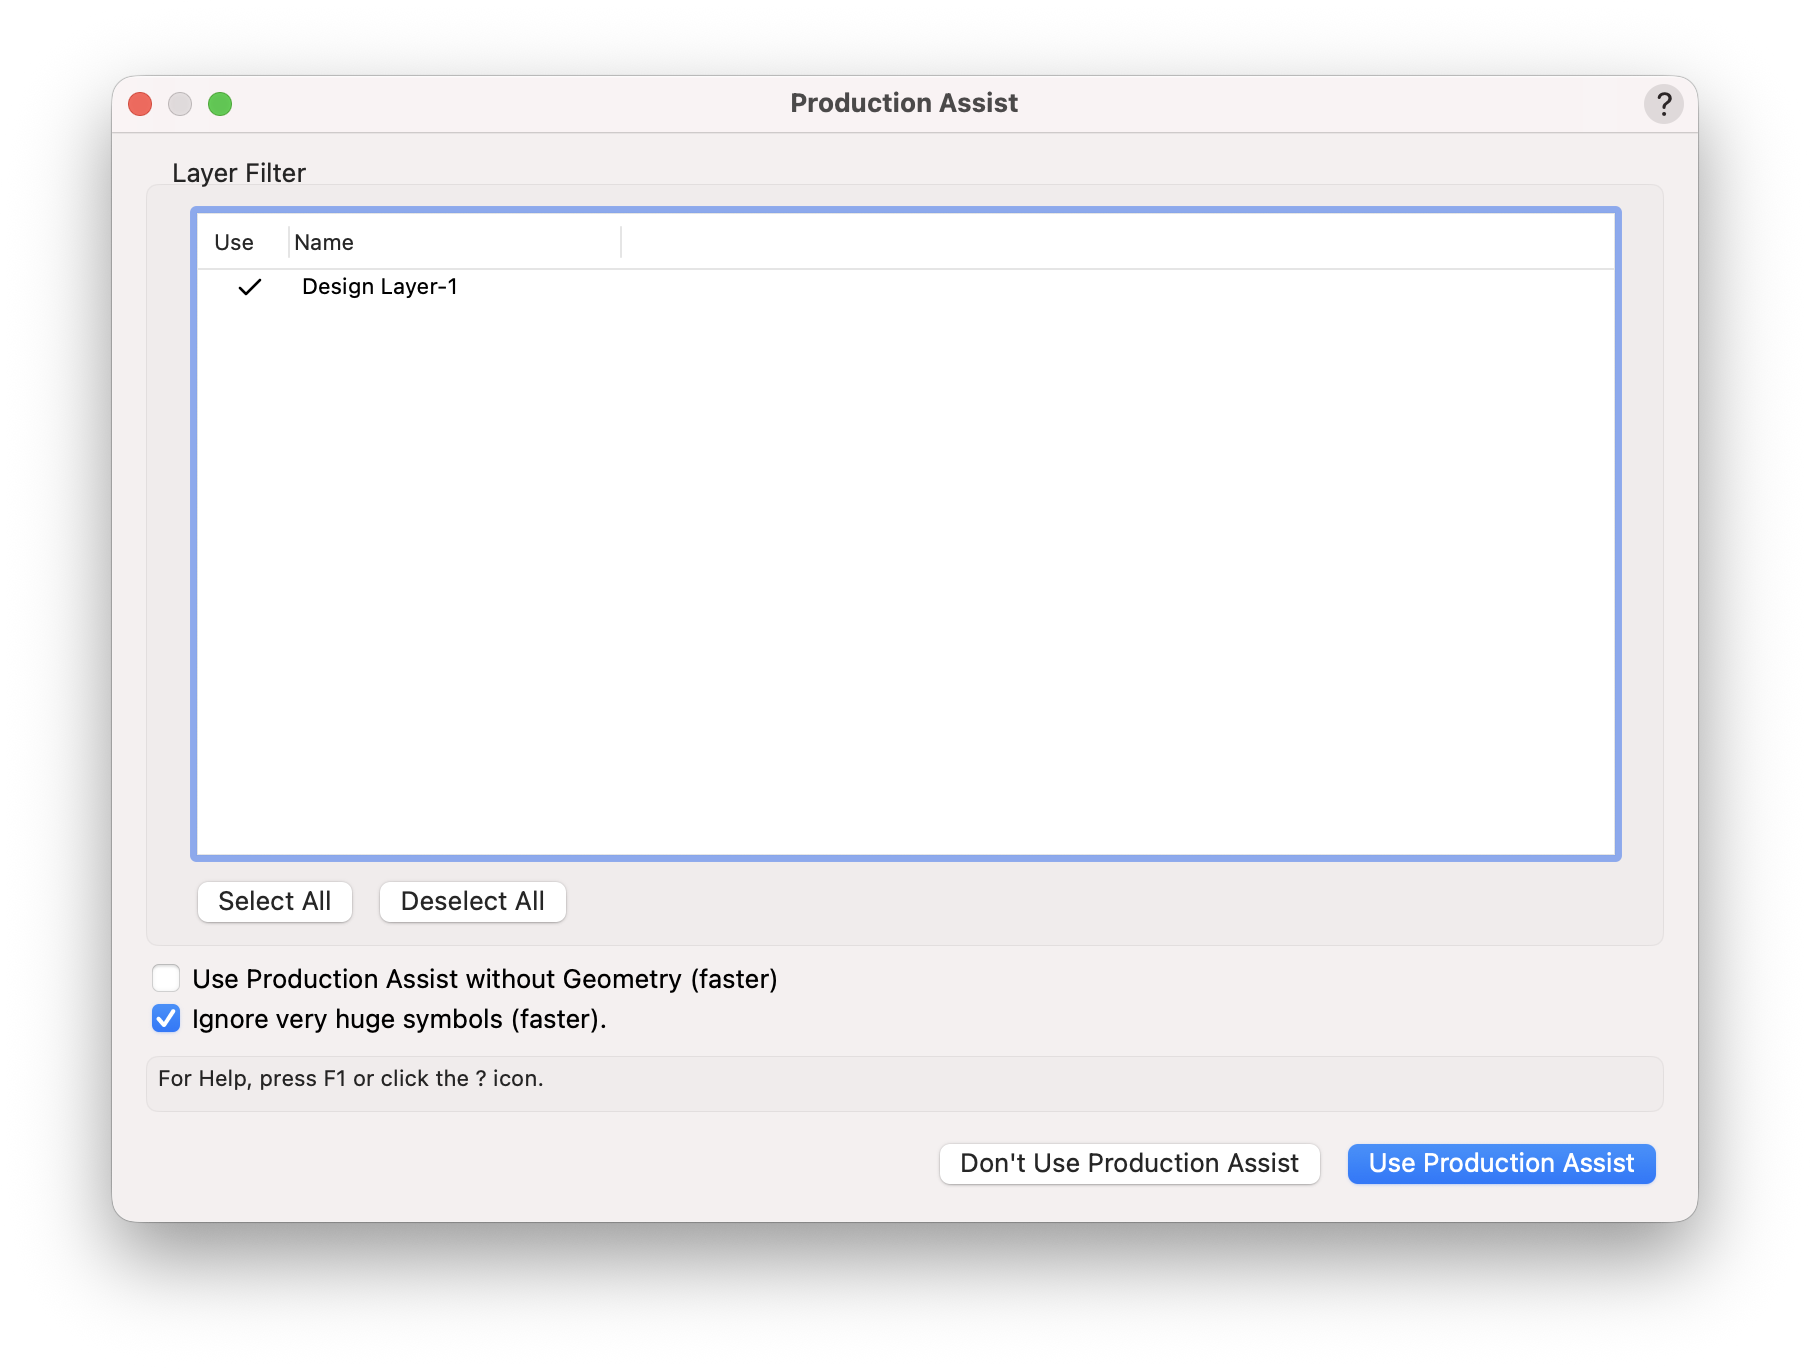
The dialog also has these options:
| Option | Effect |
|---|---|
| Use Production Assist without Geometry (faster) | Reads the drawing without the geometry of its objects. This can be faster for large drawings. For this example, leave the checkbox clear so the geometry is read too. |
| Ignore very huge symbols (faster) | Skips symbols with more than 10,000 subobjects to speed up processing. This option is enabled by default. Disable it only if Production Assist needs to read such a symbol for your model. |
Confirm with Use Production Assist so Production Assist uses the selected layers and options. Don't Use Production Assist ends this import without using the drawing with Production Assist. The choice applies to this import; with Ask at each start, the dialog appears again. You can also import the drawing again at any time: from the Production Assist menu, select Update References/Read Vectorworks Drawing again.... Read and Calculate... also imports the drawing again and then immediately starts the calculation. The ? icon or F1 opens help for the dialog.
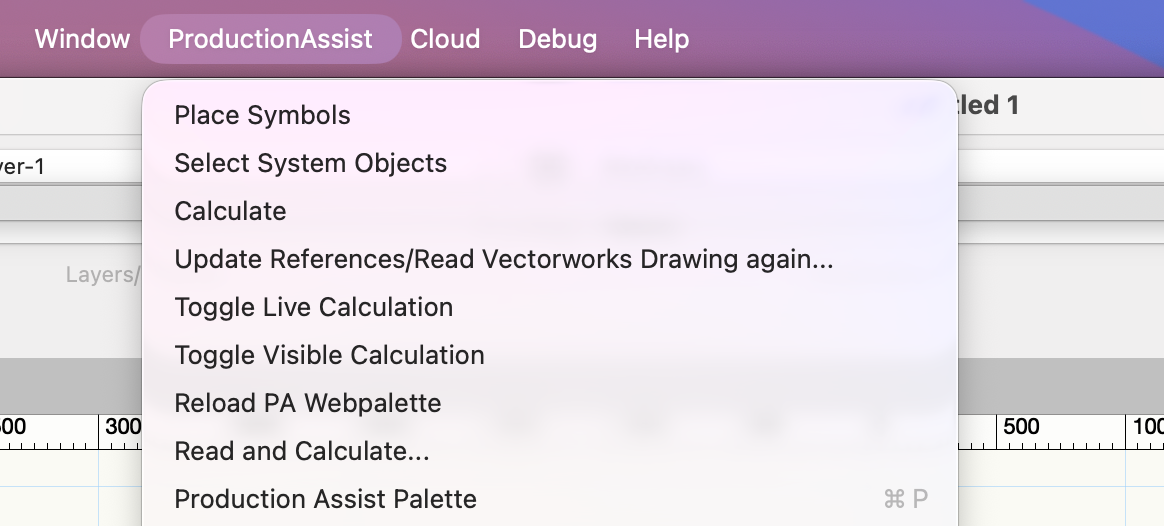
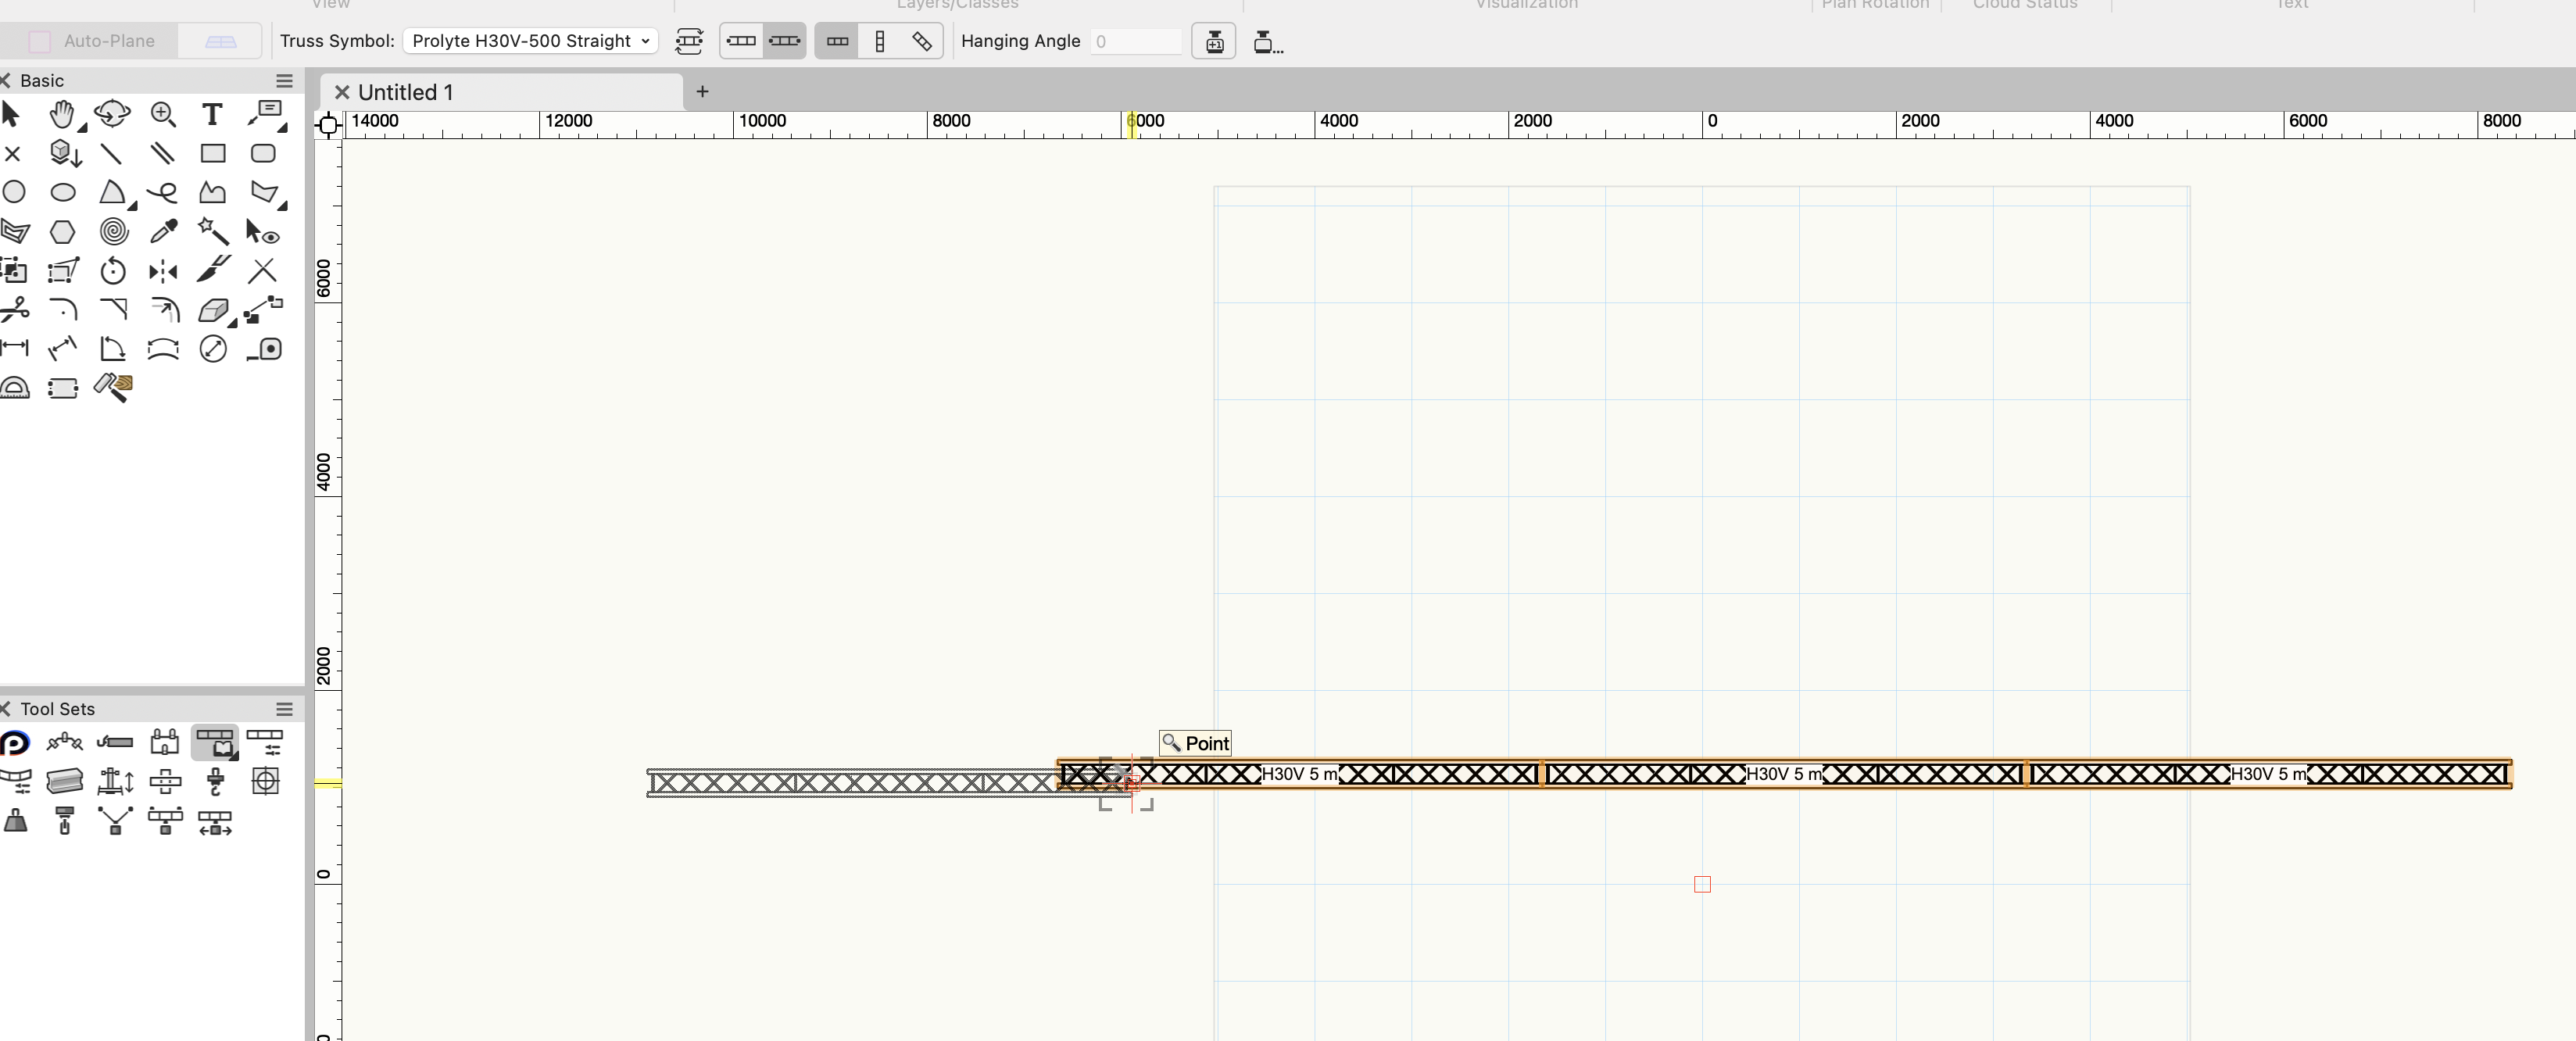
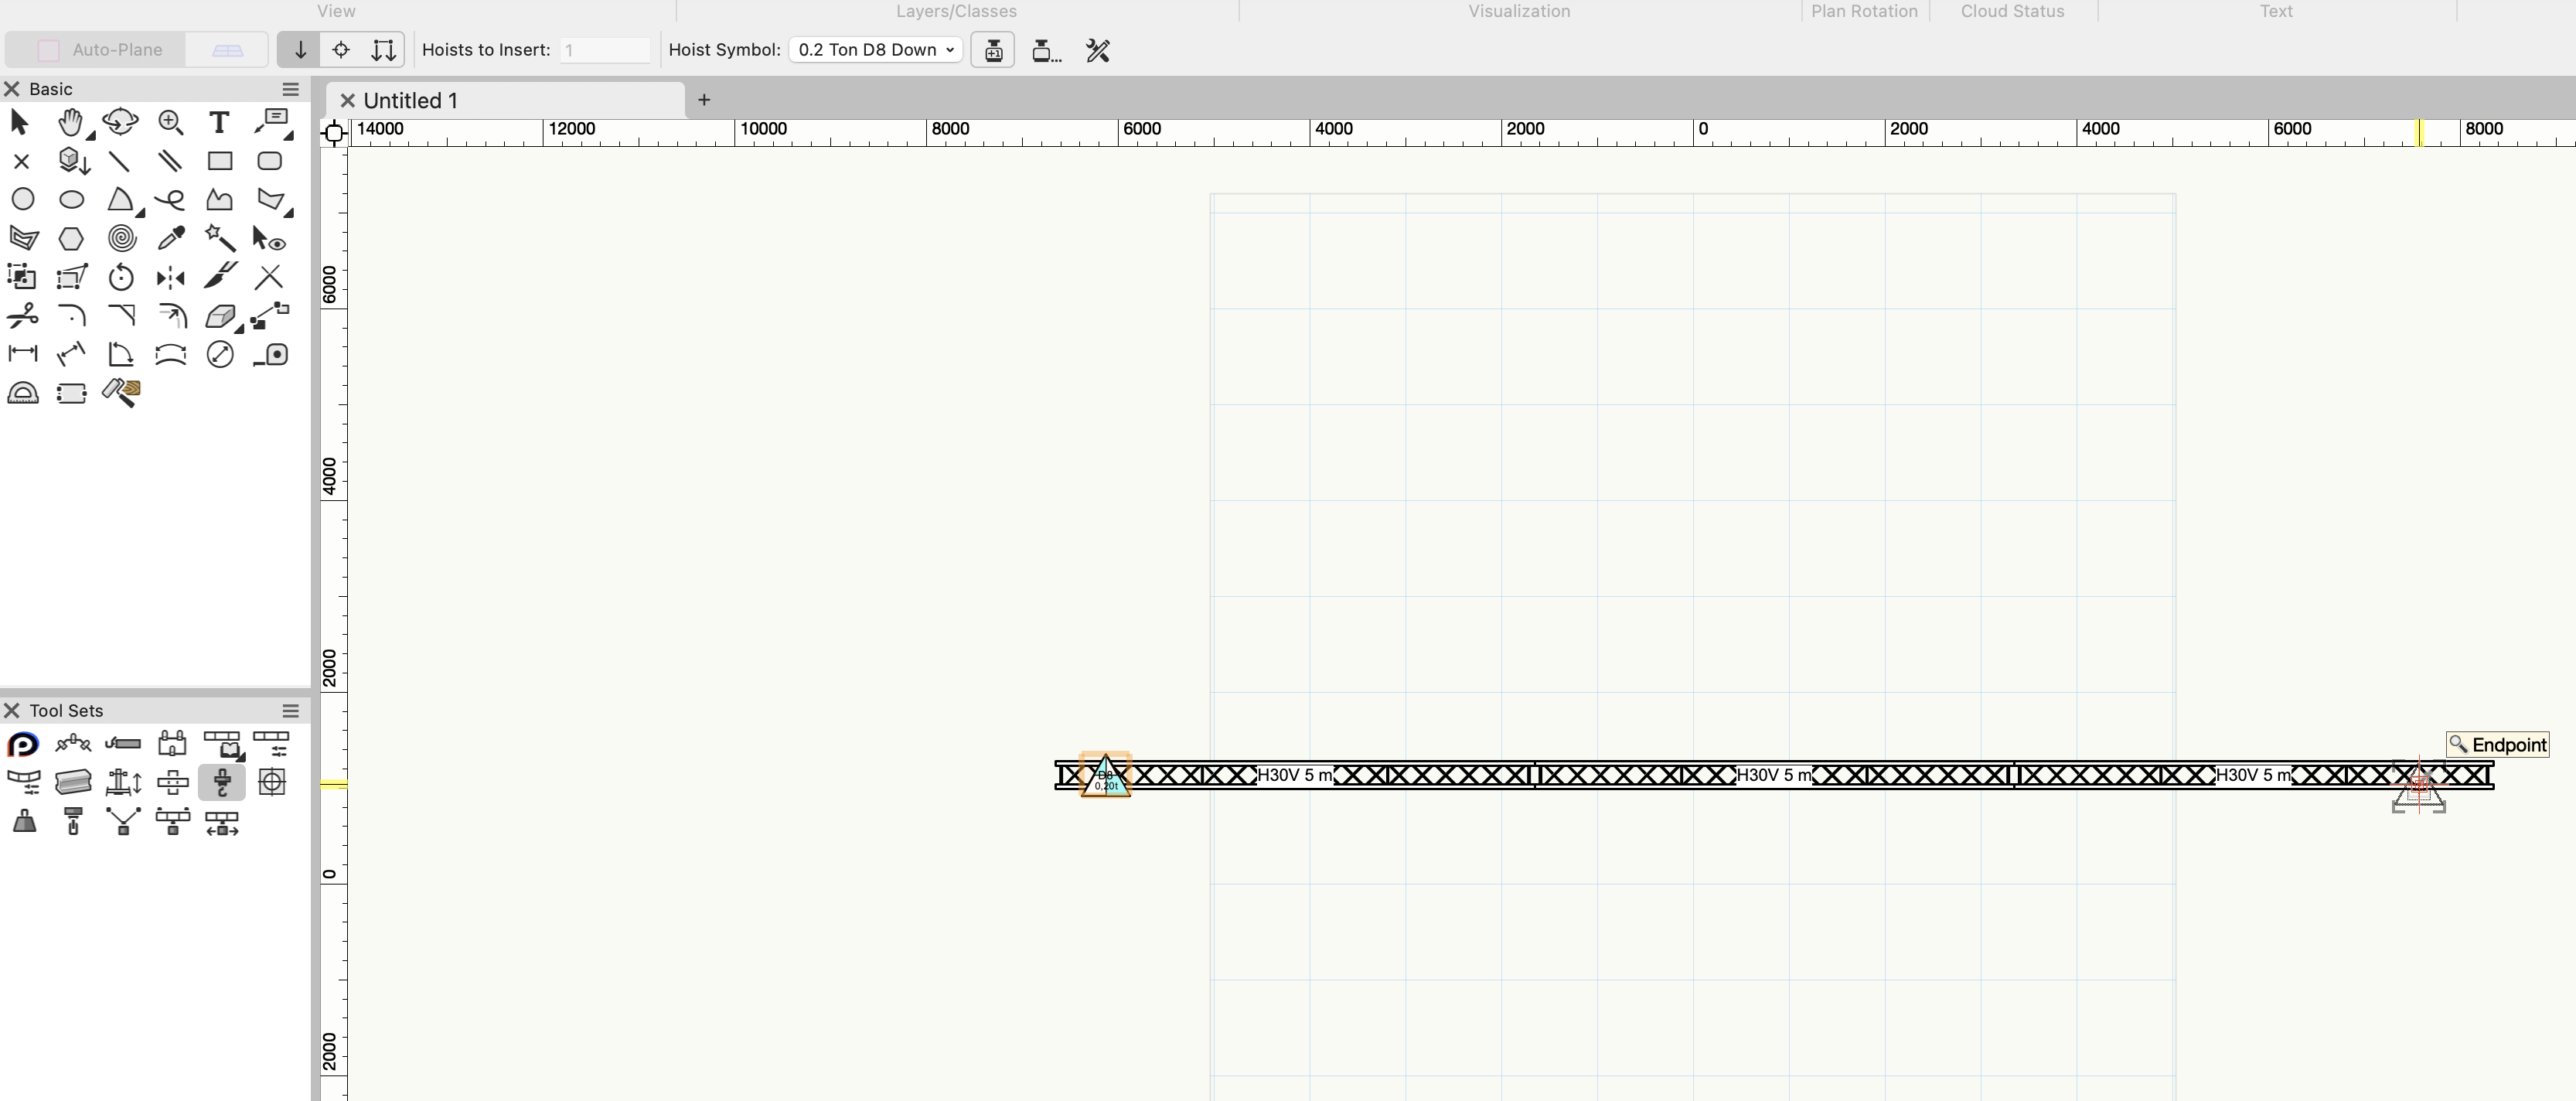
From the menu, select Production Assist → Read and Calculate.... Production Assist imports the current state of the Vectorworks drawing and then starts the structural calculation. If you have already imported the drawing and only want to calculate it again, select Production Assist → Calculate.
After the calculation, you can show the forces on the chain hoists in Vectorworks:
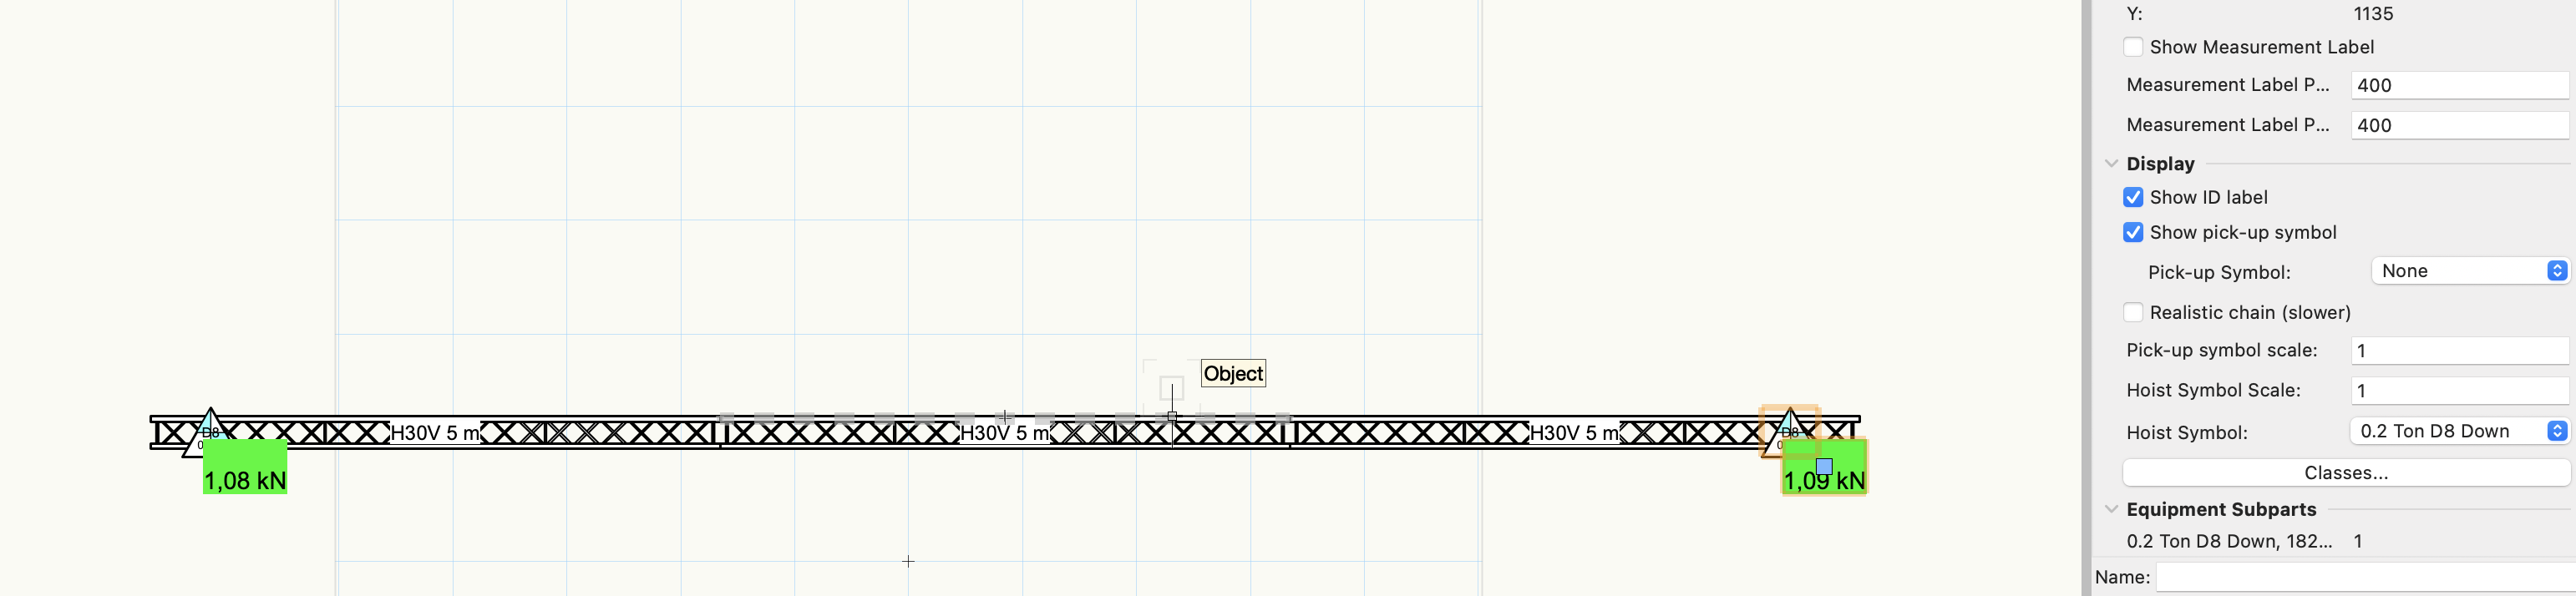
The chain hoist's Show Label option controls the label in Vectorworks. To also show the label in the Production Assist 3D renderer, enable Show labels in 3D there as well; you can find this setting under Renderer settings.
This quick start demonstrates the technical workflow with a small example. Structural calculations explains how to check a model and its calculation results in context.
For a simple power plan, insert at least one fixture and one distributor with compatible electrical connections. A fixture is a consumer; the distributor provides suitable inputs and outputs.
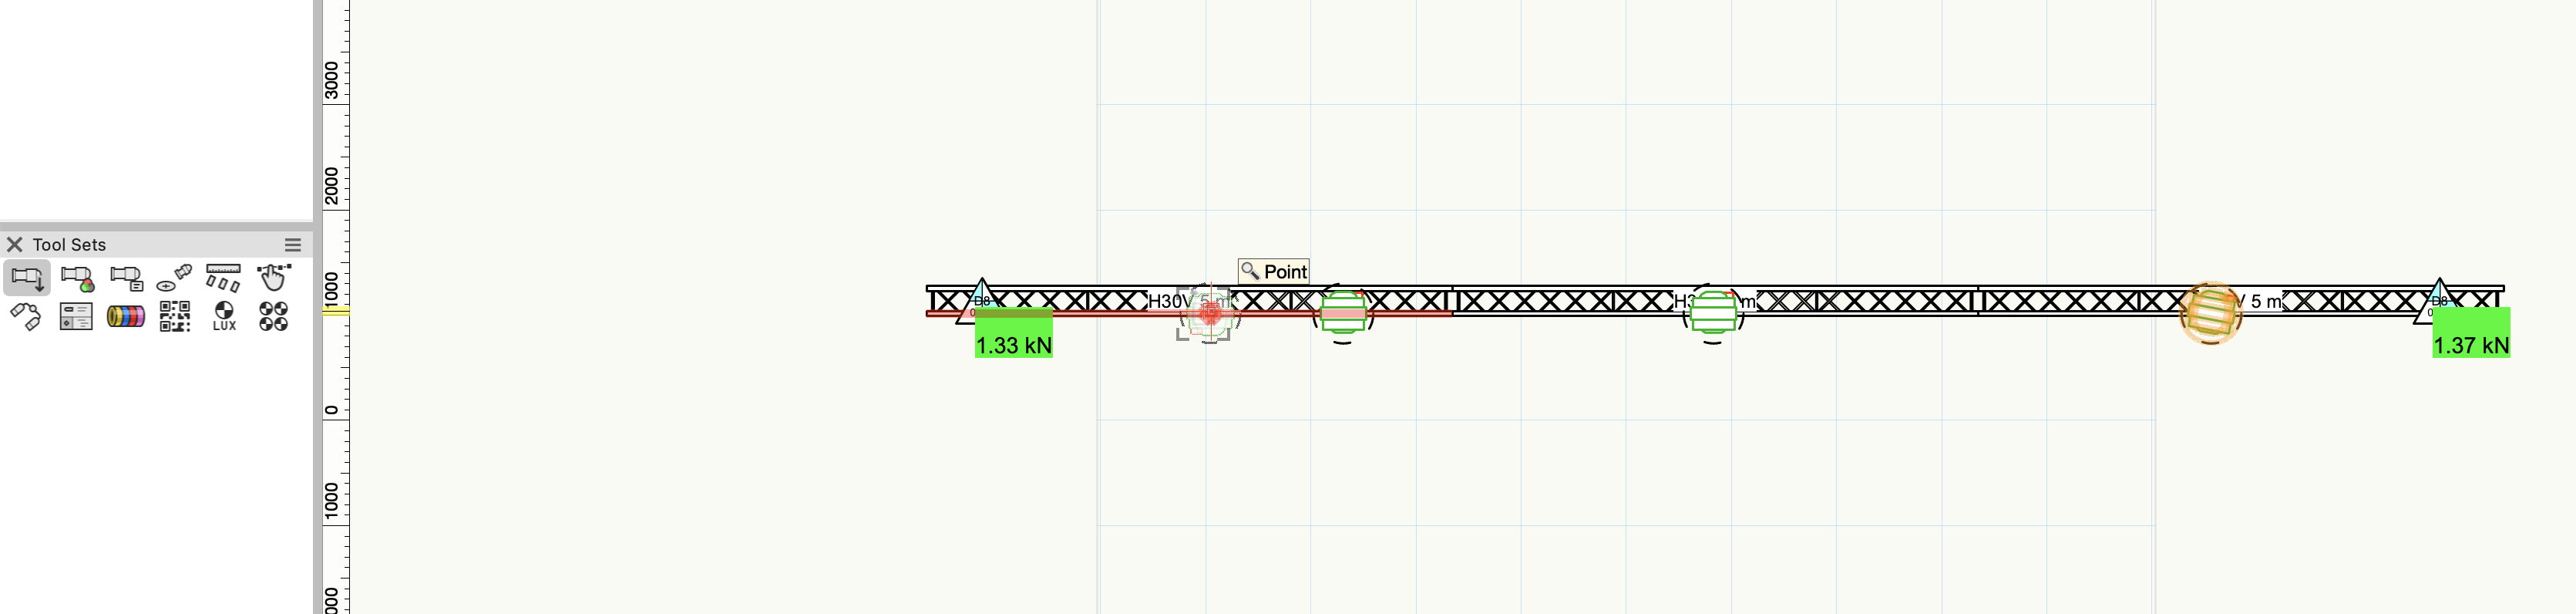
Insert a fixture: Add a fixture to the truss. If needed, use the snap point to position it where you want. The example shows a fixture placed at a point on the truss.
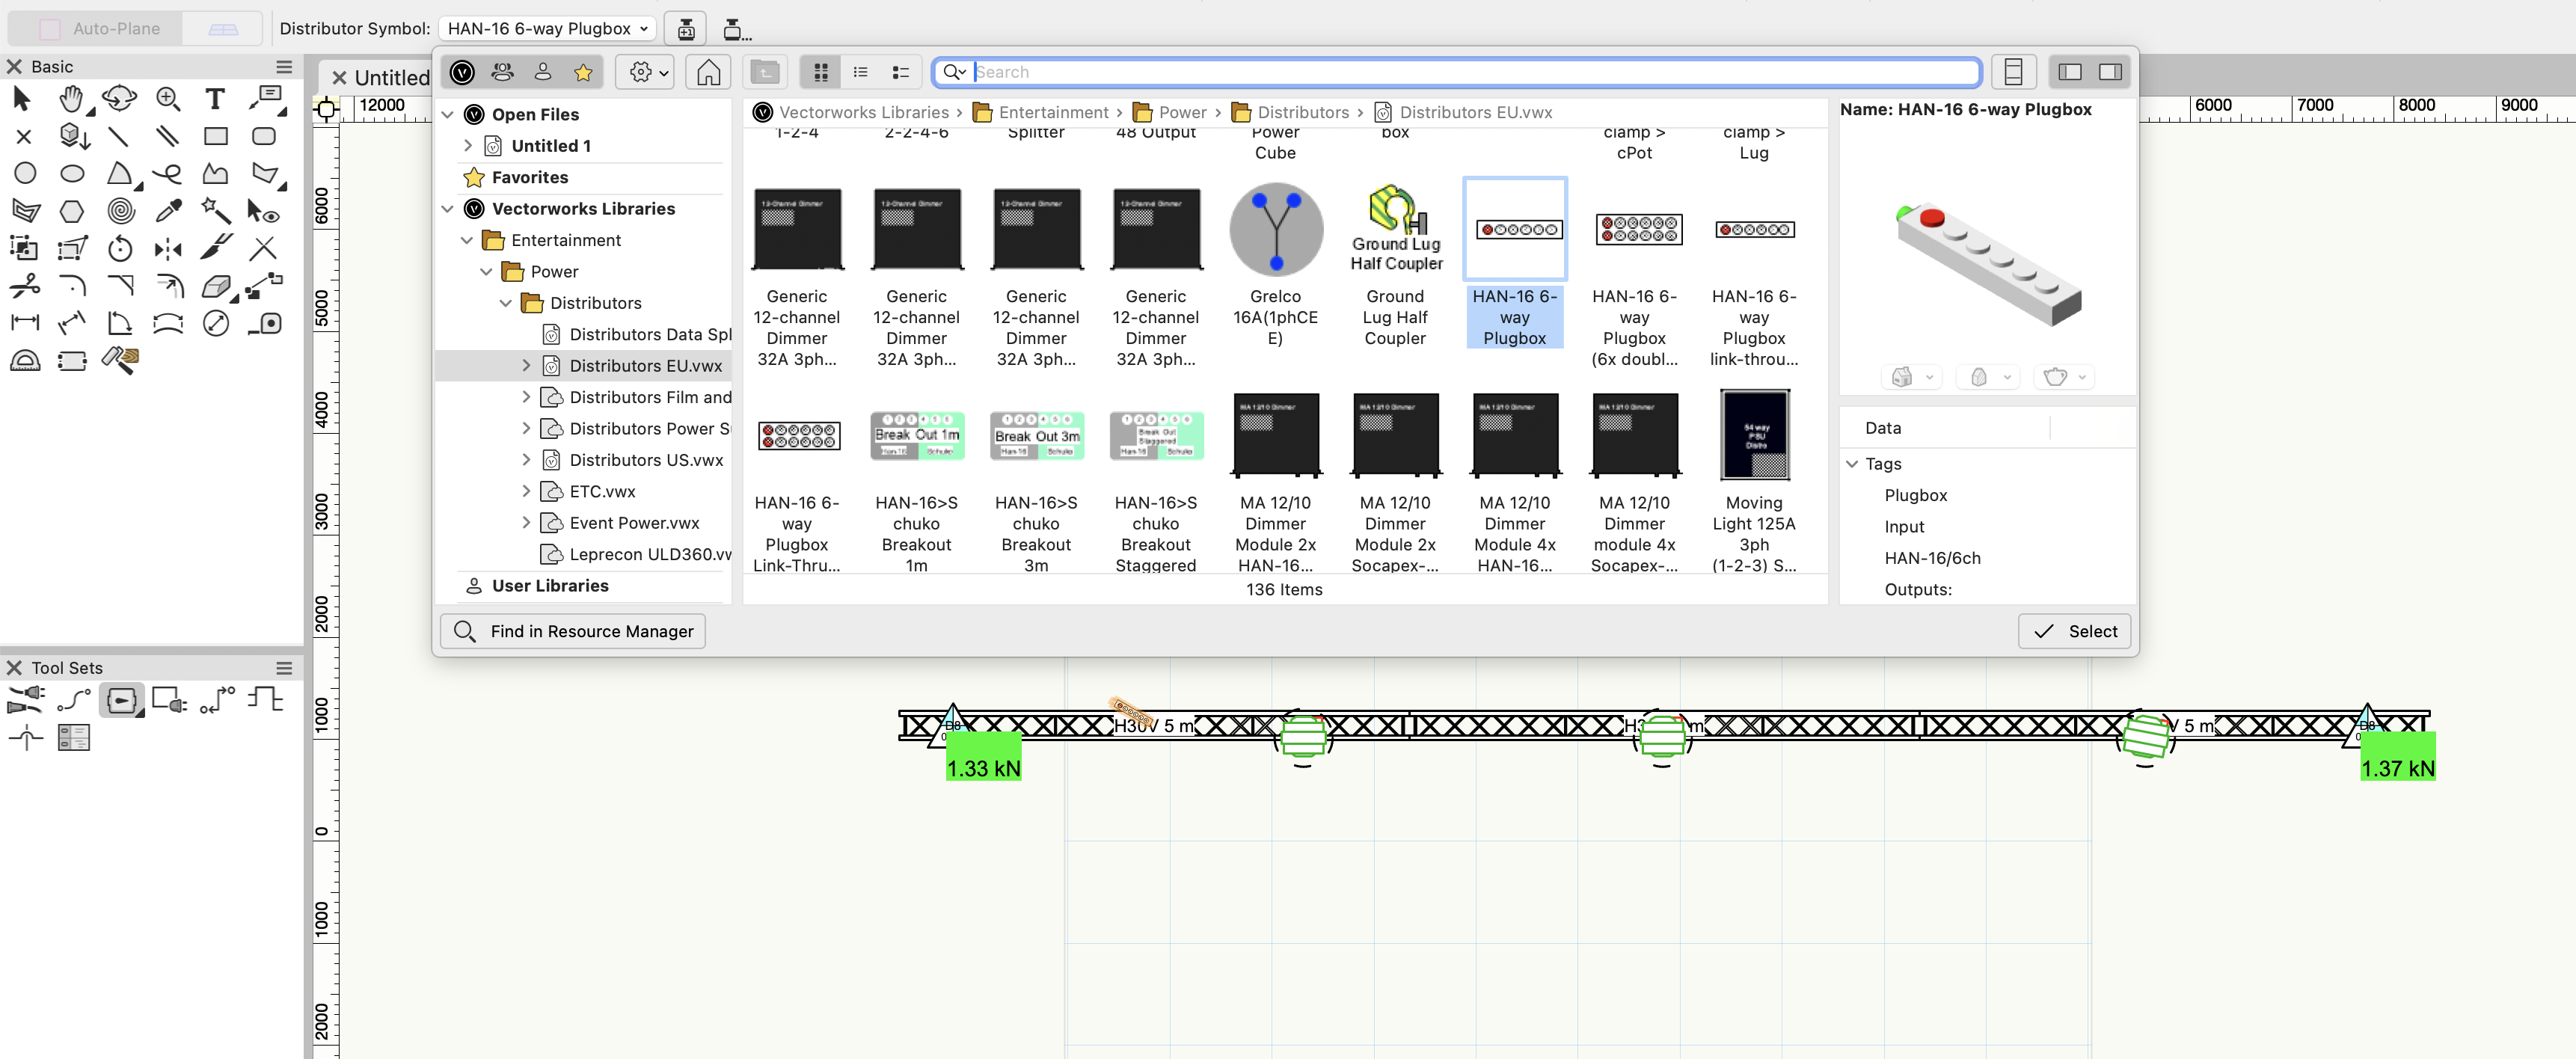
Insert a distributor: Activate the Distributor tool and choose a suitable symbol from the Vectorworks library in the Distributor Symbol field. The example uses HAN-16 6-way Plugbox. Place the distributor in the drawing.
Patch automatically: In Vectorworks, select the fixtures and the distributor. In Production Assist, run Lighting → Power Patch 1:1. Production Assist connects free inputs on the selected consumers to compatible free outputs on the selected distributors. Inputs that are already occupied are skipped. The assignment follows compatible connections and the configured patch order; it does not automatically use the shortest physical distance.
Calculate electrically: Select Lighting → Electrical Calculation to update the power values after patching.
Check the connections: If the web palette still shows the worksheet view, click Edit in the top right. Then open the Electrical tab. The diagram shows the distributor, fixtures, and their connections. Check that the expected lines are present and that the consumers and connections match.
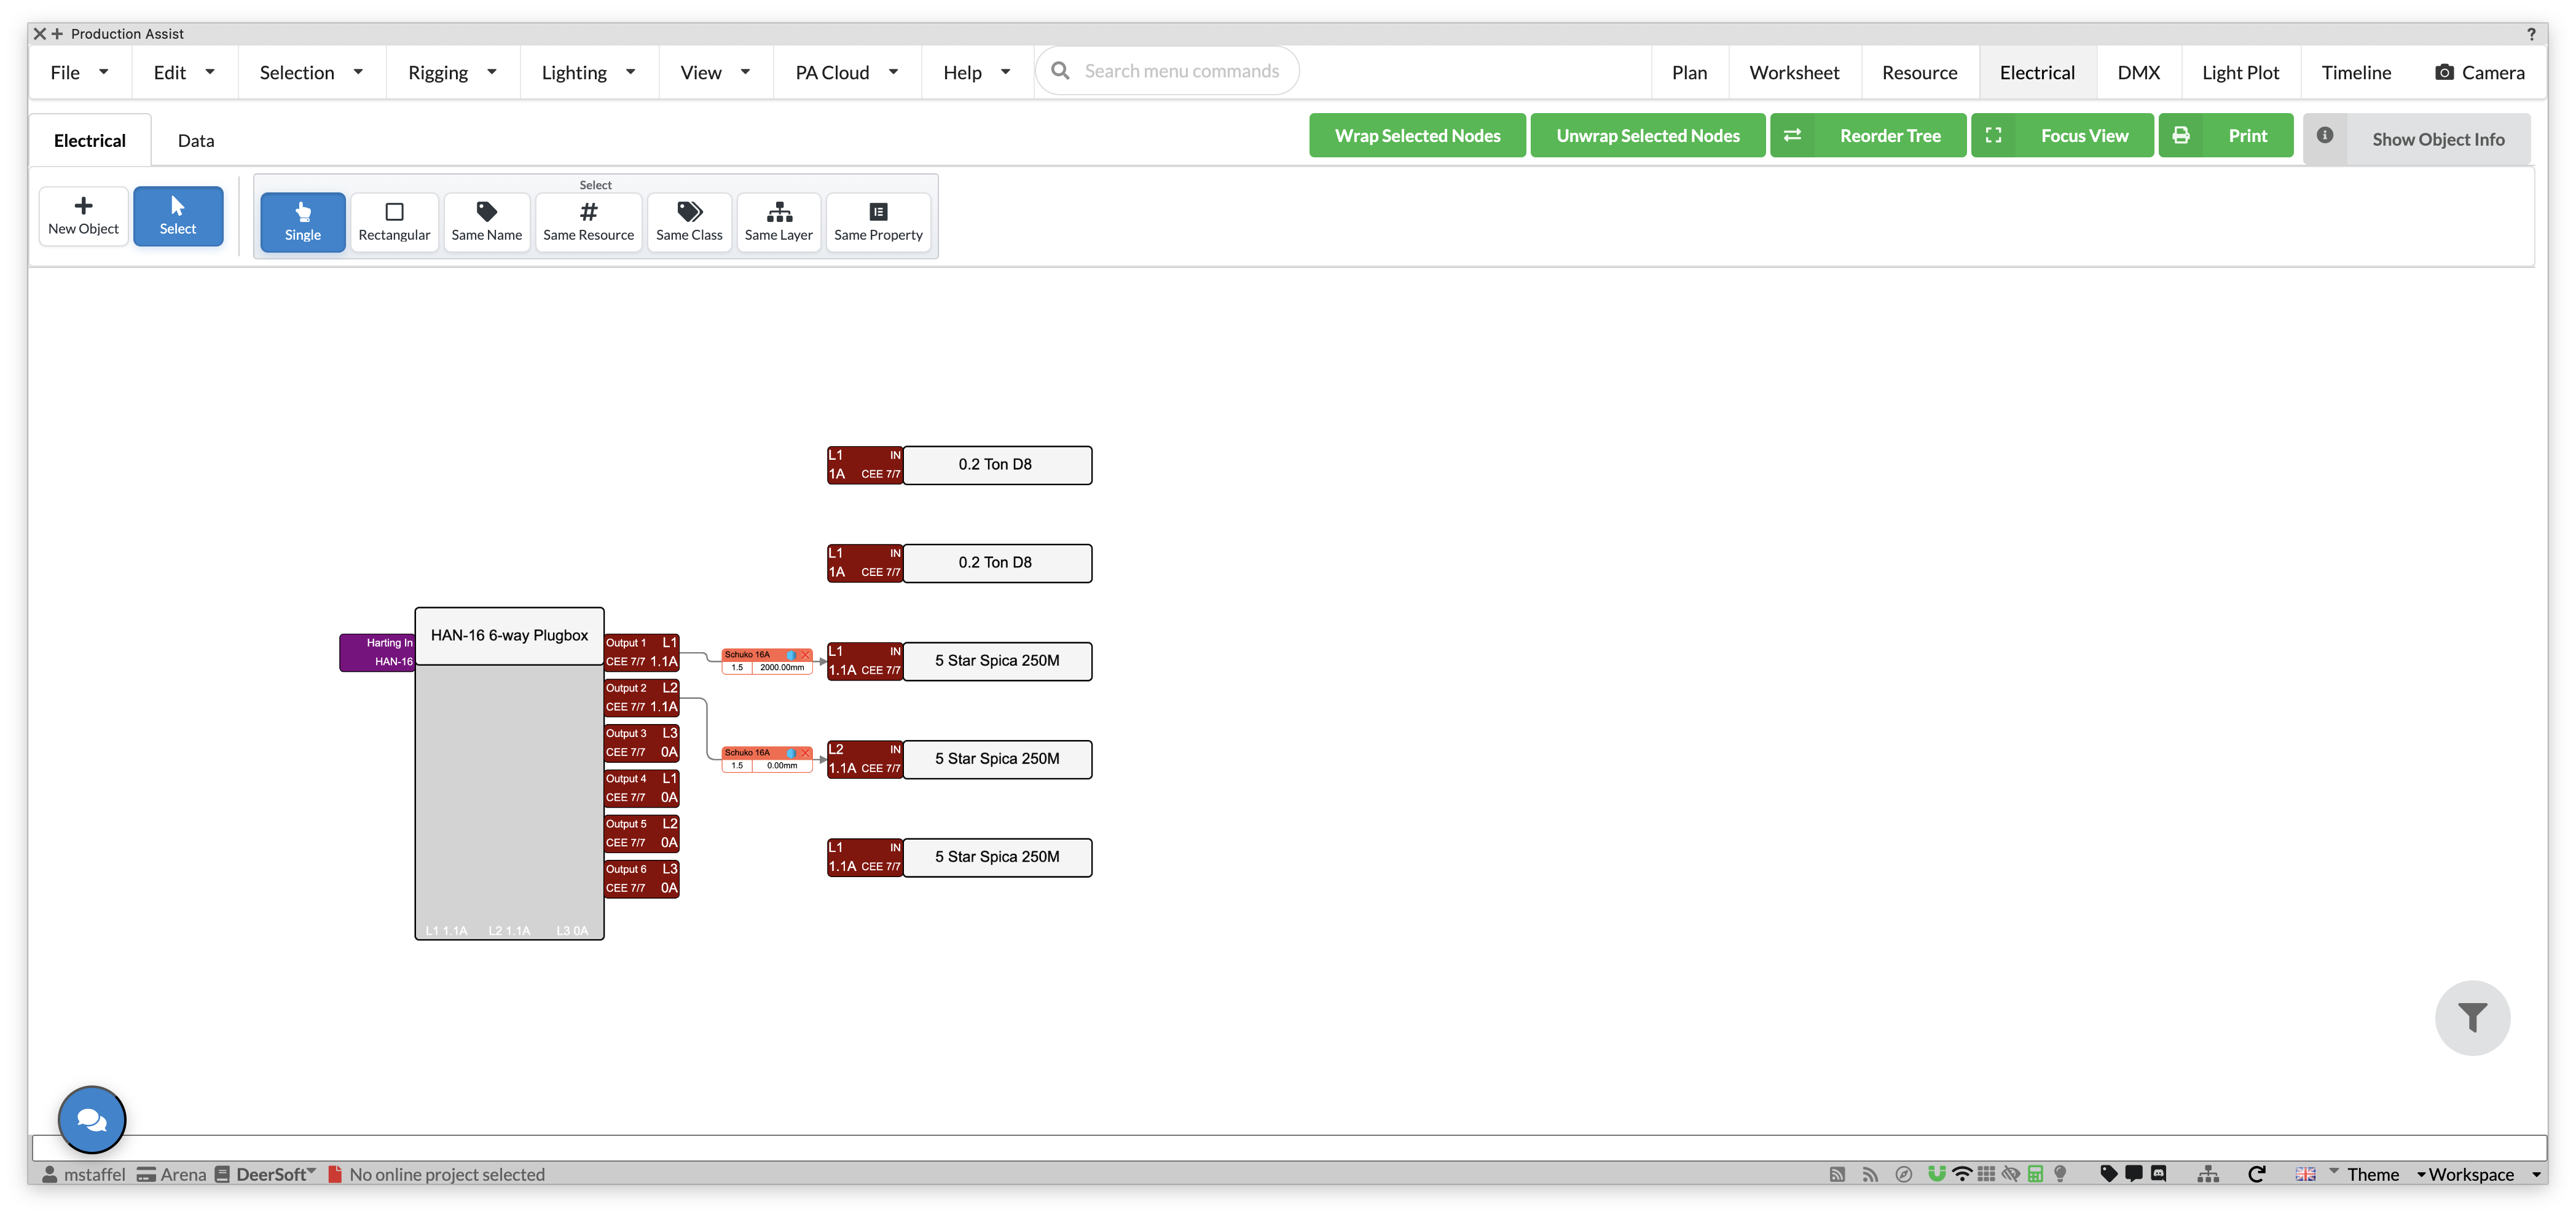
Automatic Power Patch 1:1 processes only your selection. To make individual connections, drag from an output to the matching input in the wiring diagram. If you also want to check the supply's load, insert a suitable power source and connect it to the distributor's input. For the full steps, requirements, and other patch commands, see Electrical Planning; Using Electrical View explains how to arrange and edit the diagram. For DMX and data connections, see Network Planning.
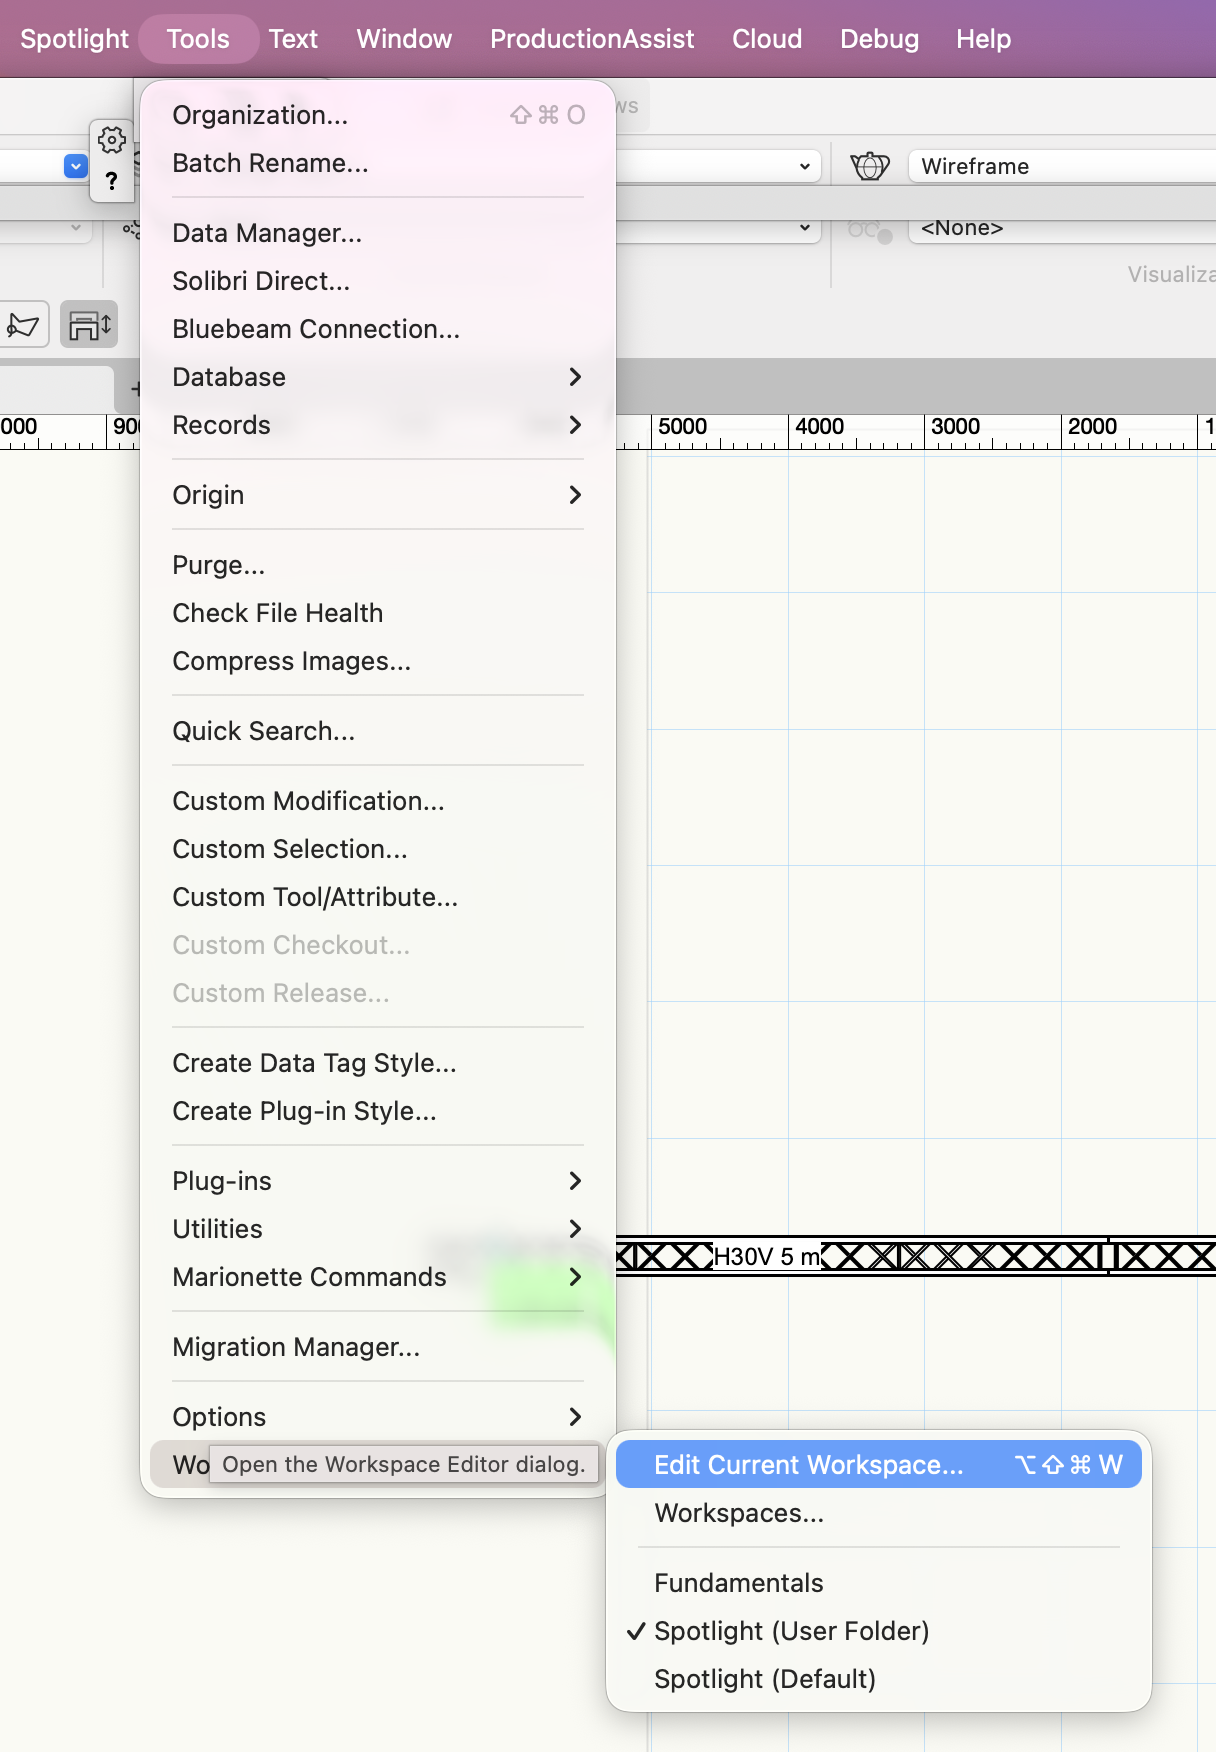
If Production Assist, Truss, or Hoist does not appear in your workspace, open Tools → Workspaces → Edit Current Workspace... in Vectorworks.
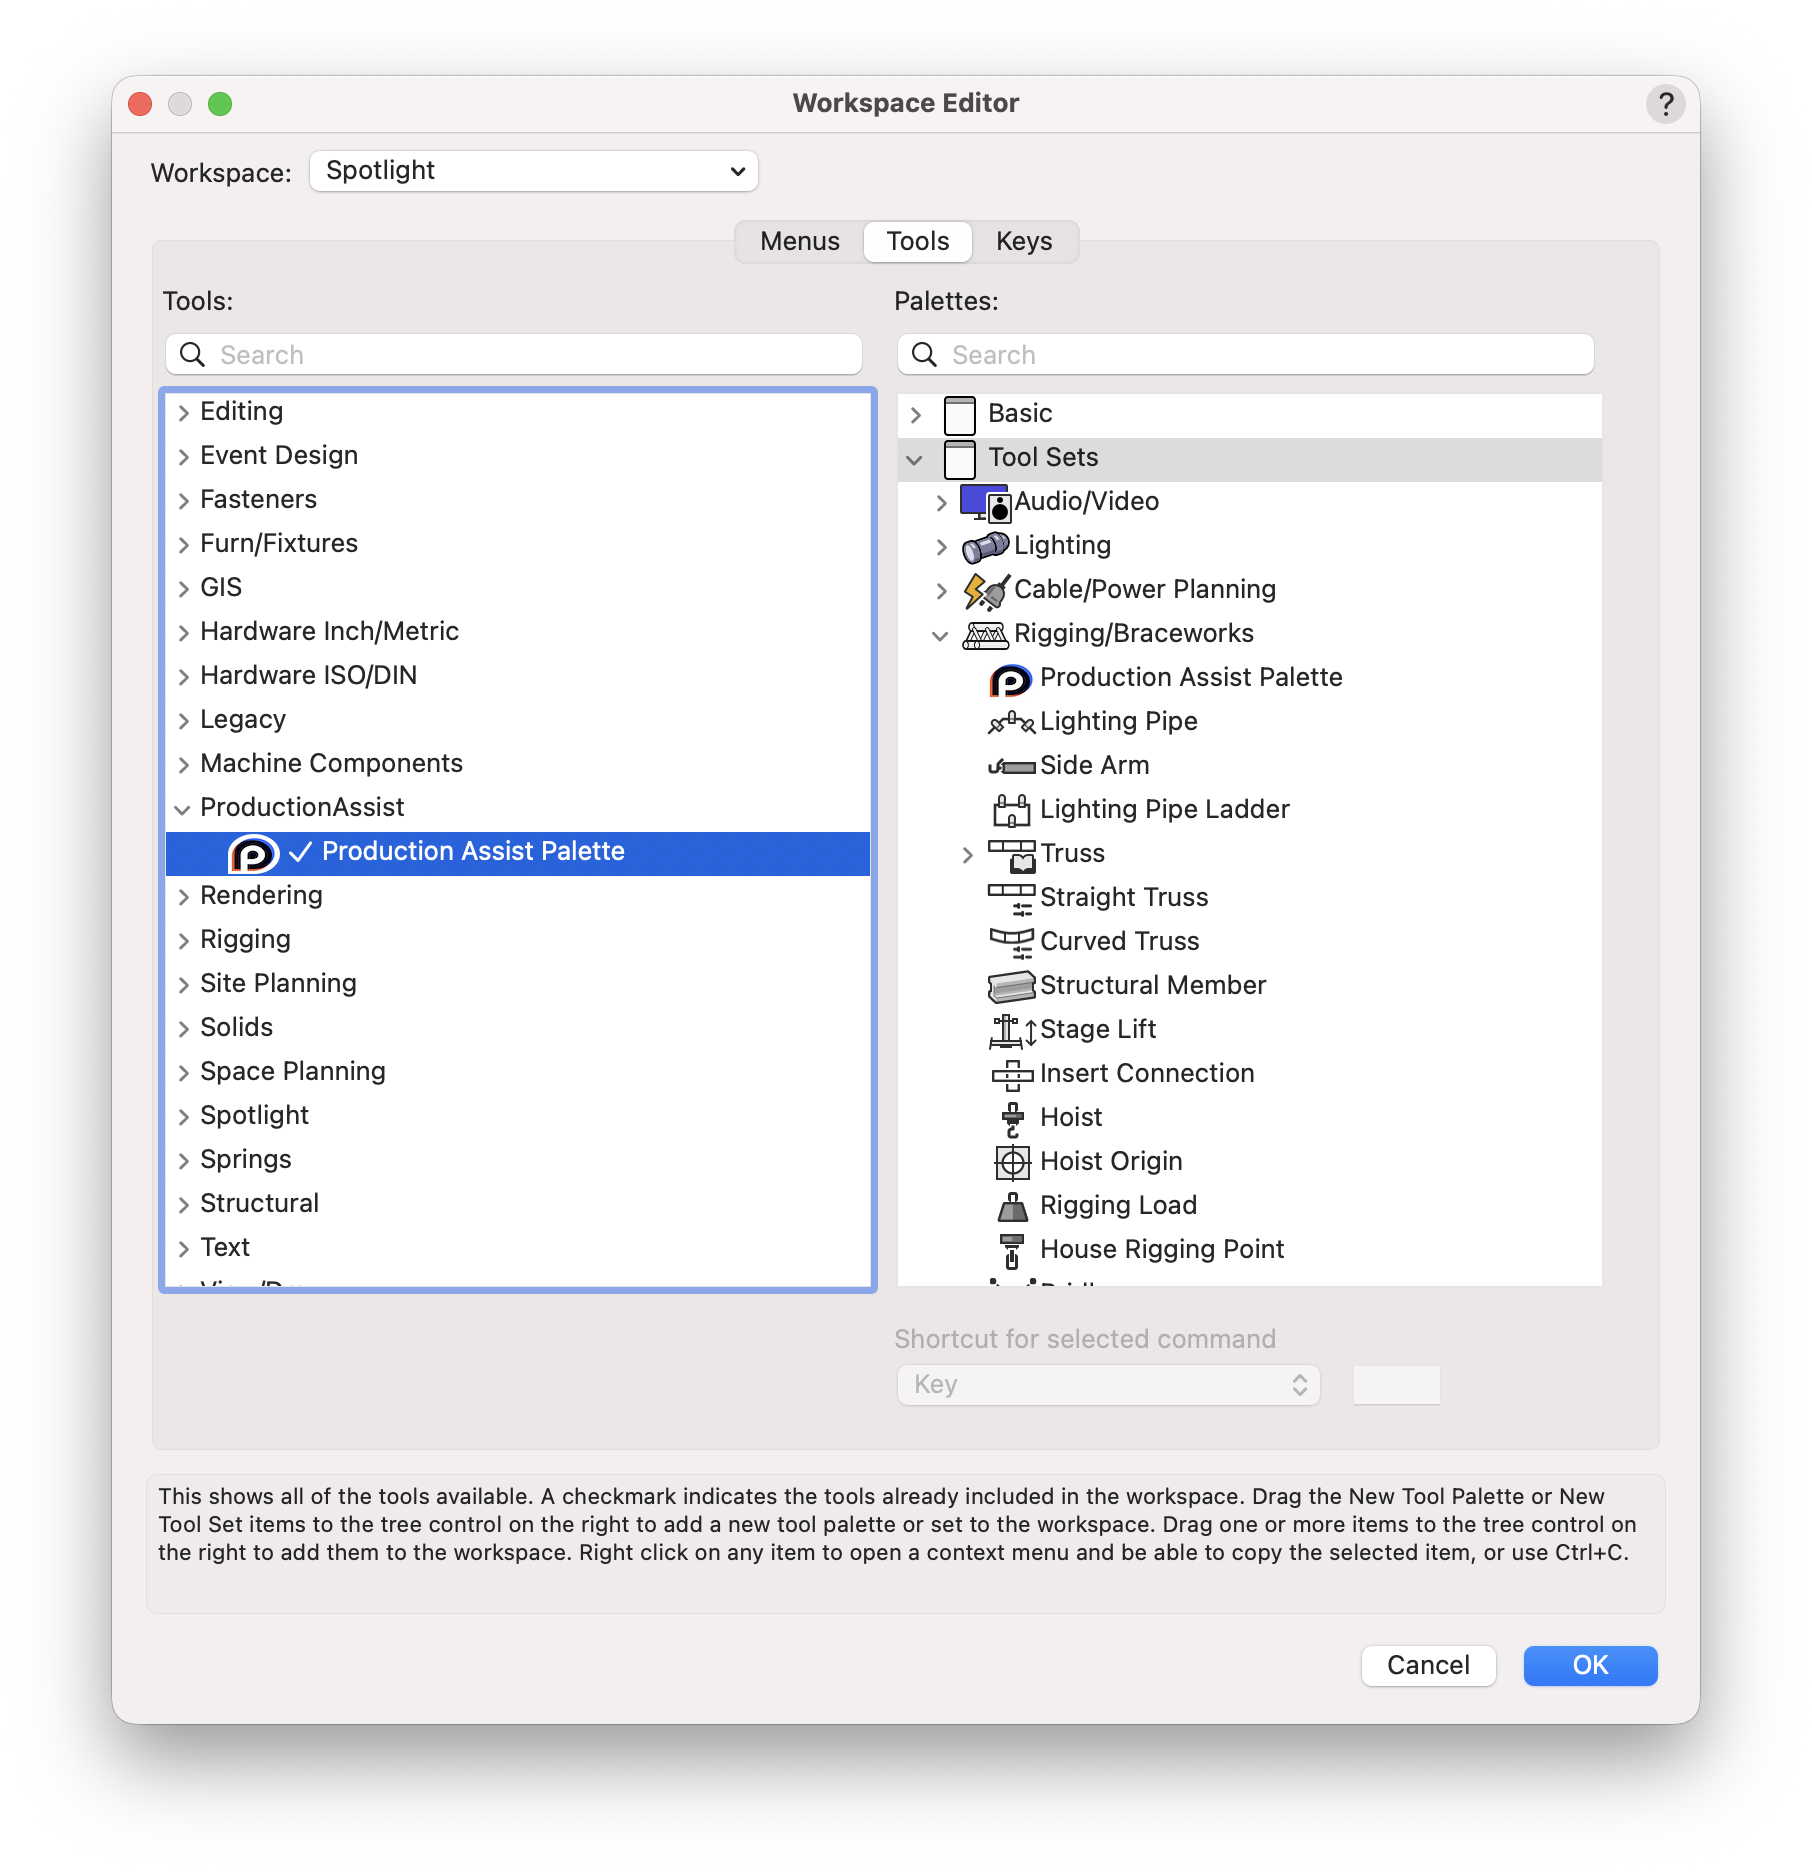
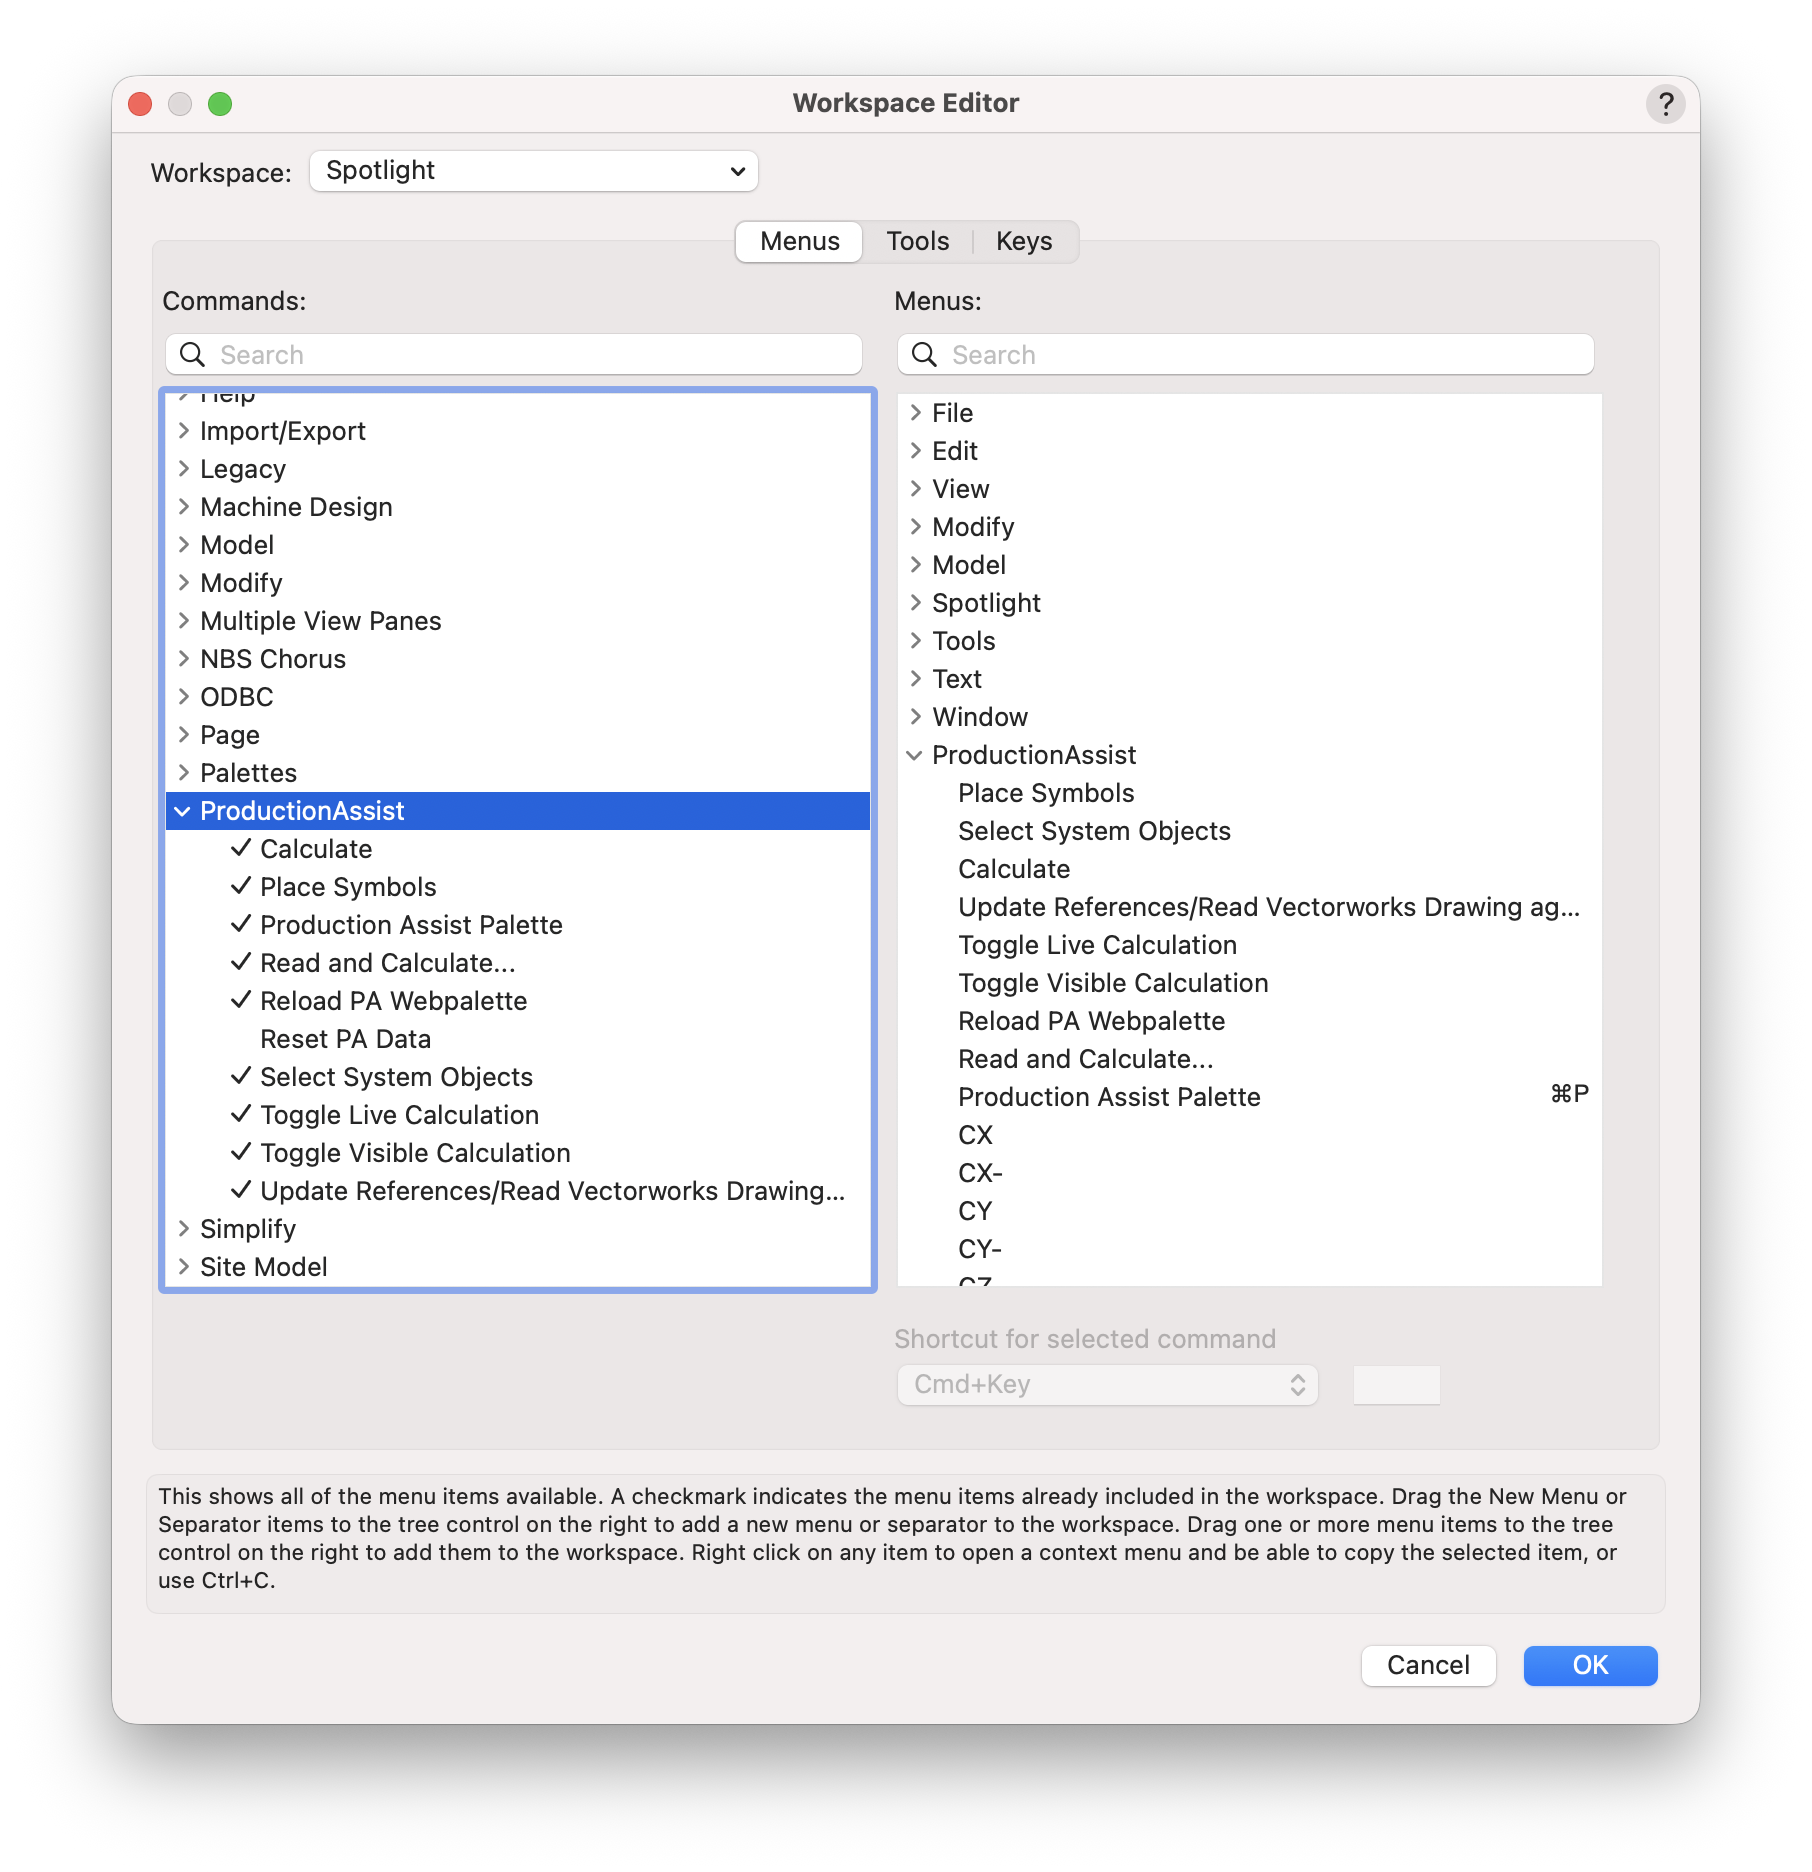
In the Workspace Editor, open the Tools tab and drag Production Assist Palette from the command list into a tool set. Truss and Hoist are listed in the Rigging/Braceworks tool set. The Menus tab contains the Production Assist menu commands; you can add them to the active workspace there.
If you want to sort objects in the Scene Tree or group them into assembly groups after importing, see Scene Tree. For more Vectorworks features and field mappings, see Production Assist in Vectorworks. The integration guide also includes the object catalog, instructions for Truss Crosses and Drops, and the workflow for completing a structure. For an overview of all Production Assist areas, see User Interface.