🇬🇧

Documentation

Create backgrounds for documents#

Content of this tutorial:#

  • Creating a background using labels
  • Apply a background to a calculation report
  • Creating a template from a background
  • Share a template using Production Assist Cloud
  • Using a shared template

Creating a background#

Production Assist uses the same system to create backgrounds as labels. For more information about labels, see the related article .

  1. Open Resource Manager -> Print Labels
  2. Create a new label using the Create button on the right. A new label will appear called " Print Label "
  3. To edit, press the Edit button. The label editor opens
  4. Within the Object Properties, select the Label Print tab
  5. Set width and height, as well as label width and label height to the desired sheet dimensions. In the case of A4 (vertical) this is 210mm wide and 297mm high

  1. In the Object Properties it is also possible to rename the background under " Name "
  2. Then edit the background like a normal label. You can find an example in the existing “ Default Background

Applying backgrounds#

Backgrounds can be applied to the export of calculation reports, documentation and worksheets

  1. Generate a report using one of the following methods:

    • Calculation report: File -> Export calculation report as PDF...
    • Documentation: File -> Export worksheets as PDF
    • Worksheets: Window -> Worksheets -> PDF
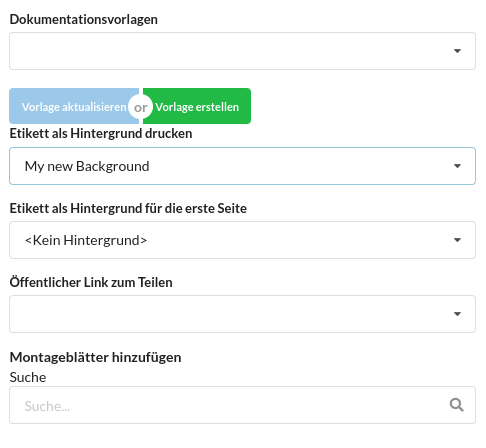
  2. Under “ Print label as background ”, select the previously created background

Creating a template#

Either:

Labels and labels can be exported using File -> Export -> Export Labels...

The exported file is a normal project file which only contains the labels

Or (since 1.8.1):

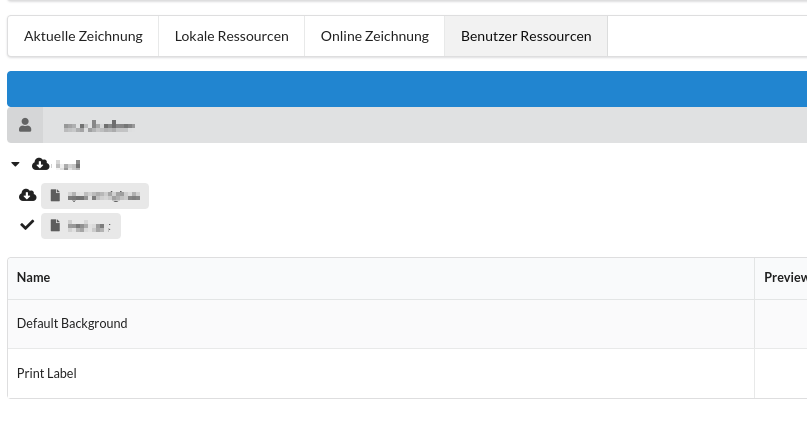
In the Resource Manager * -> Print Labels it is now possible to share a resource directly using the Upload to Cloud button.

  1. To do this, click on the button, which opens a menu for entering the data.
  2. Select a user and a category. Categories can only be created and edited online under Online Content .
  3. Give the new online resource a name, a description and information about the manufacturer.
  4. By clicking OK, the resource is uploaded and is now available to the selected user
  5. Sharing the template is no longer necessary and the template can be used directly, as described below under Using a shared template .

Sharing a template#

The following steps are now possible:

  • The file can be used as a basis for local projects by copying and opening it
  • The file can be uploaded to the cloud to make its content (and therefore the selected backgrounds) available anywhere:
    1. To do this, go to the Production-Assist website and click on Online Content at the bottom of the menu bar
    2. Select your username from the list of available users
    3. Then create a new group with the green plus
    4. Then add a new resource to this group
    5. Upload the file you created previously and give it a name. By clicking “ OK ” the file will be uploaded and its contents will now be available to you

Content can be added not only to your own user account, but also to accounts managed by you, as well as to the company account

Using a shared template#

  1. Open Resource Manager -> Print Labels
  2. On the right, click " Import/Download... "
  3. Click on “ User Resources
  4. Select the desired user/company account
  5. Click on the previously uploaded template

If you want to see and edit the content of other users, they must add you in User Settings -> Account & Billing -> Content Admins

Sharing content between multiple users is reserved for the Pro Teams license