
Production Assist offers a system for cross-user and cross-platform collaboration. This offers the possibility to work with several people at the same time on any project and to retrieve the required information online at any time.
Each drawing in Production Assist can be uploaded to production-assist.com's server, and thus the current state of work can always be made available to other project participants.
The current work status of the overall project is always stored in the Master Plan and can be viewed by everyone.
Each project can also have different sub-plans/work plans in which different people work on different areas. These sub-plans are called Branches.
Changes made in the Branches can be sent to the Master Plan, which is then updated there. The changes are called change requests. After submission, these changes are either updated directly to the master or - depending on the project setting - must be approved by other users. Whether and who has to approve changes is defined in the Review Template.
A new project can be created on any supported platform.
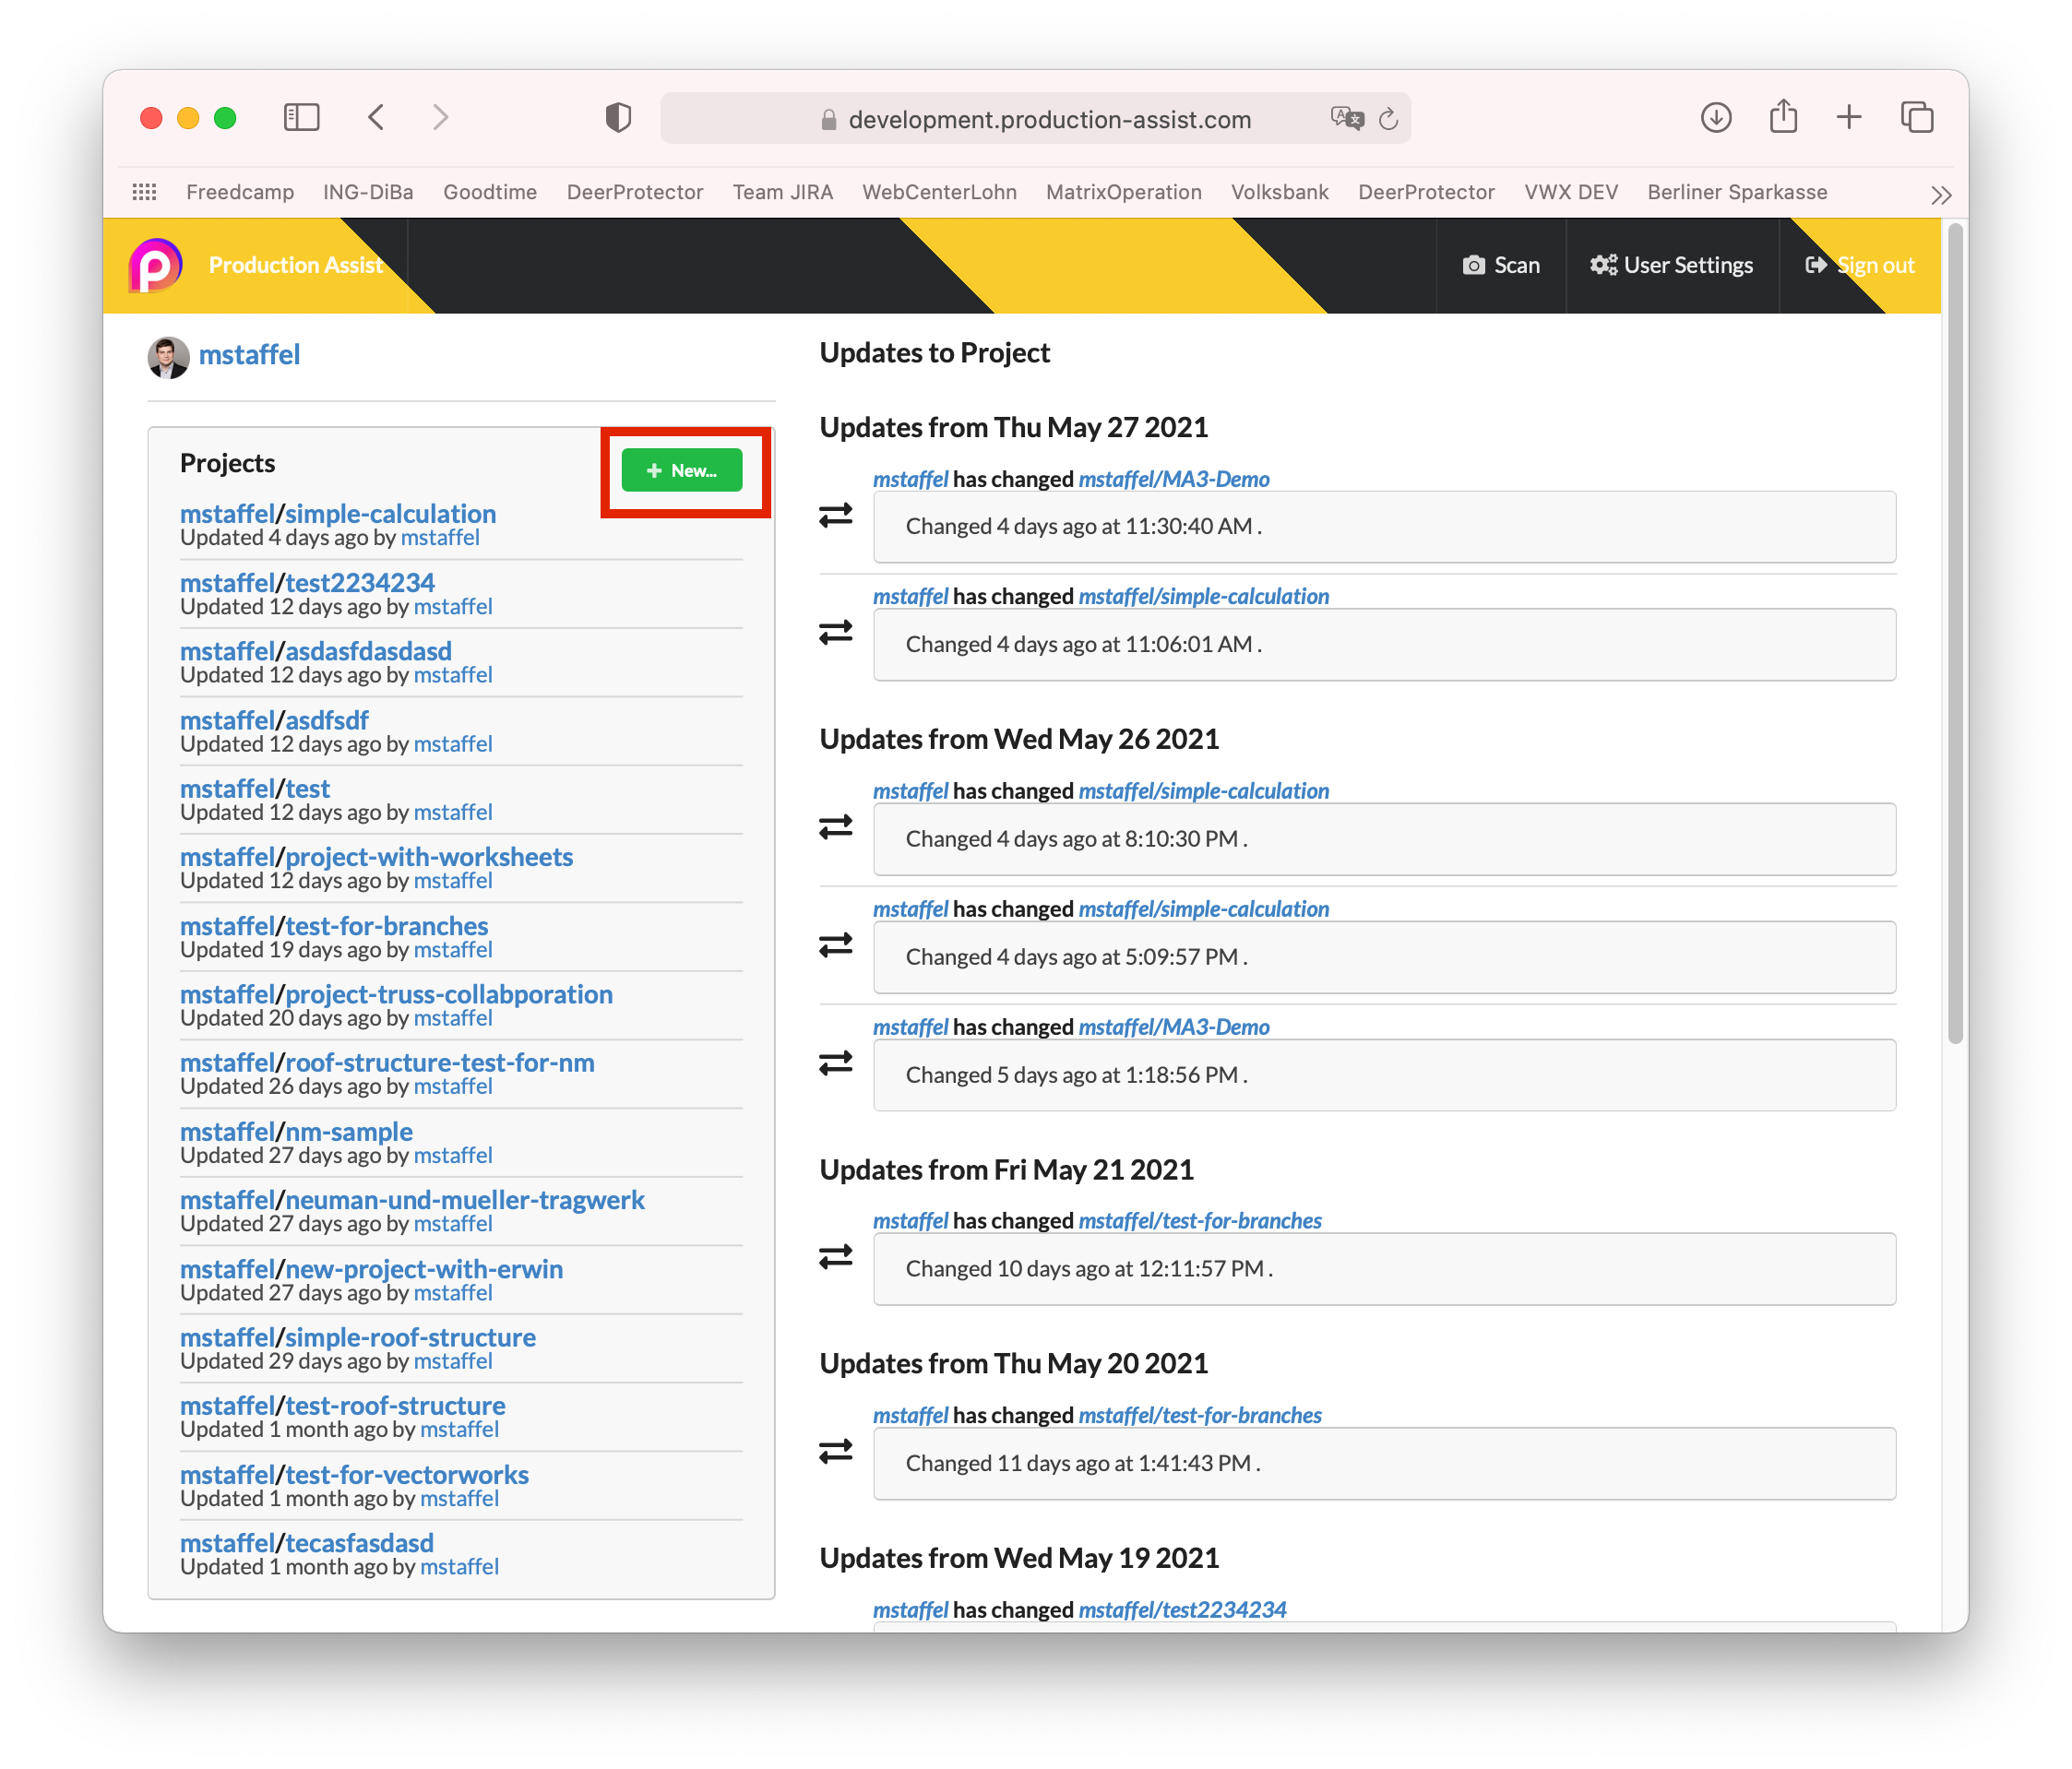
On the website, above the project list on the left side of the window, you can use the button + New... to create a new project.
In the desktop app and in the plug-in, you create a new online project by clicking PA Cloud - Commit to Project on the menu bar.
There you can create a new project on the left side of the window.
| Field | Description |
|---|---|
| User/Organisation | Shows who created the project |
| Project Name | Name of the project |
| Review Template | Selectable templates for releasing changes |
| Symbol Map Template | Selectable templates for replacing symbols with PA symbols |
| Base on Project | Selectable project templates |
| Groups | Add a specific group of stakeholders to the project |
| Change List Checks | Selectable templates for automatic reconciliation of changes and conflicts |
| Project Member | Add individual stakeholders to the project |
Attention: Not all names can be used as project names. Please use only numbers and letters or dashes ("-"). The name that will be generated is displayed as a warning if necessary!
Notes: You can also turn a locally stored project into an online project via Commit to Project.
In order for other users to see or work on your project, you need to add them to the project. You can do this either directly when creating the project dialog window or later on the production-assist.com website.
To do this, select your project with a click in the project list on the left side of the start page. This brings you to the project page.
In the Settings tab you will find the item Access.
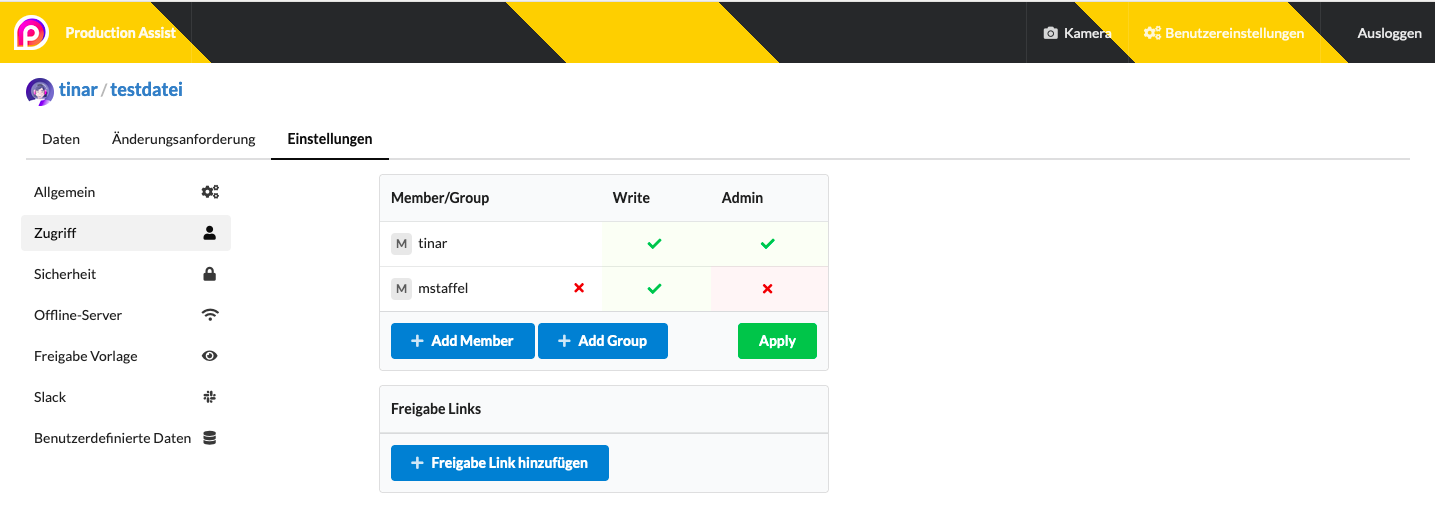
Here you can now add people who have a PA account to your project or create groups of people for simplification.
By clicking on +Add Member, you can add the corresponding people to the project from the users listed and set their user rights. You then need to click Apply to finalize your changes.
| User Right | Description |
|---|---|
| Write | This right allows a user to see the project, create and change branches. |
| Admin | This right also allows a user to create and edit users. |
In addition, a link can be created which allows other people to access to the project page but does not allow them to edit it.
Groups allows users to be assigned to a group and thus assigned user rights for a project to all group members at the same time.
If you want to work on an online project, you must first load the drawing from the server. To do this, check out the desired project under File - Checkout in the menu bar.
The following window opens:

The top view shows the eight most recently used projects and their Branches. If your desired project is not listed, you can select it from the drop-down under All Projects.
By clicking on the desired Branch, you load the drawing into your program. If only the master plan of the project is available so far, you must then create a work plan - called a Branch.
A Branch is an independent work area or plan. There is always a Master Plan, which is present by default in all projects and cannot be deleted. It is the "Single Source of Truth" and thus symbolizes the current state of planning accepted by all project participants.
The actual work takes place in personalized branches. Each planning participant can copy the master plan as a branch and then make changes to this copy independently of other users. All changes are tracked and displayed as a Change Request. When the work on a branch is complete, the changes can be transferred to the master plan.
Branches can be created either via the web interface or via the app.
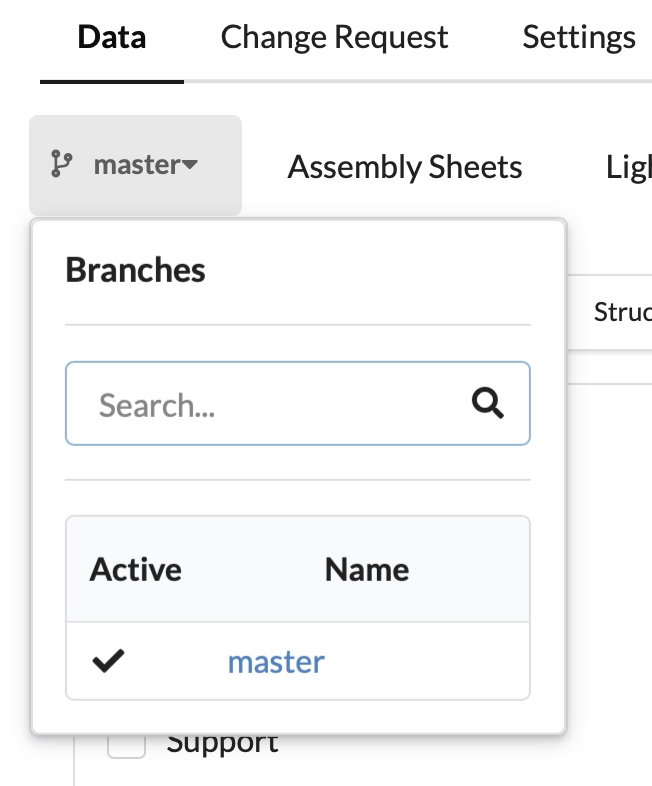
In the web interface, the corresponding project must be selected in the project list on the start page by clicking on it. Now the project page opens. Under the Data tab, you can see which plan is currently active under Master on the left and see all existing branches.
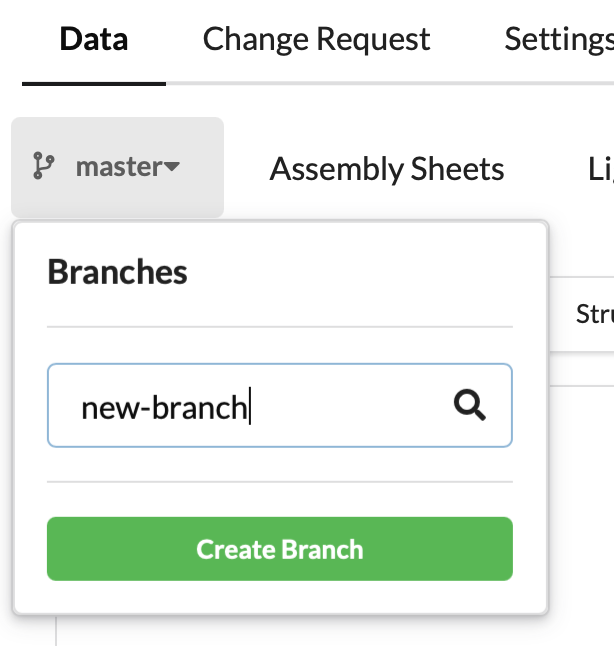
If you want to create a new one, simply type in the desired name and click on Create Branch.
 |
| |
|
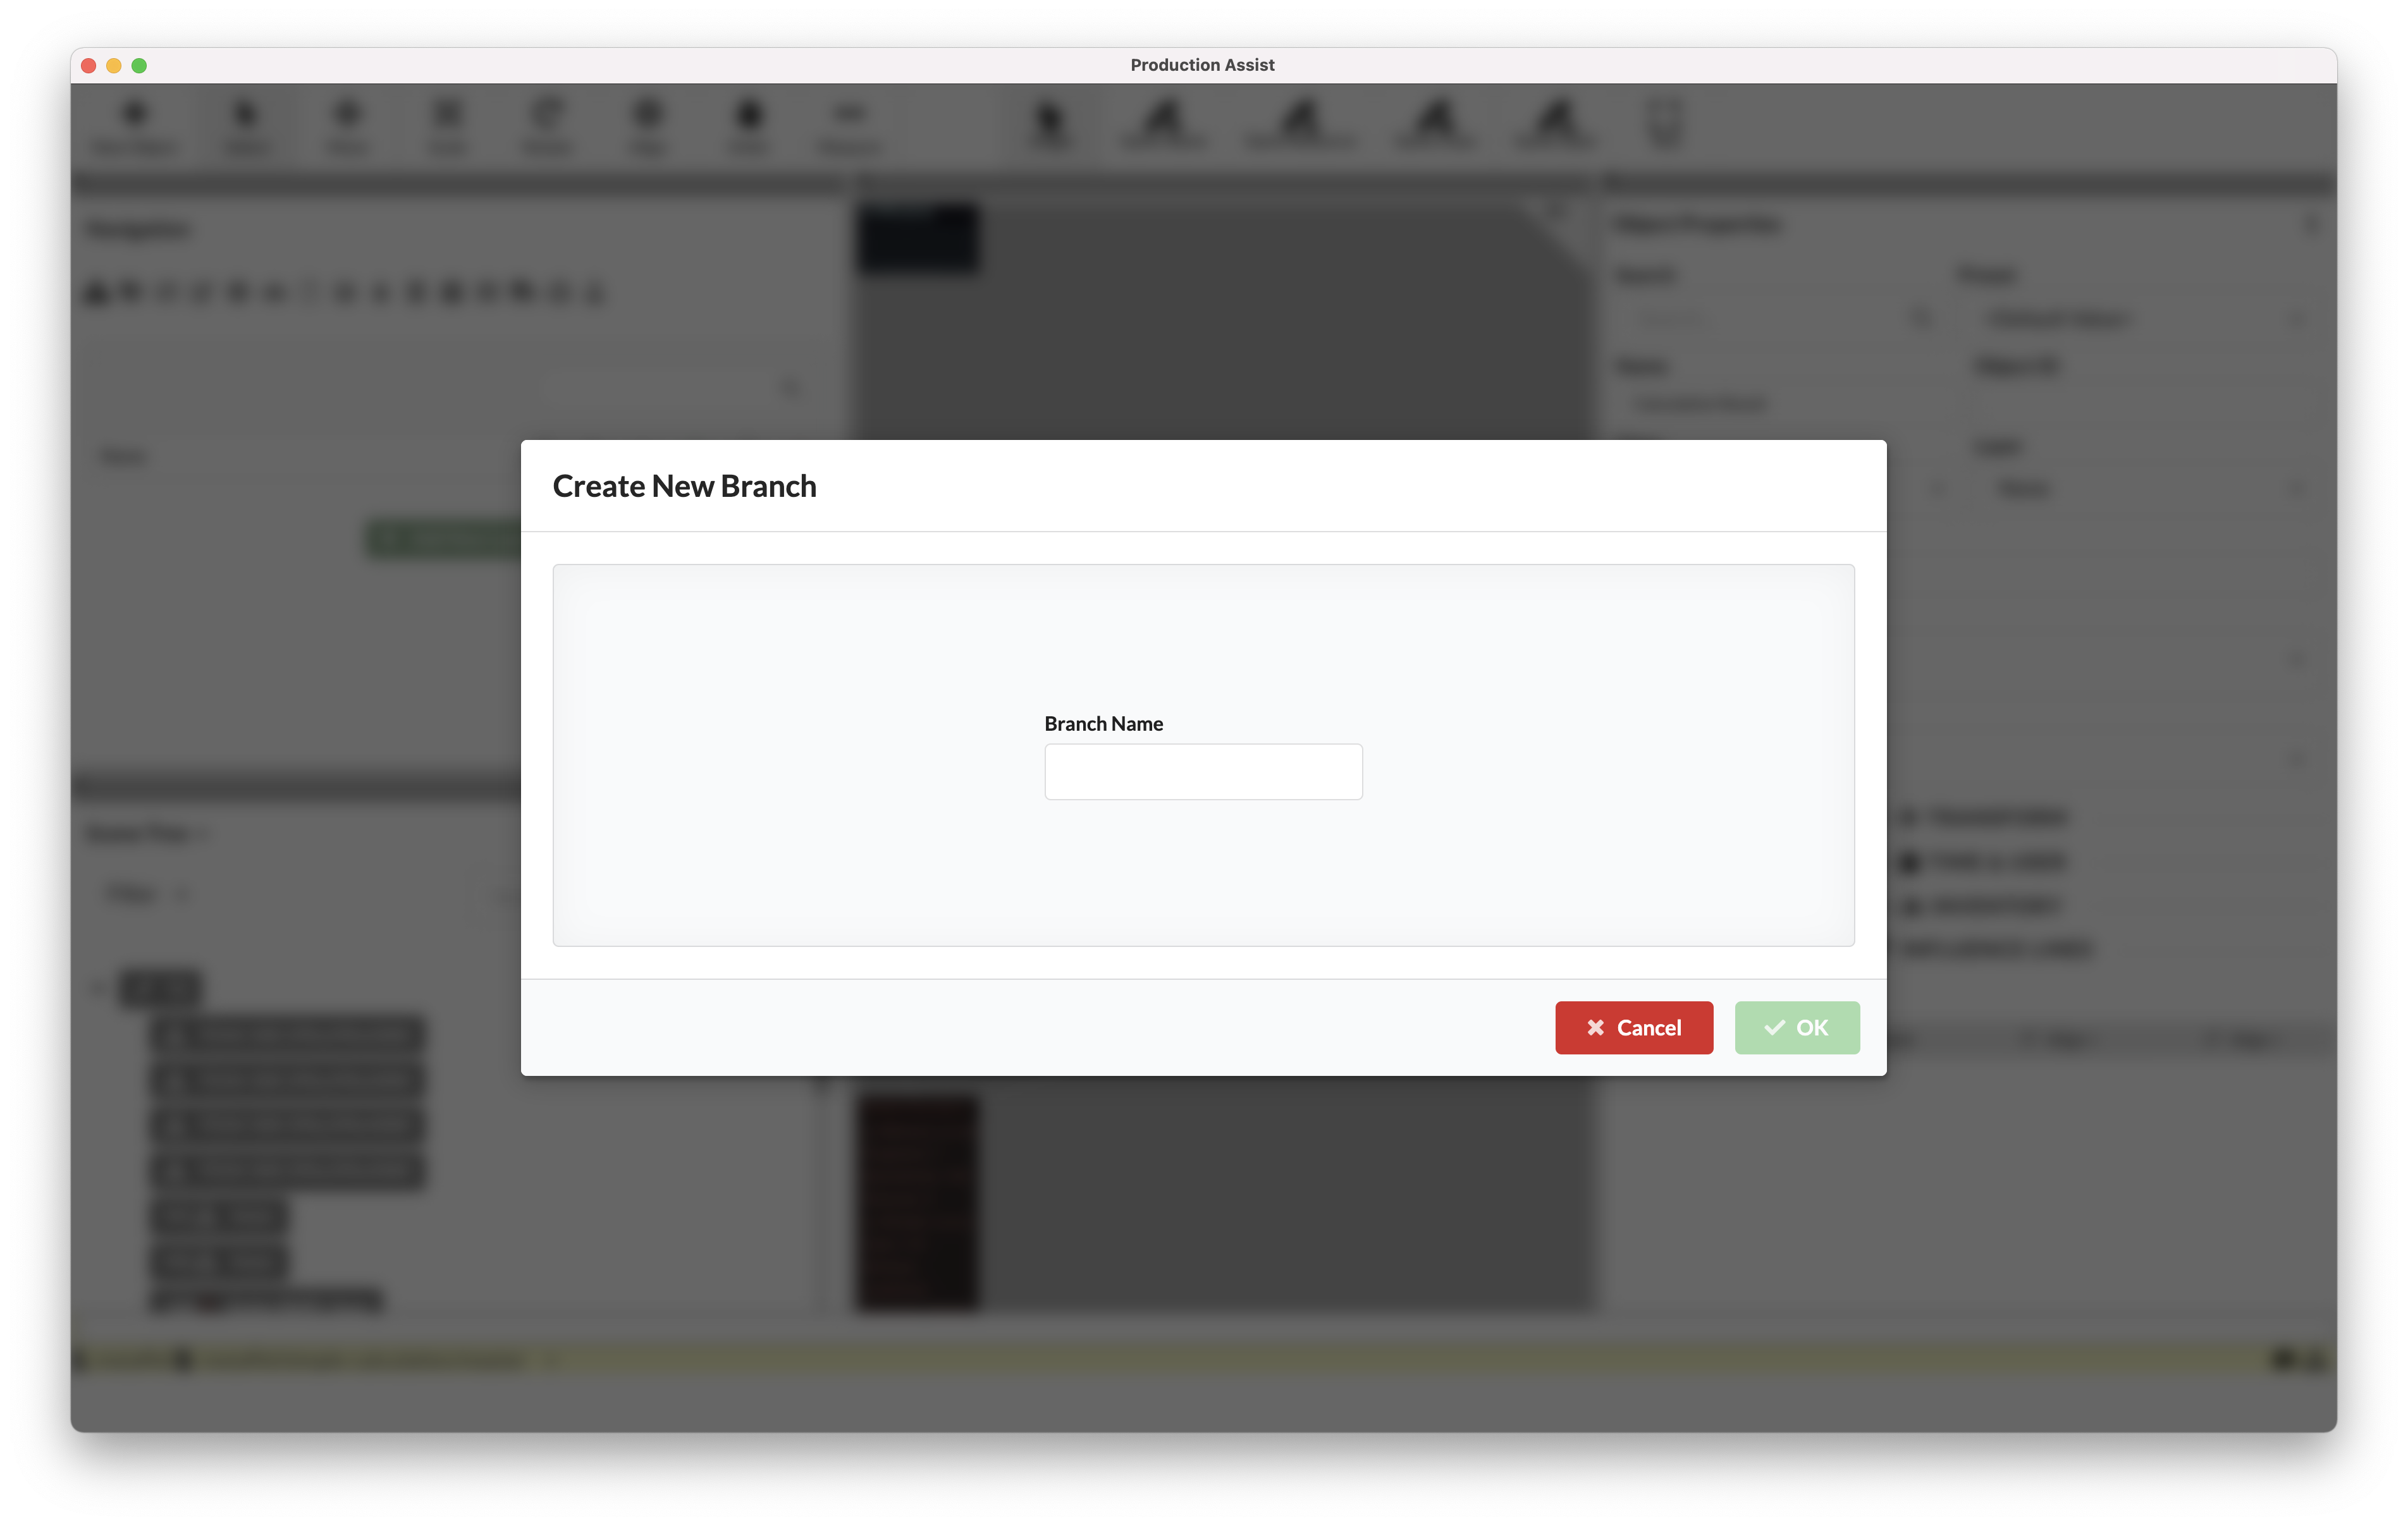
In the app you can create a new branch under PA Cloud - Create Branch on the menu bar.
Now you can work on the drawing. As long as you only save the drawing, the changes will only be saved in your work area. To update the master plan with the changes, you must transfer them to it (commit).
Once you have made all the necessary changes in your branch, you can transfer them to the master.
To do this, select PA Cloud - Commit to Master on the menu bar.
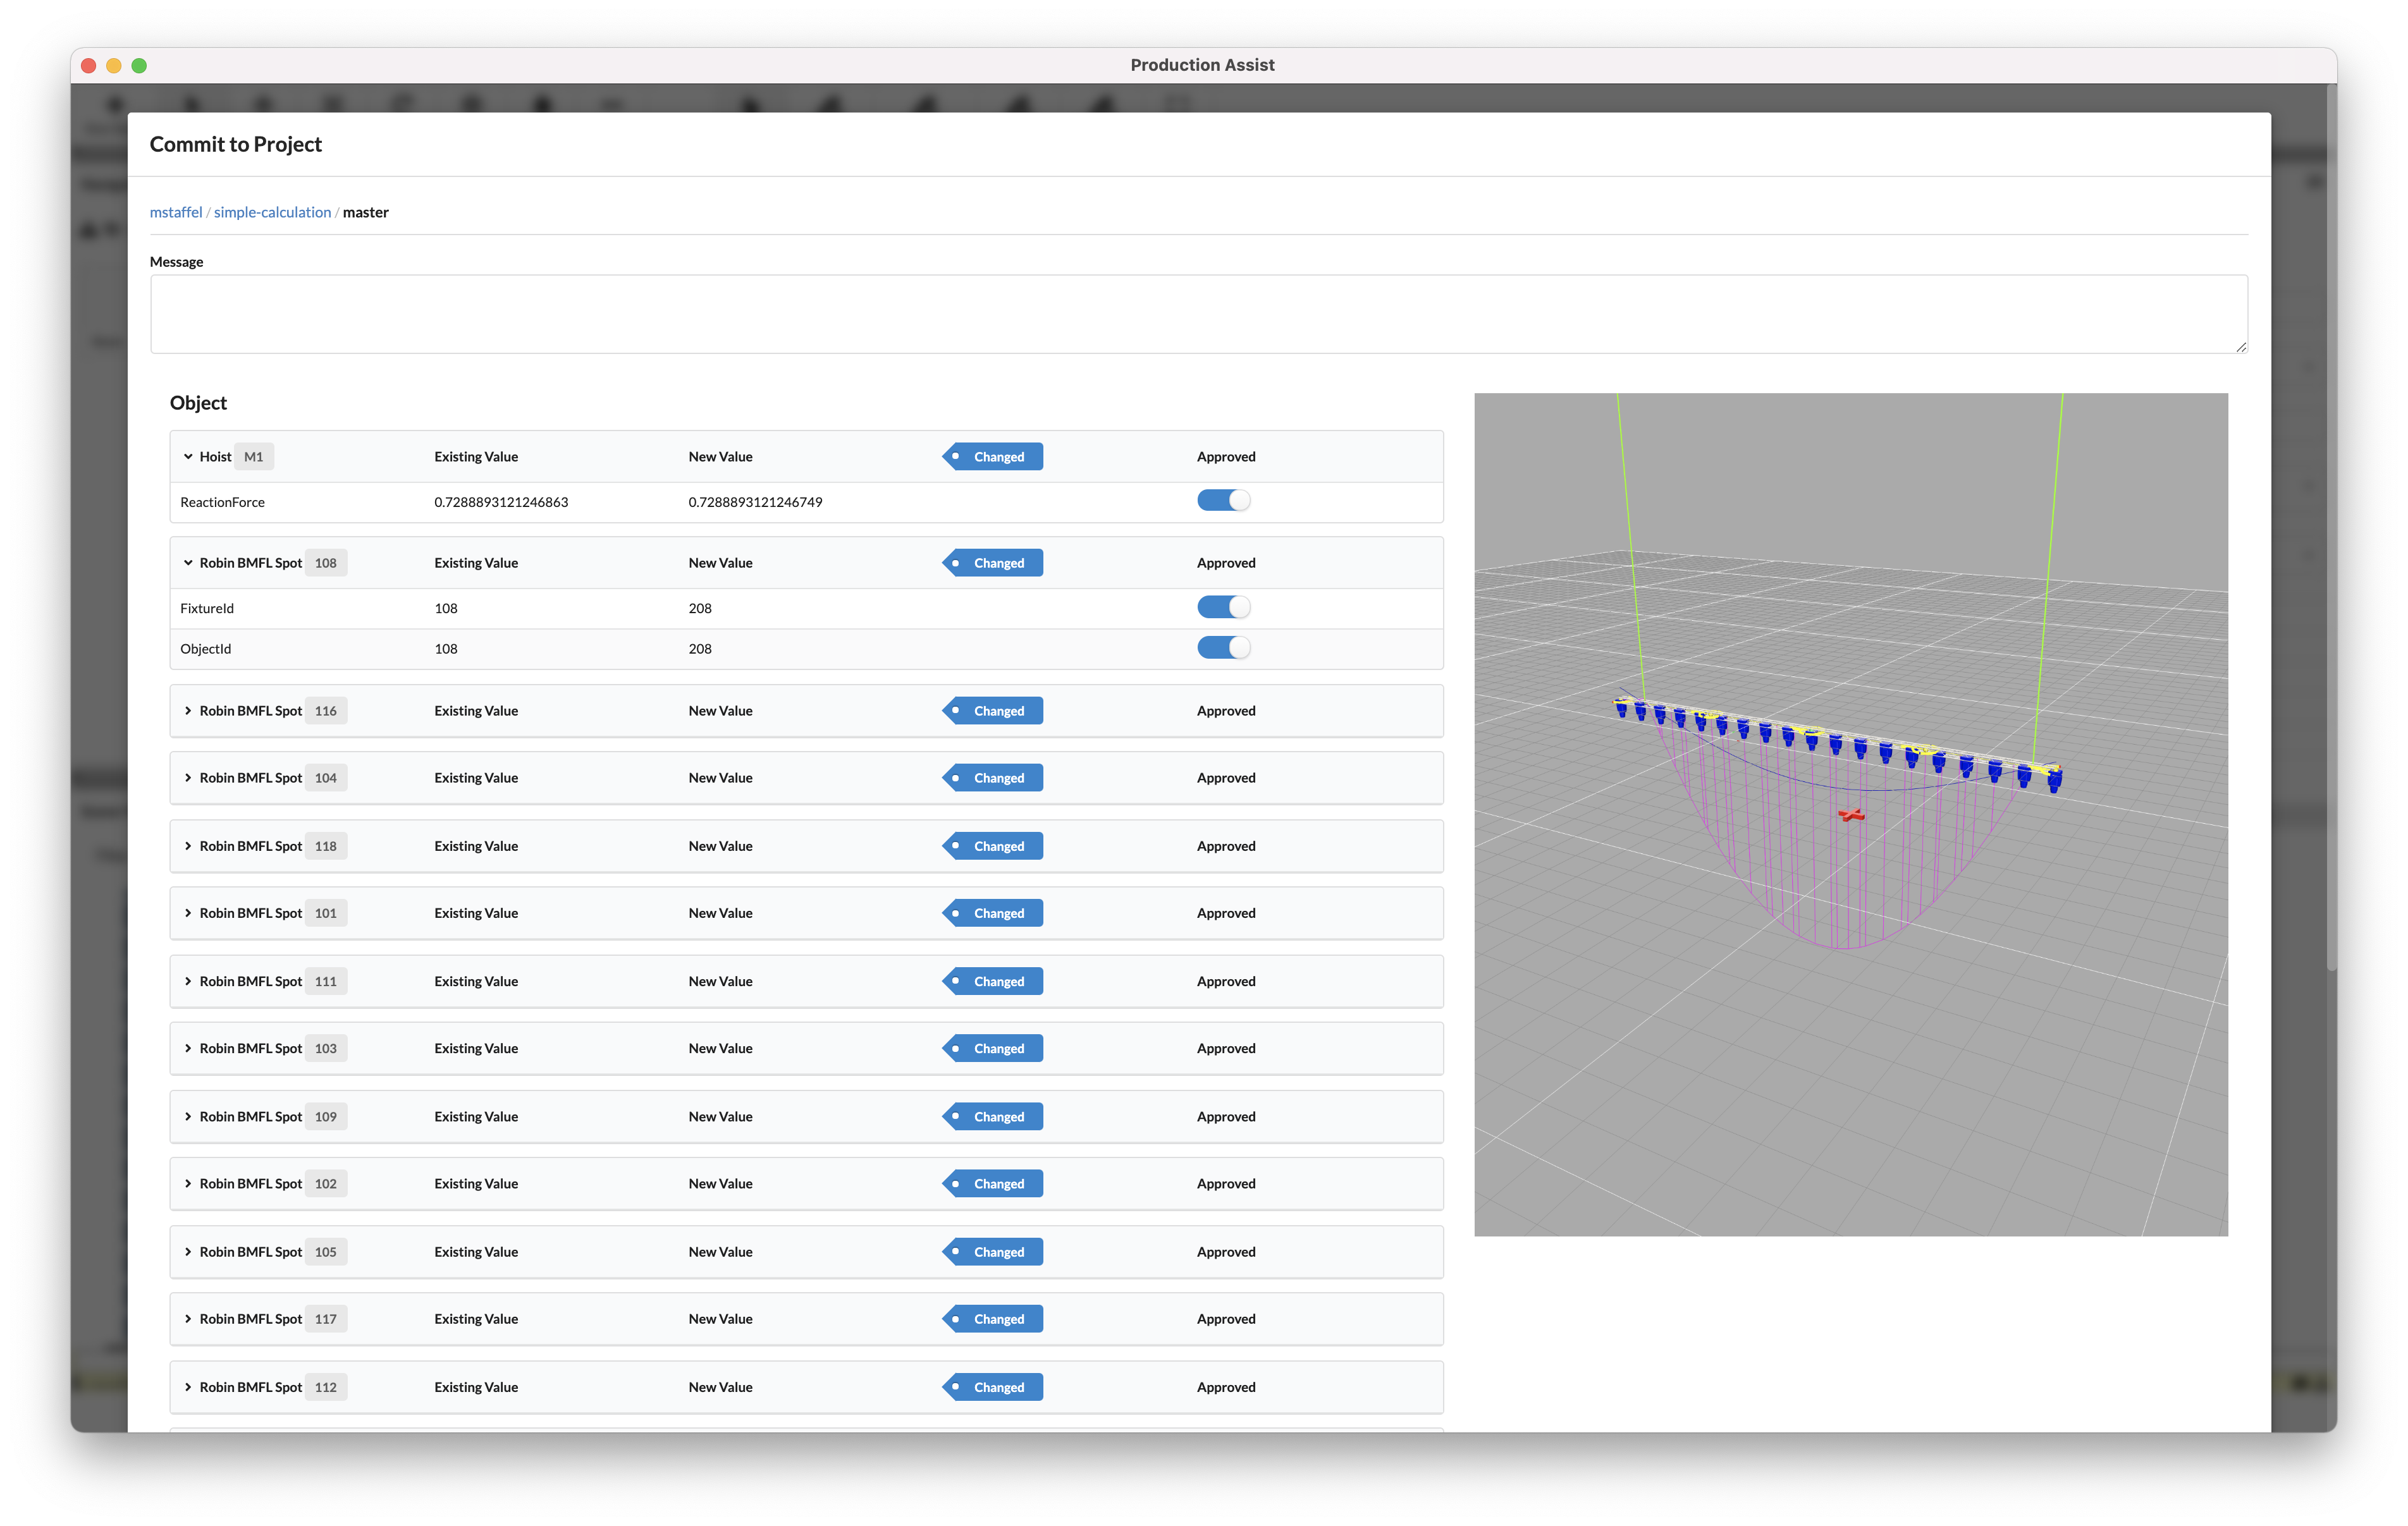
Here you see a list of all the changes you have made to the drawing.
Under Message you can also summarize the changes for the other project participants.
On the left side, all changes are displayed in tabular form. Any property that has changed is captured here. The Approved switch allows you to choose whether or not to transfer certain changes.
On the right side, the changes are displayed in 3D. New objects are displayed in green, changed objects in blue, and deleted objects in red. If an object has not changed, it is grayed out.
When you create a branch, the master's current status is copied at the time of creation. Subsequent changes by project participants must be transferred manually via PA Cloud - Update from Master on the menu bar.
Change Requests show the differences between the master plan and the branch.
On the one hand, when transferring the changes from the branch to the master, it shows what will be changed and gives one the opportunity to decide what should be transferred.
On the other hand, the complete change history can be displayed online on the project website. In the Change Requests tab, under Differences, the changes are displayed in tabular form in 3D and 2D.
| Display in 3D | Display in table form |
|---|---|
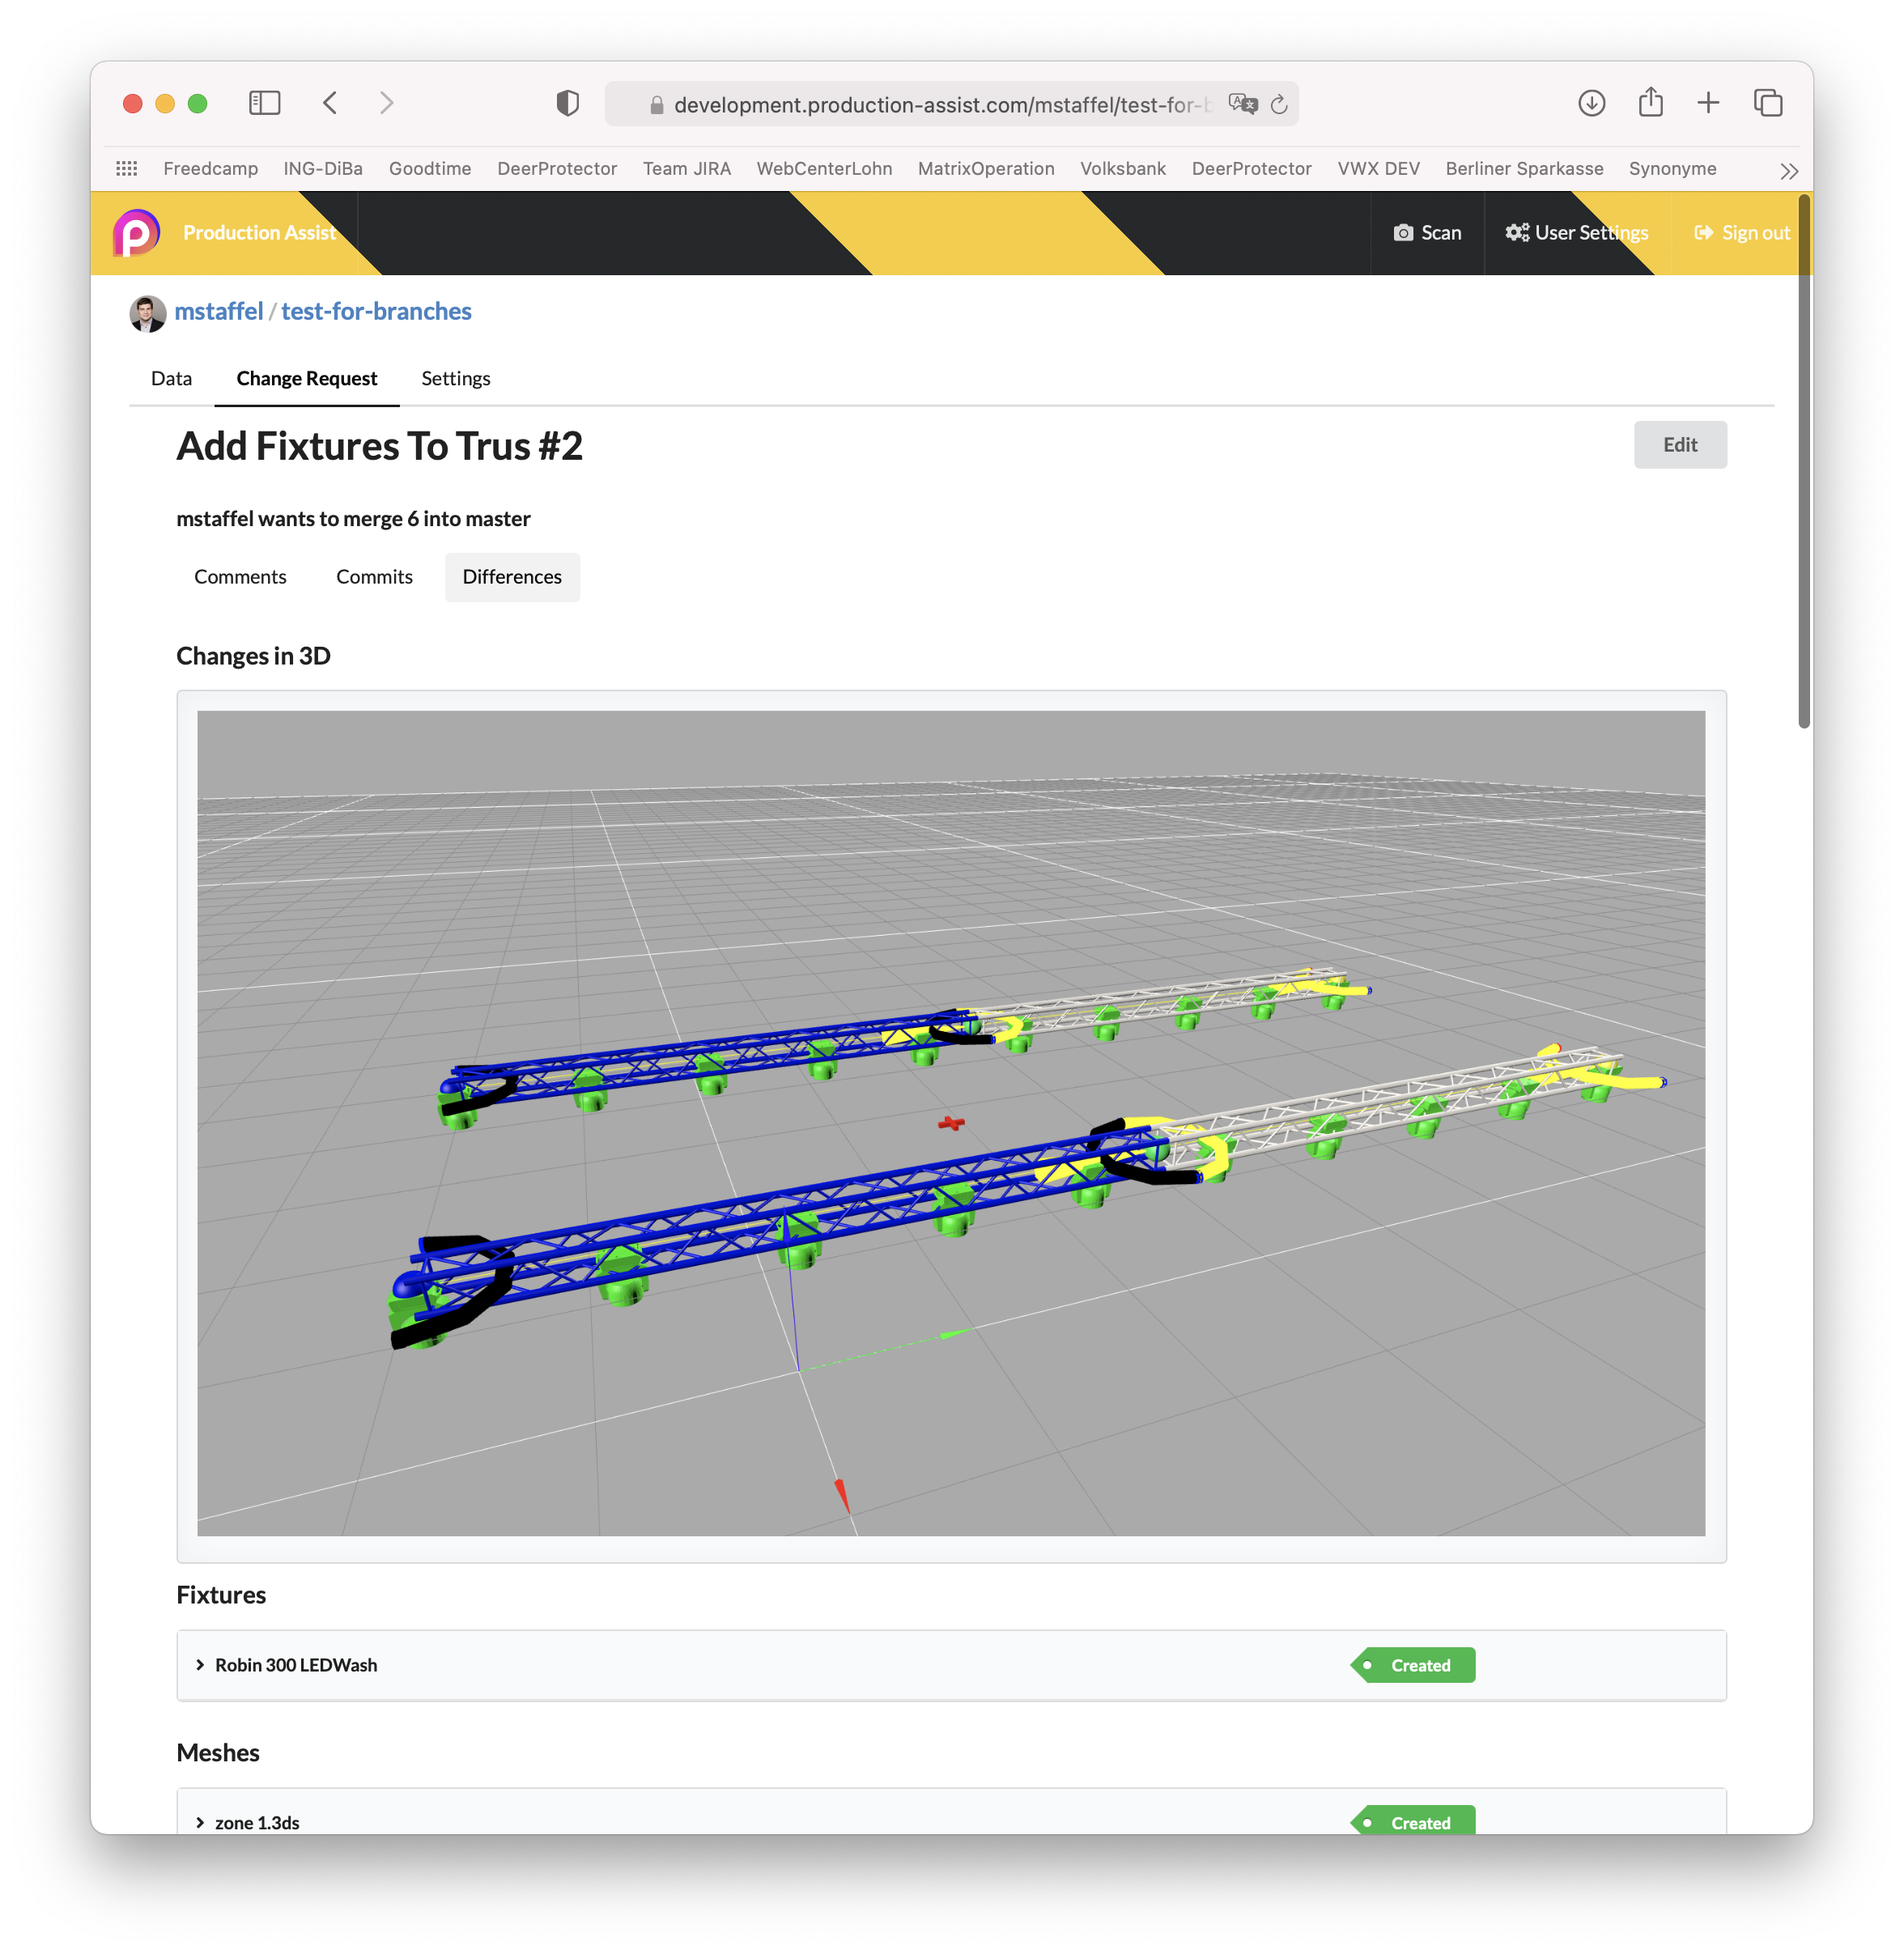 | 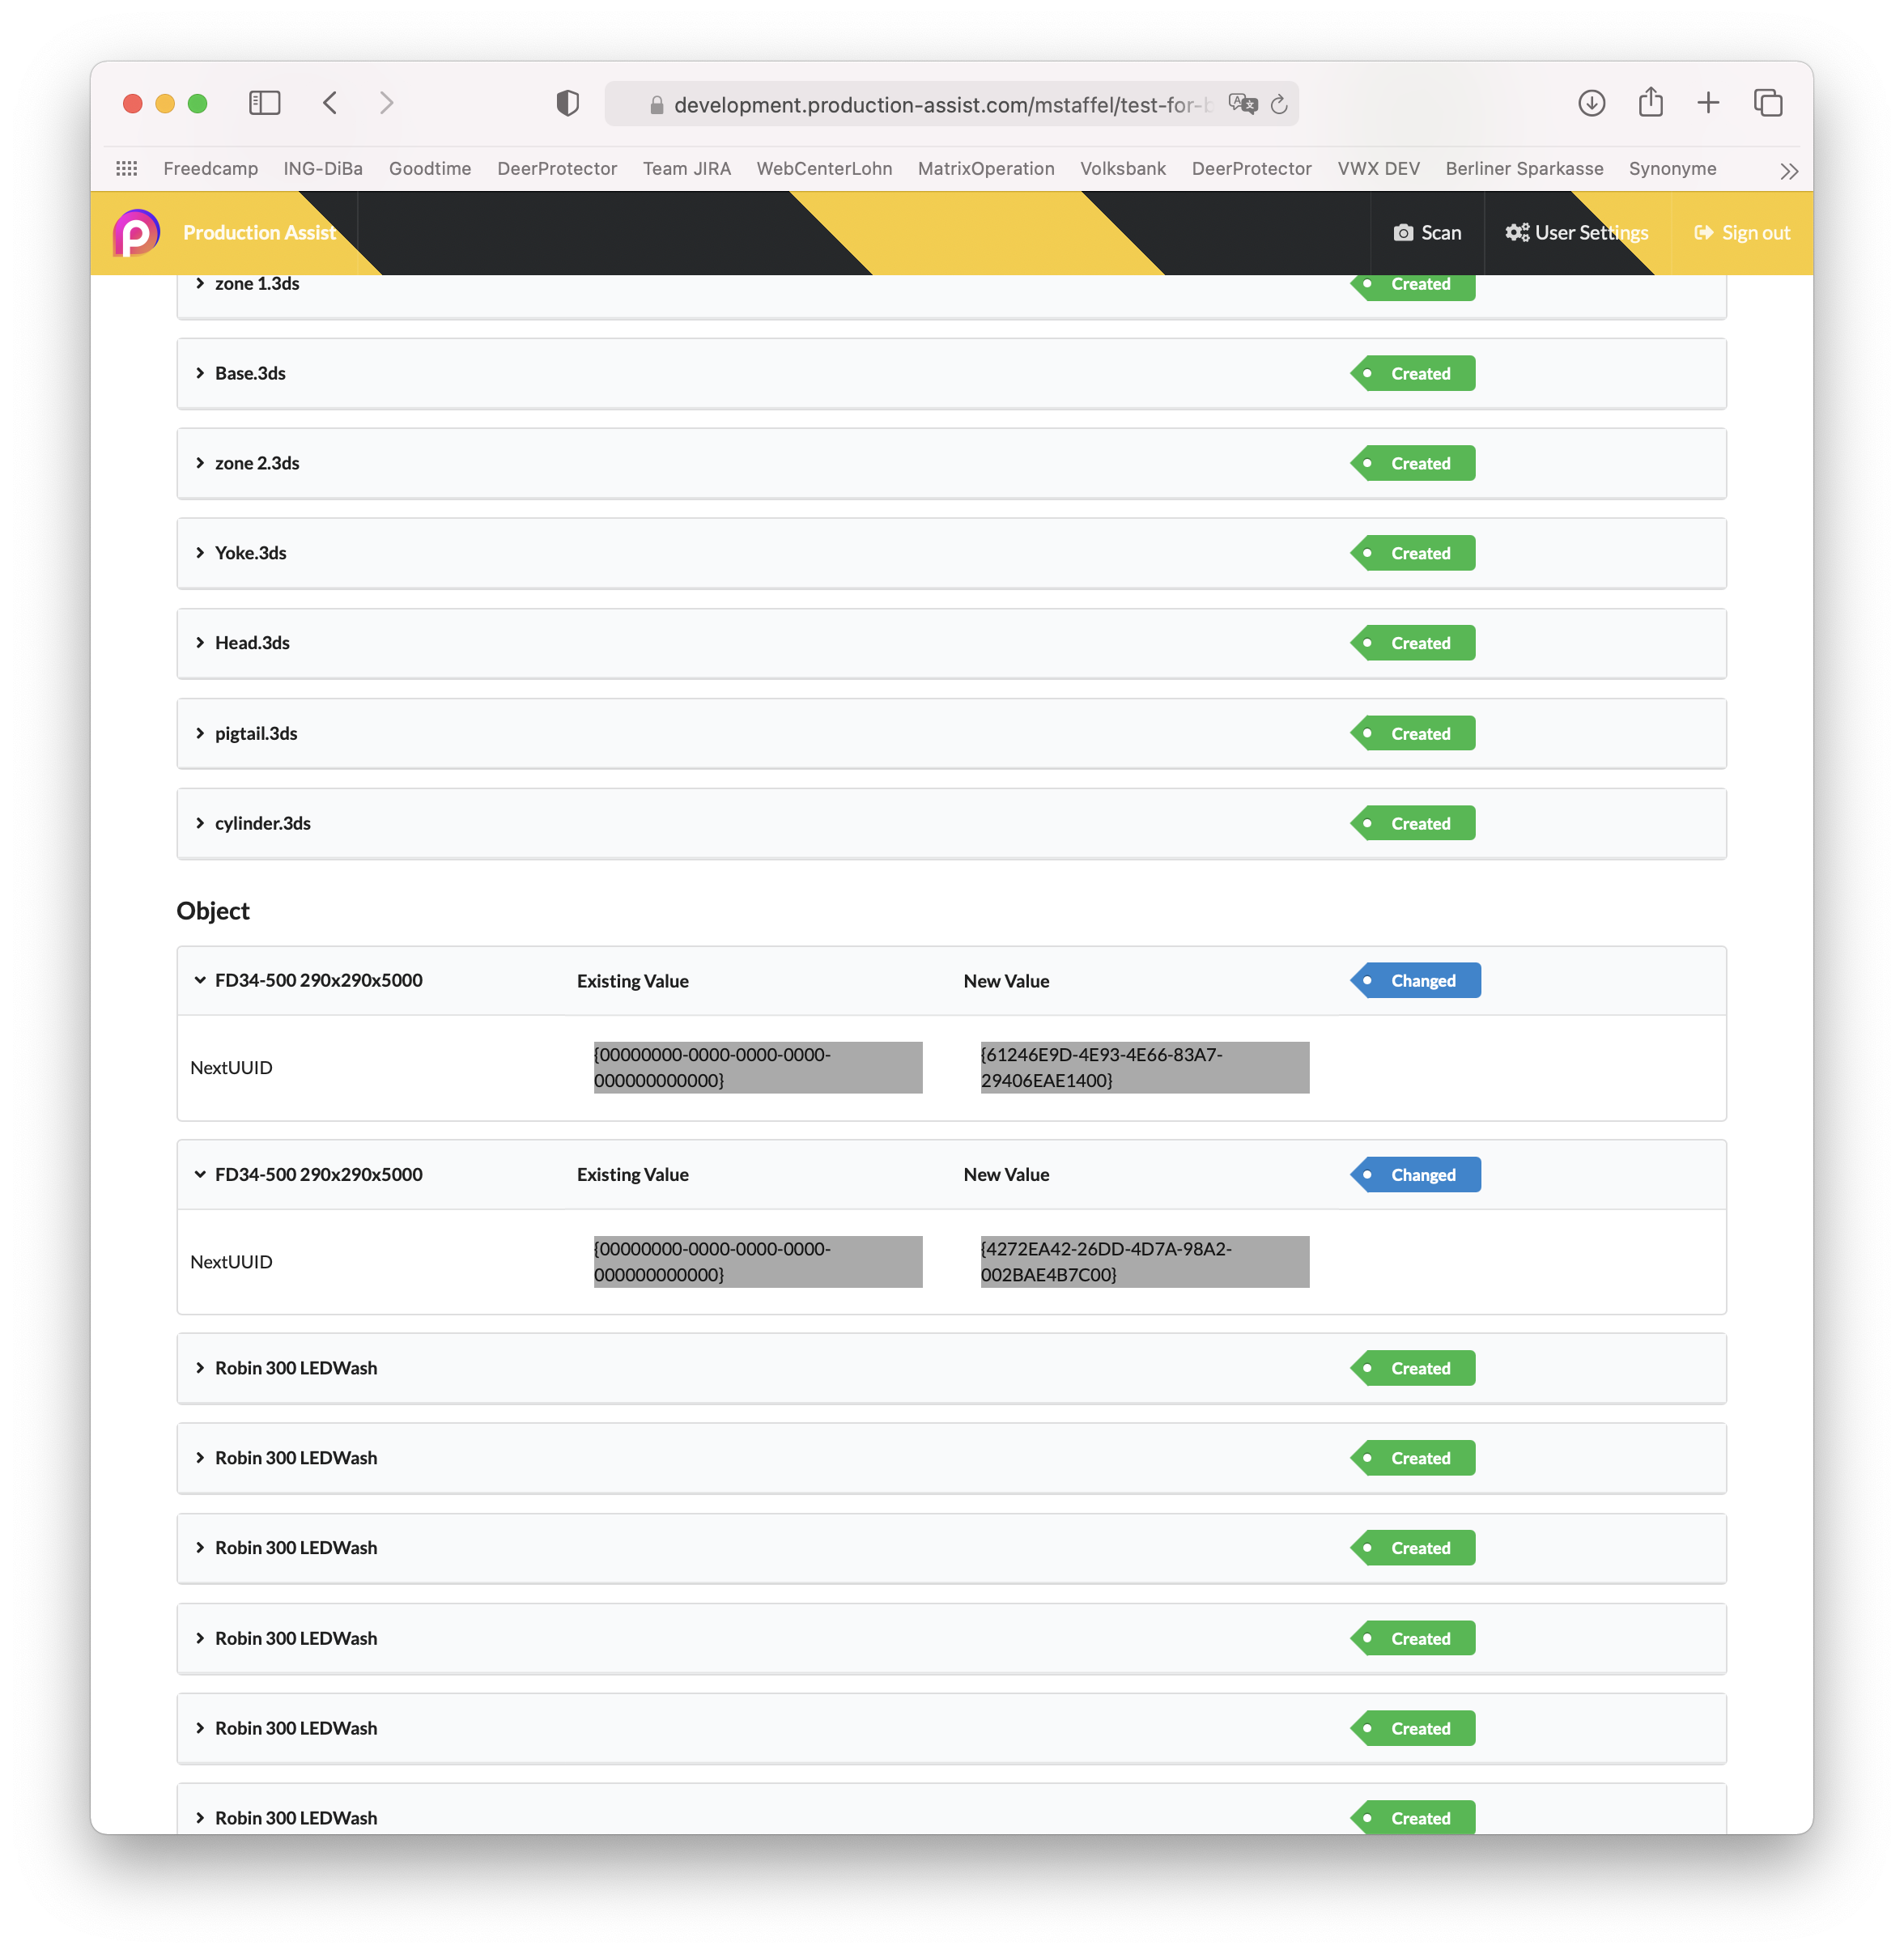 |
| Changed objects turn blue, new objects are displayed in green. | All changed properties are displayed. |
All change transfers are listed under the item Commit. Bild 8.6c
Change requests also allow users to comment on and discuss the changes. You can find these entries by clicking on the item Comments.
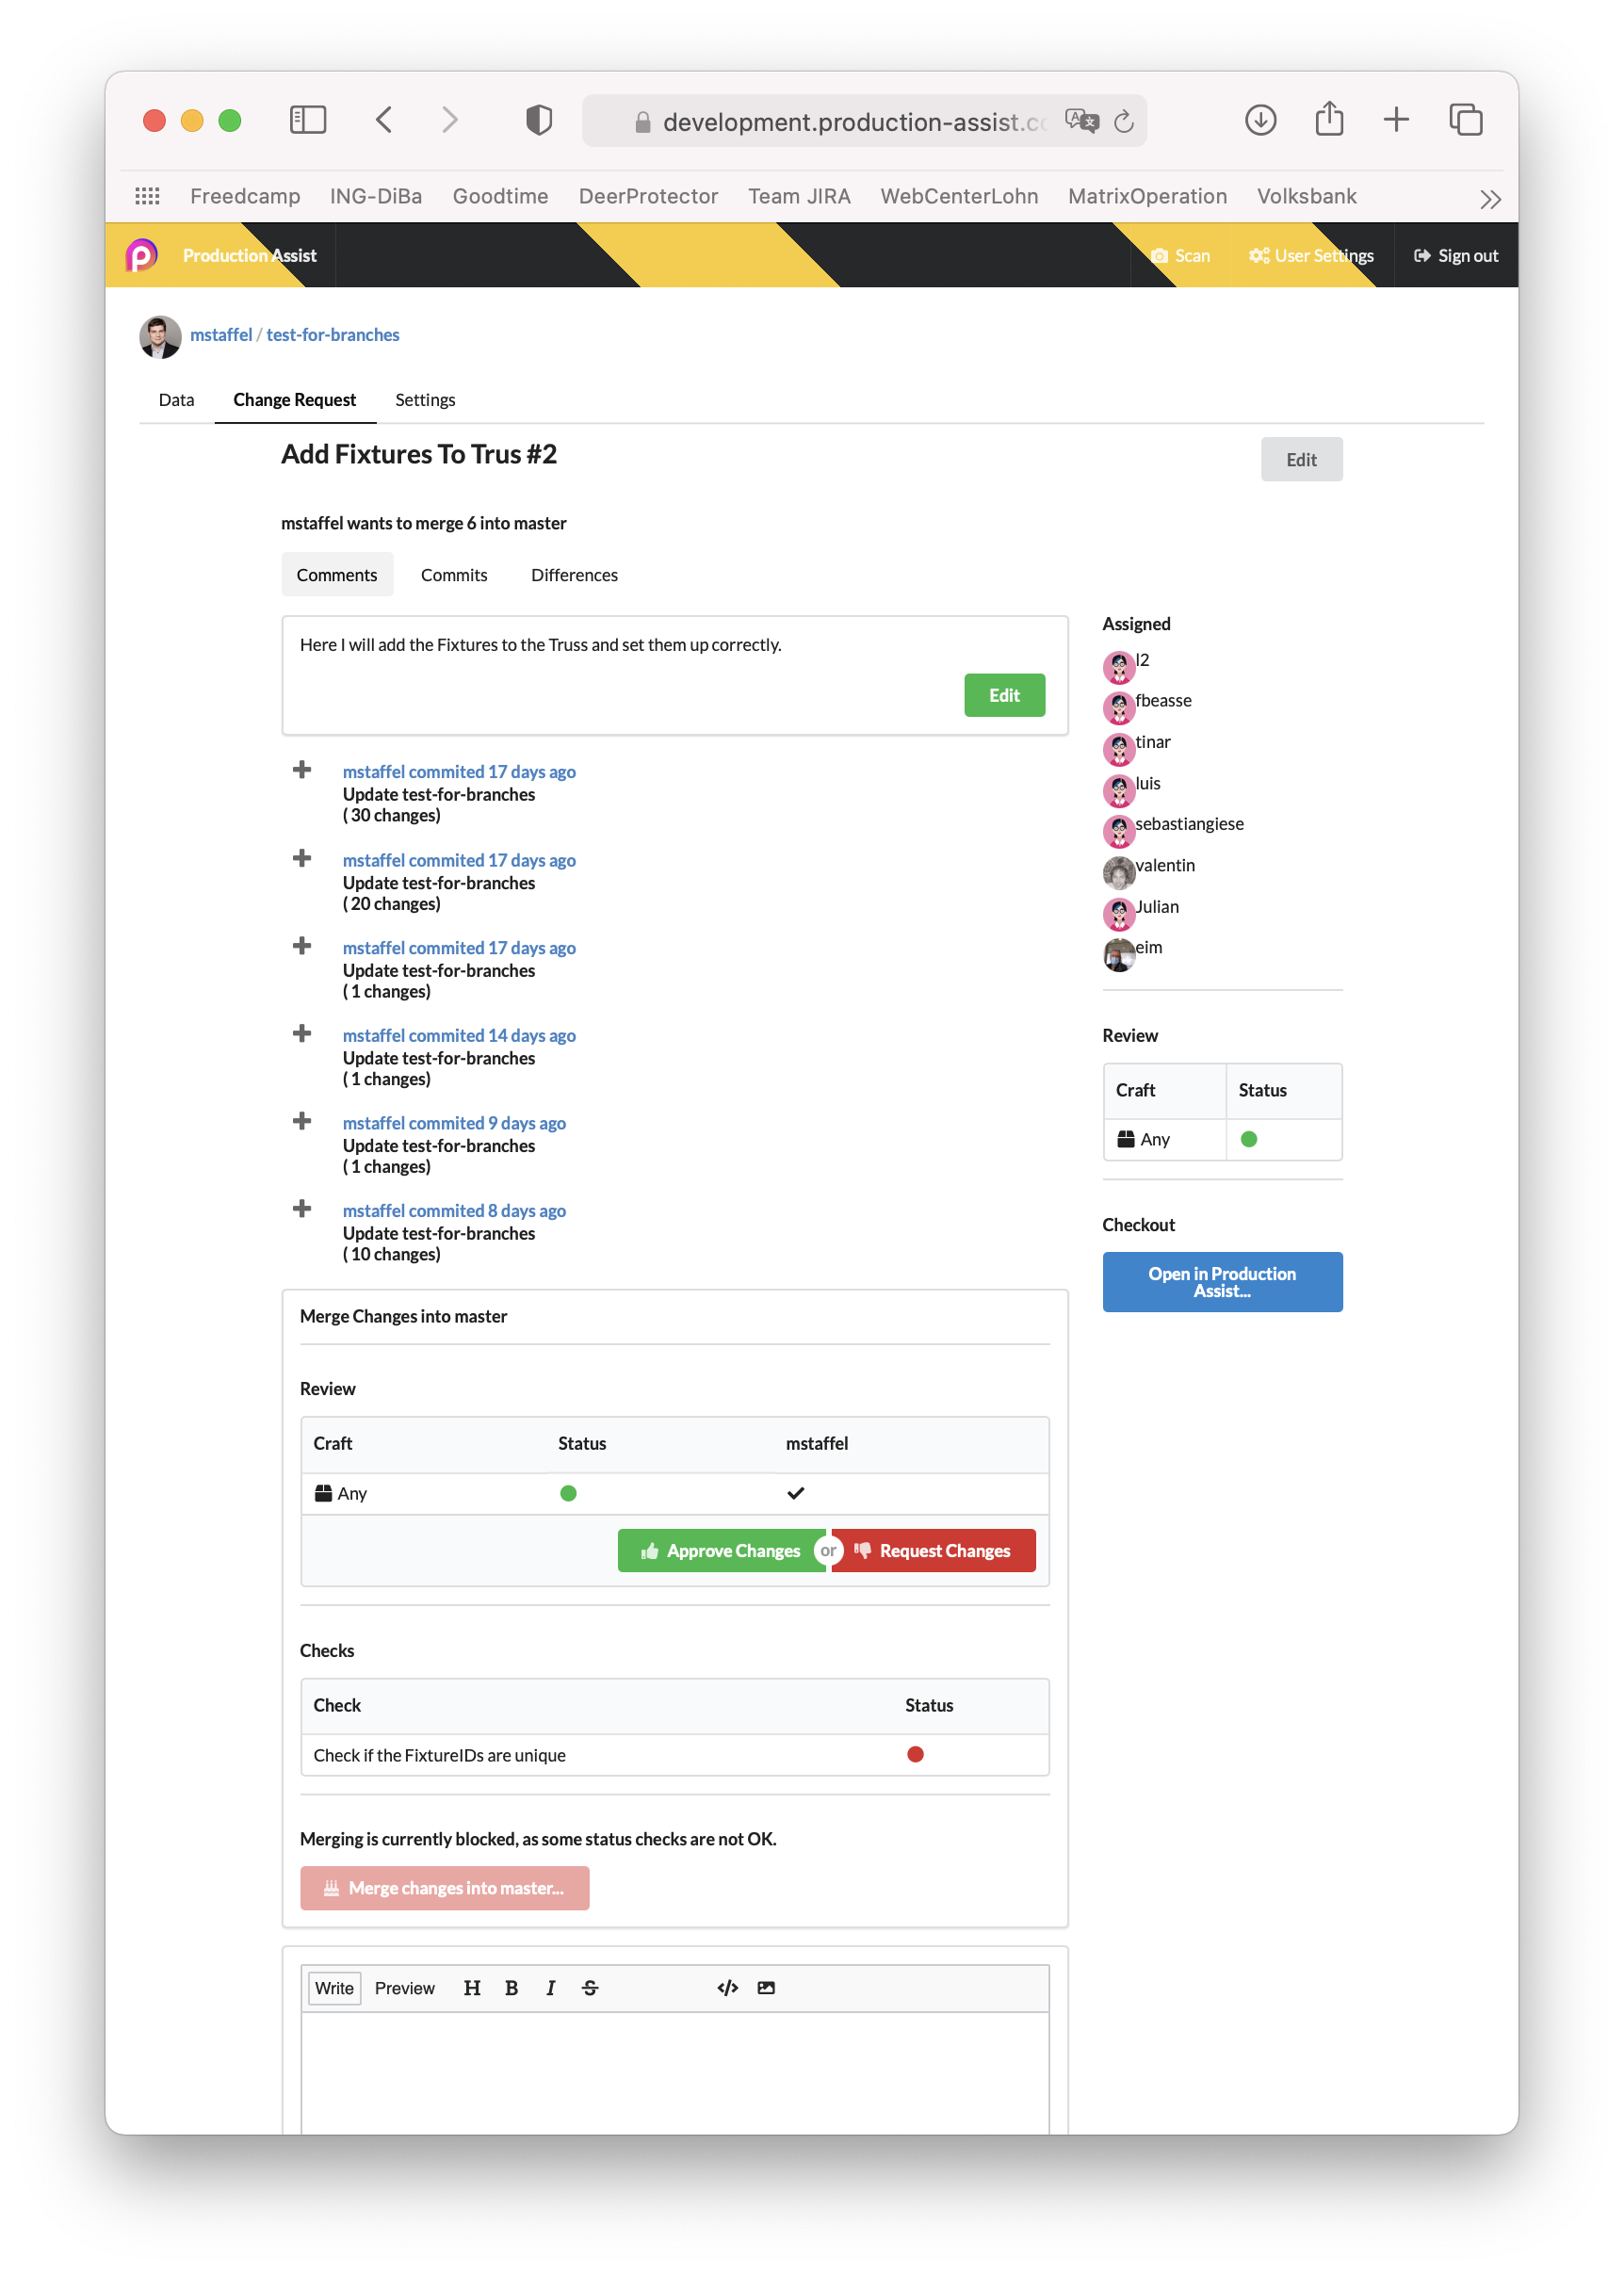
Here, project participants can also share the changes if the project settings specify that certain people have to approve the changes. Only then can they be transferred to the master.
You can specify that changes to the master plan are only incorporated if they have been released (approved) and do not cause errors. Templates are created for this purpose - a Review Template and a Change List Check.
The Review Template defines which people have to release changes before they are transferred to the master.
Change list checks allow automatic checks to be carried out every time changes are transferred to the master plan of a project. These are automatically executed by the Production Assist Cloud and the result is stored in the change request.
| List with all Checks | Editing individual Checks |
|---|---|
 | 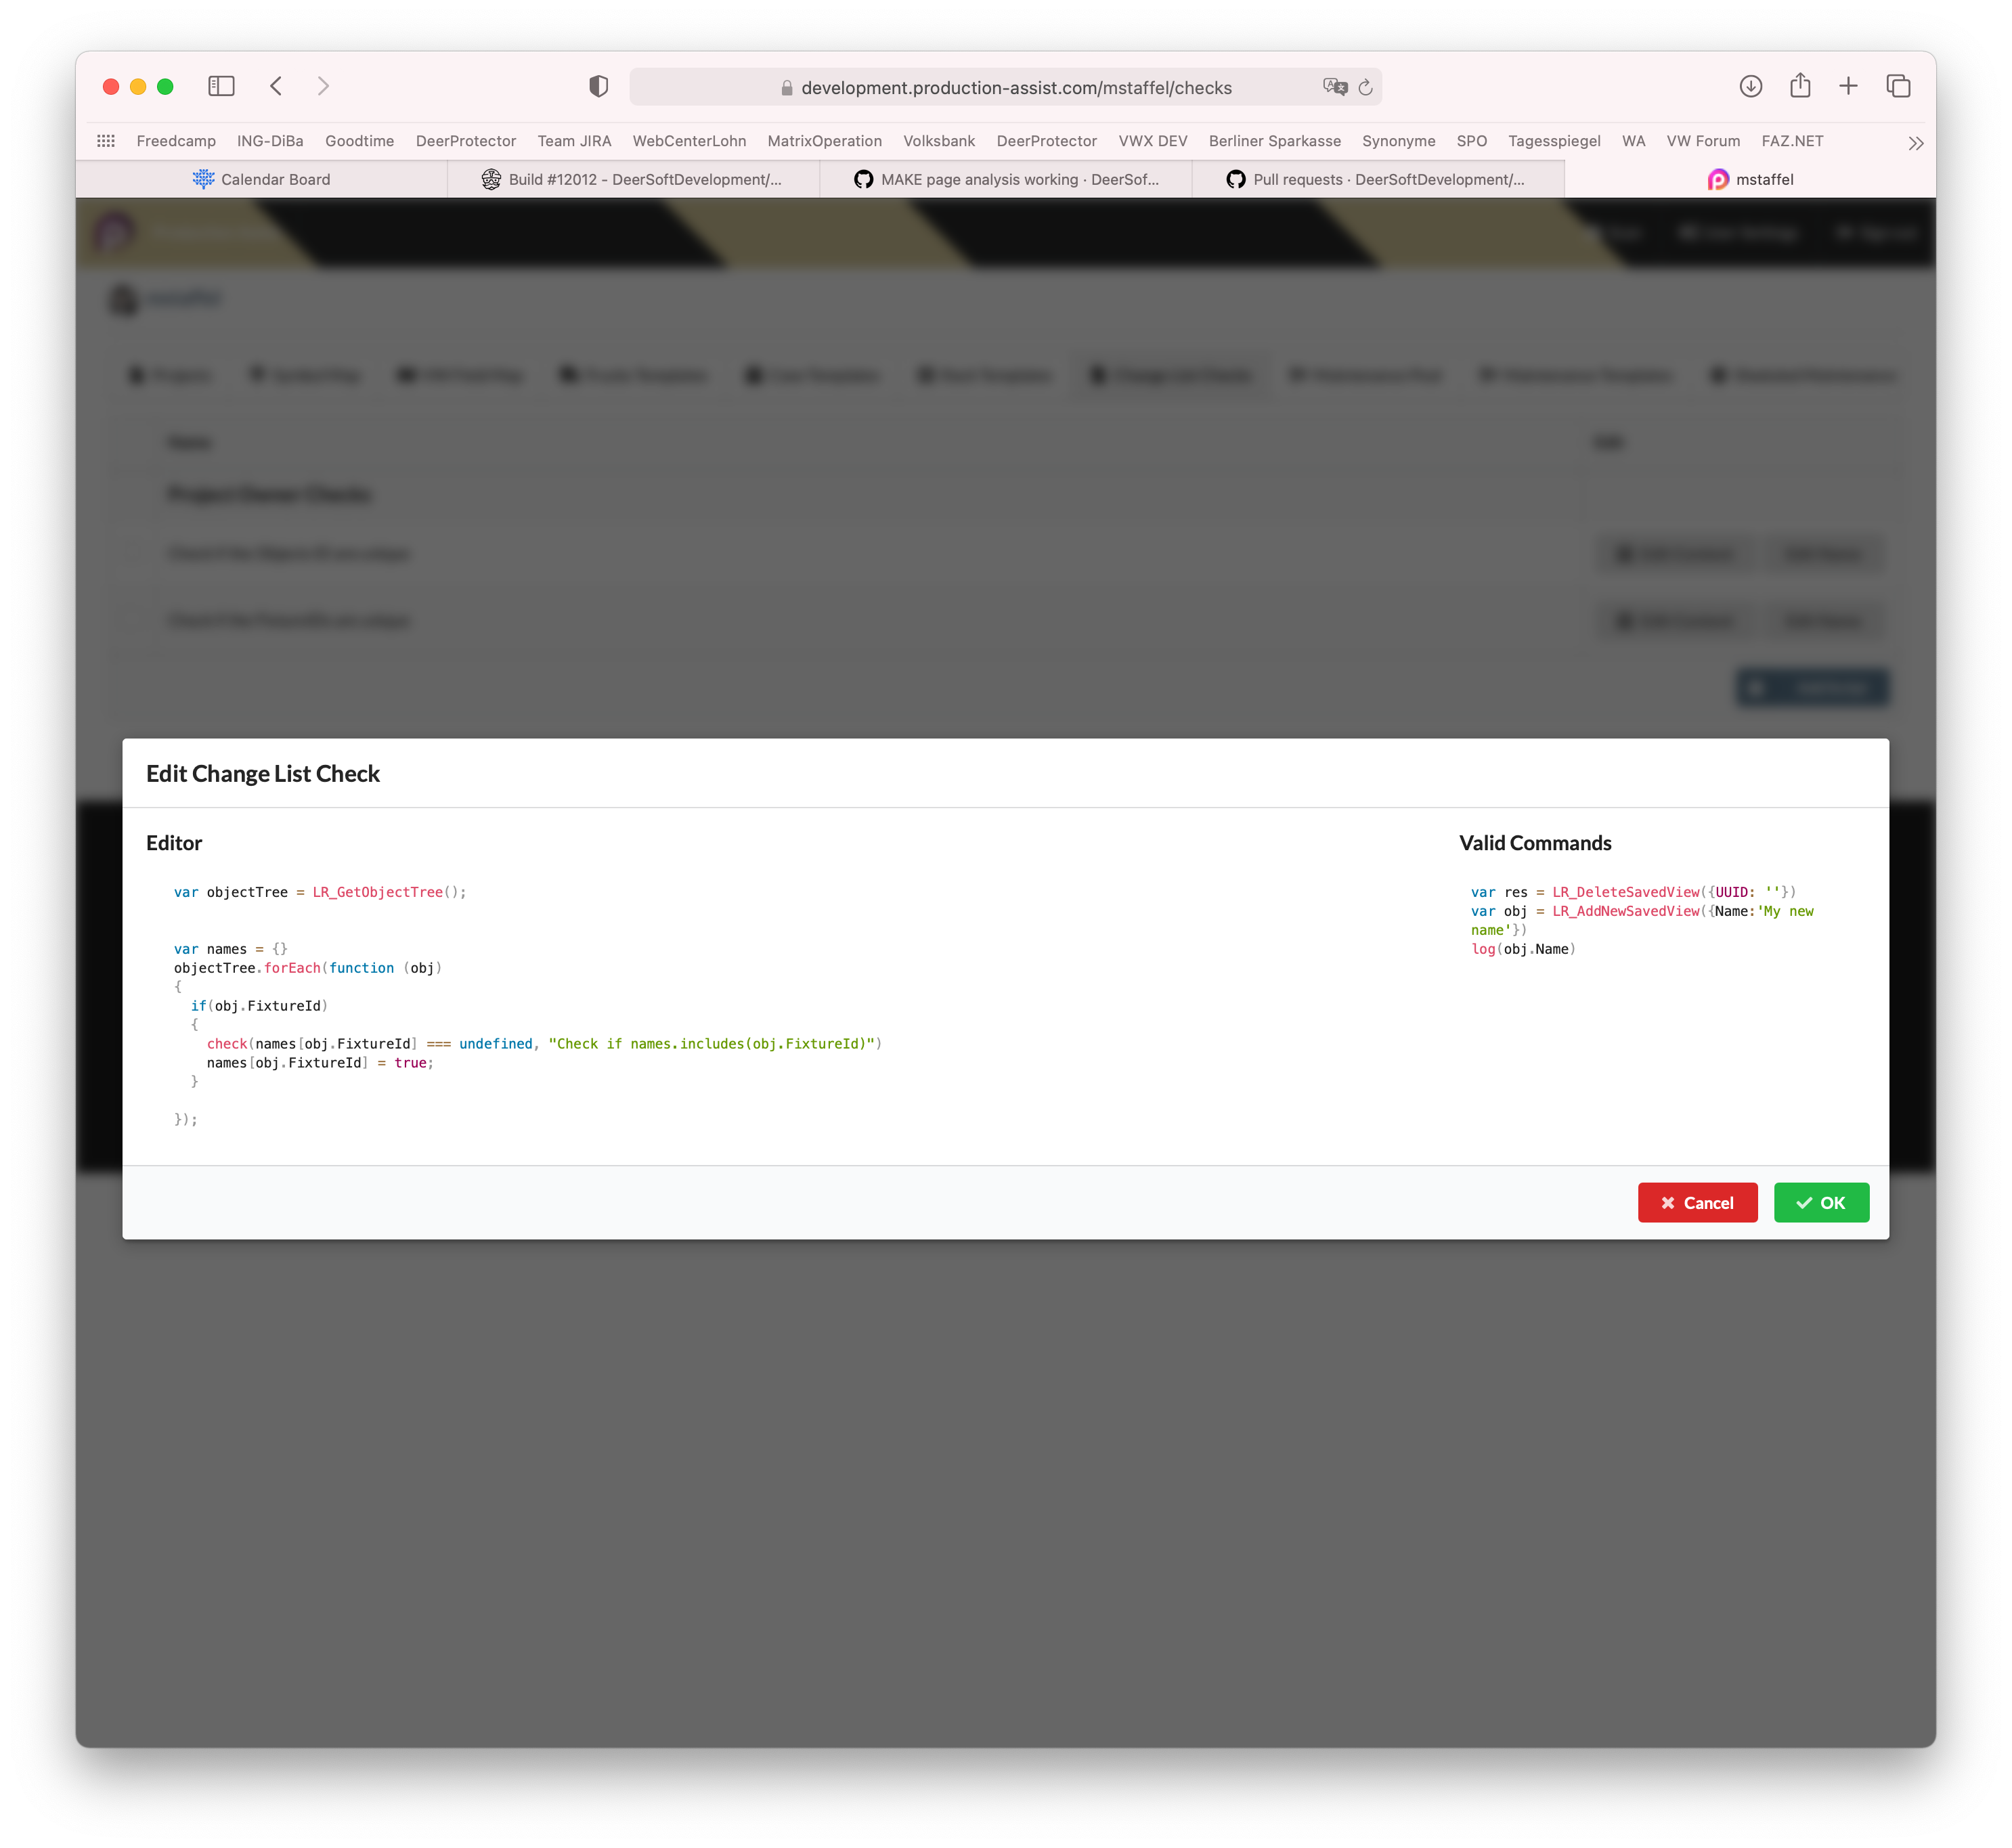 |
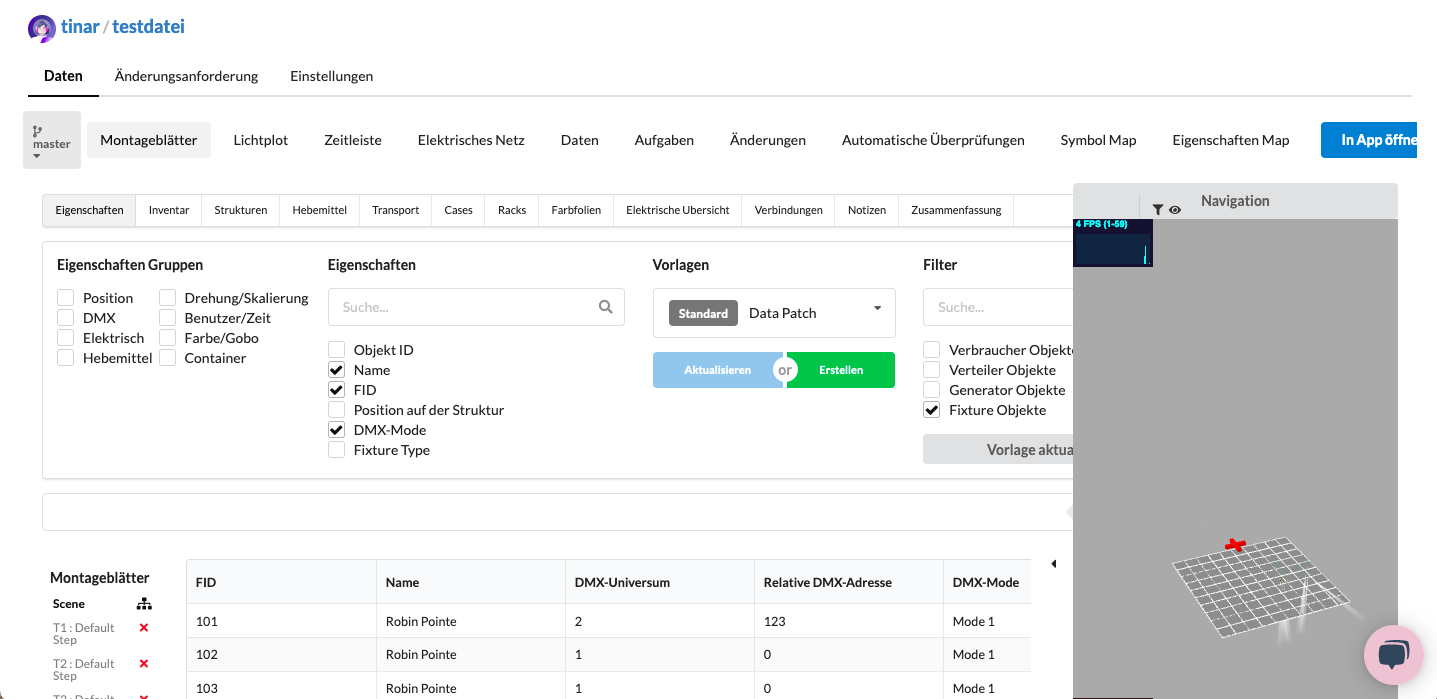
You can also view all Worksheets and information about the objects in your drawing at any time online on the project website. These are created automatically as soon as you save a project online (see "2. Creating an Online Project").
You can also share this project page with other project participants. To do this, you can select the item Access under the Settings tab and then create and share a link.
Likewise, any QR code that is automatically created for all Assembly Sheets and can be printed on labels for all objects will direct you to the project website and show you the corresponding information.
